How to Schedule Visits With Driving Time and Mileage (For RBTs & Analysts)
This guide is essential for efficiently scheduling visits that include driving time and mileage, allowing you to accurately track travel duration and distance. By following the outlined steps, you can ensure that both the time spent traveling to and from client locations is recorded correctly, streamlining your scheduling process. Understanding these features can enhance your time management and client service.
Alert: The availability of Driving Time options depends on your agency’s settings.
🚘What is Driving Time?
1. Driving Time lets you track both the time and distance spent traveling to and/or from a visit location. There are two types of travel entries:
- Driving Time TO Service: Time and distance spent getting to the visit location.
- Driving Time FROM Service: Time and distance spent leaving the visit, whether you're heading to your next client or returning home.
Scheduling a Session with Driving Time TO Service
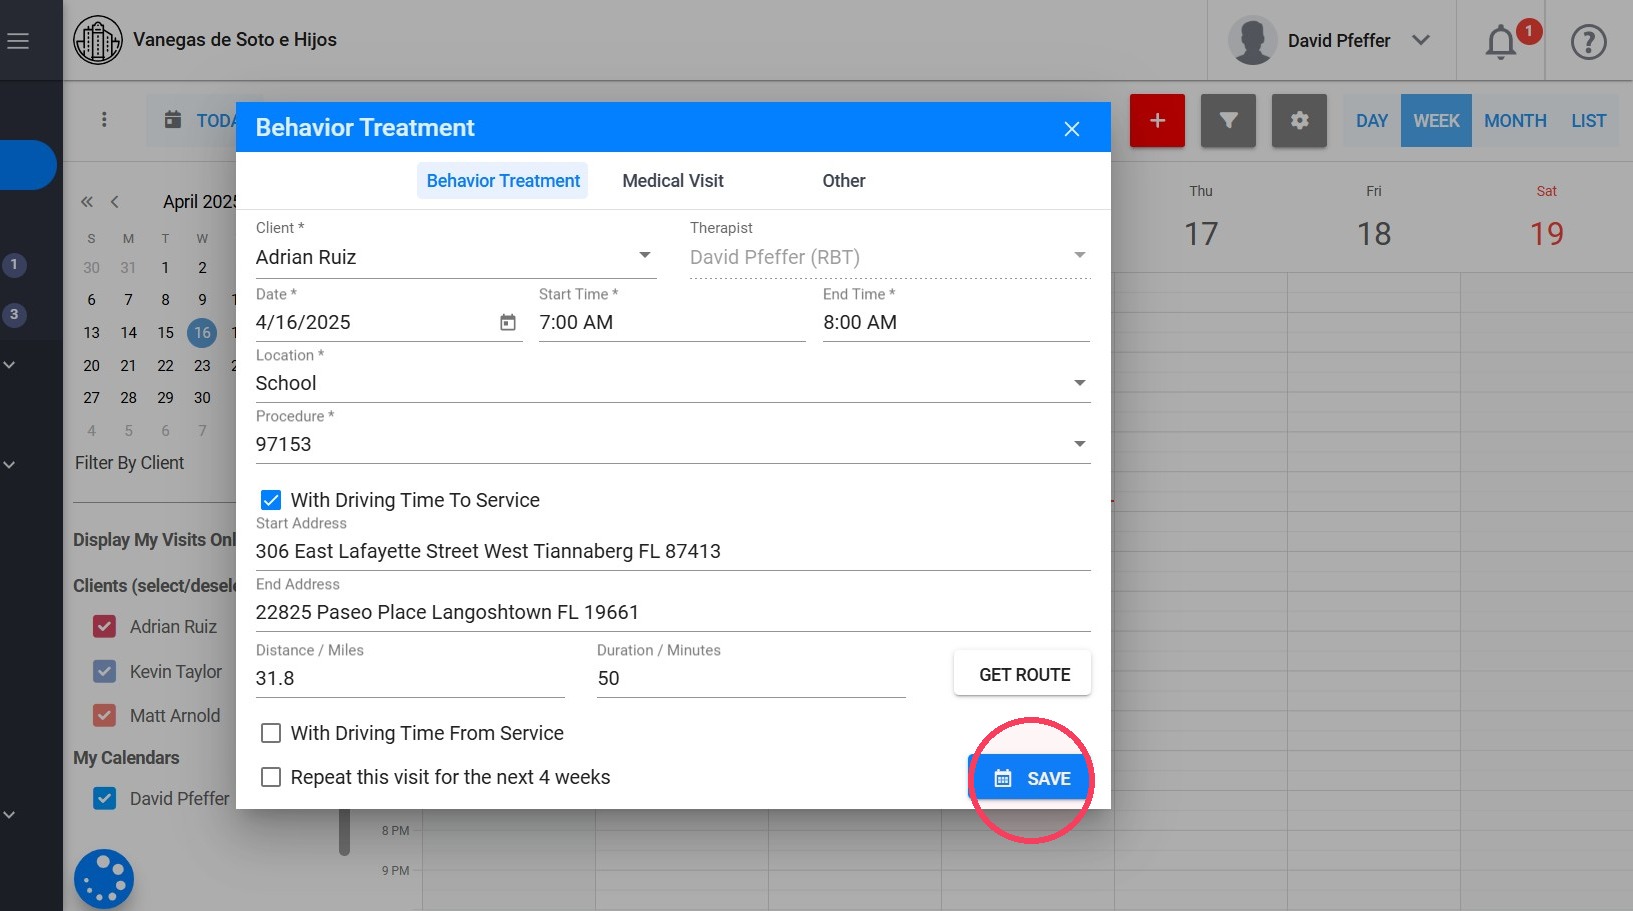
2. Here’s how to schedule a visit with Driving Time To the Service:
🔹 Step 1: Enable Driving Time To Service
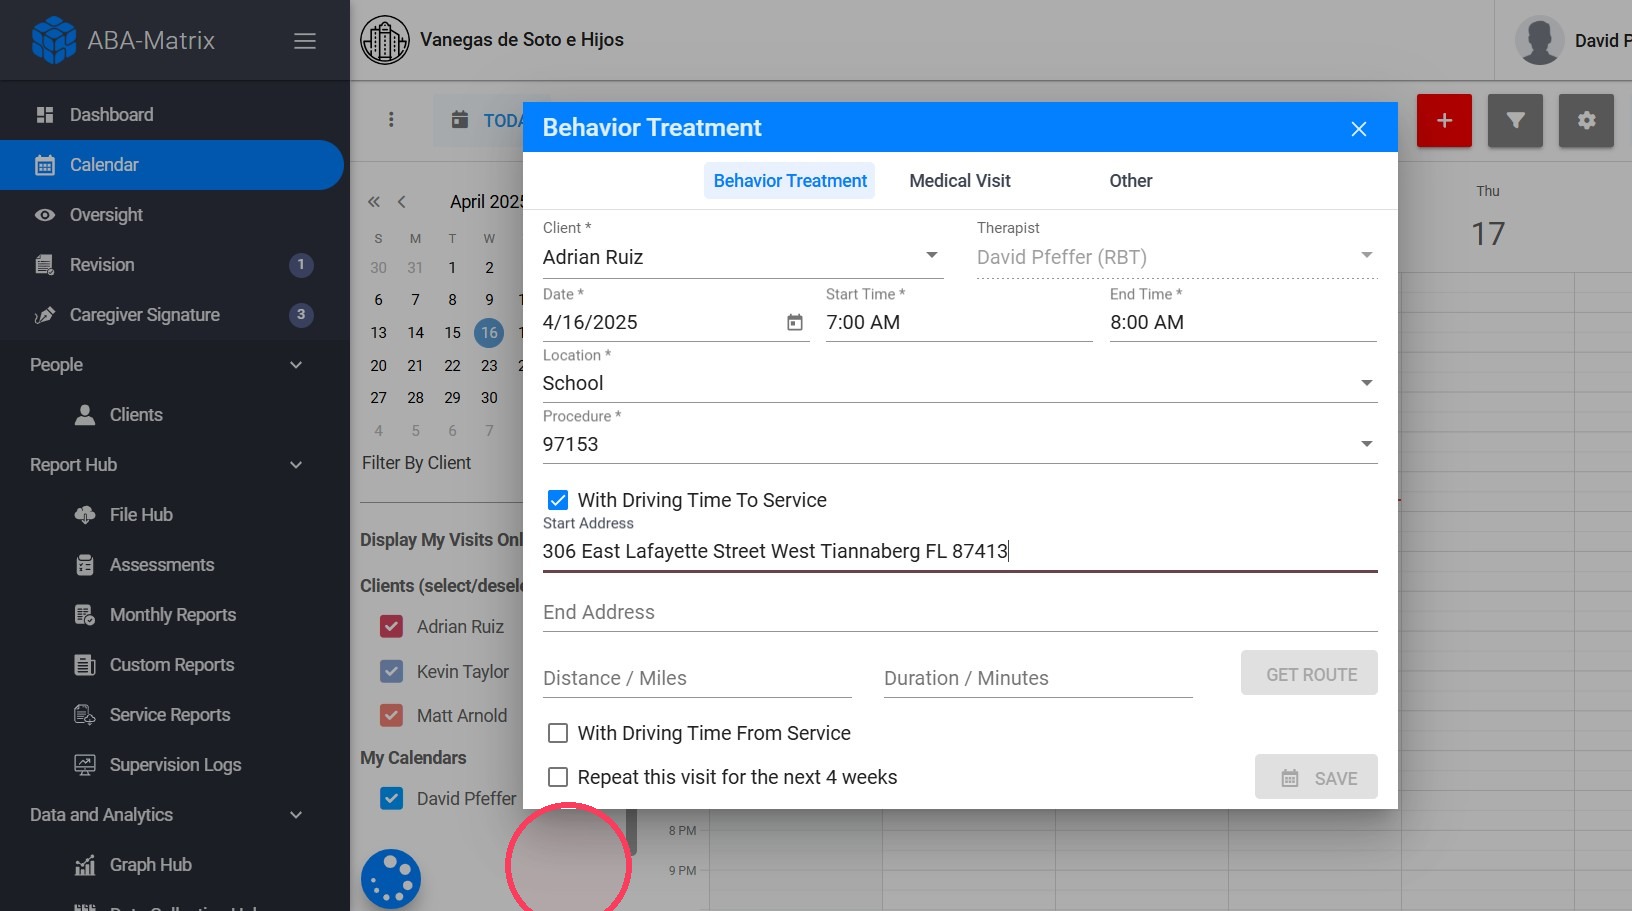
When creating the visit, check the option that says "With driving time to service"
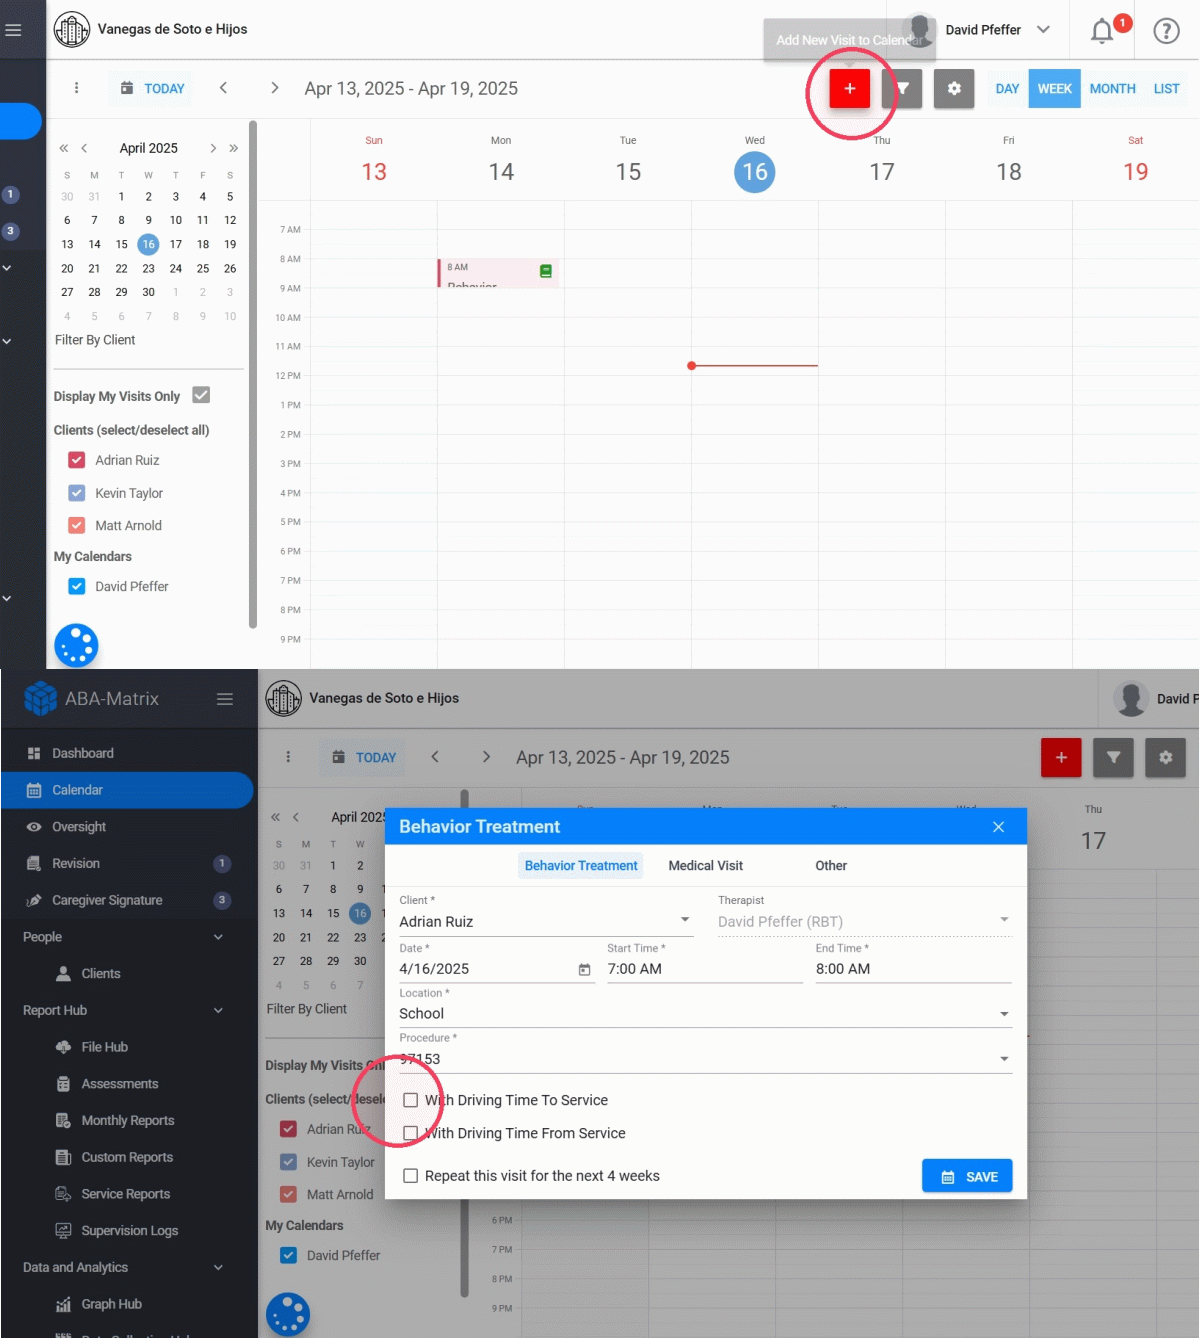
3. This tells the system you want to record the time and miles it takes you to travel to the visit location.
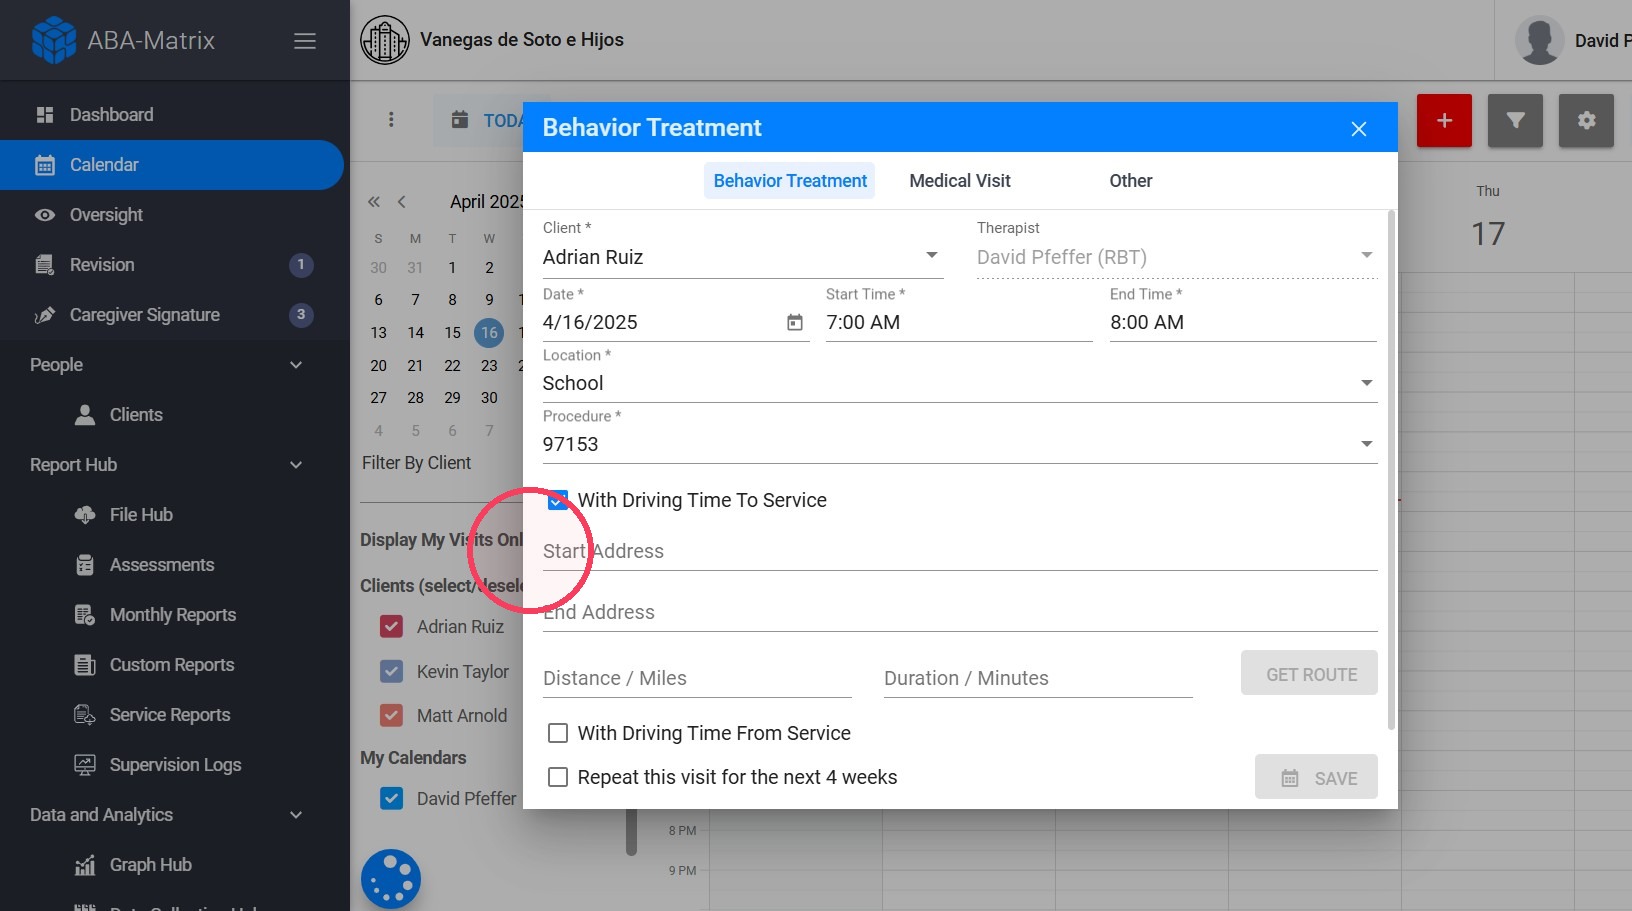
4. 🔹 Step 2: Select Start Address
You’ll see a dropdown list of possible starting points:
- 👥 All client addresses for clients assigned to you
- 🏡 Your own address as therapist (if added to your profile)
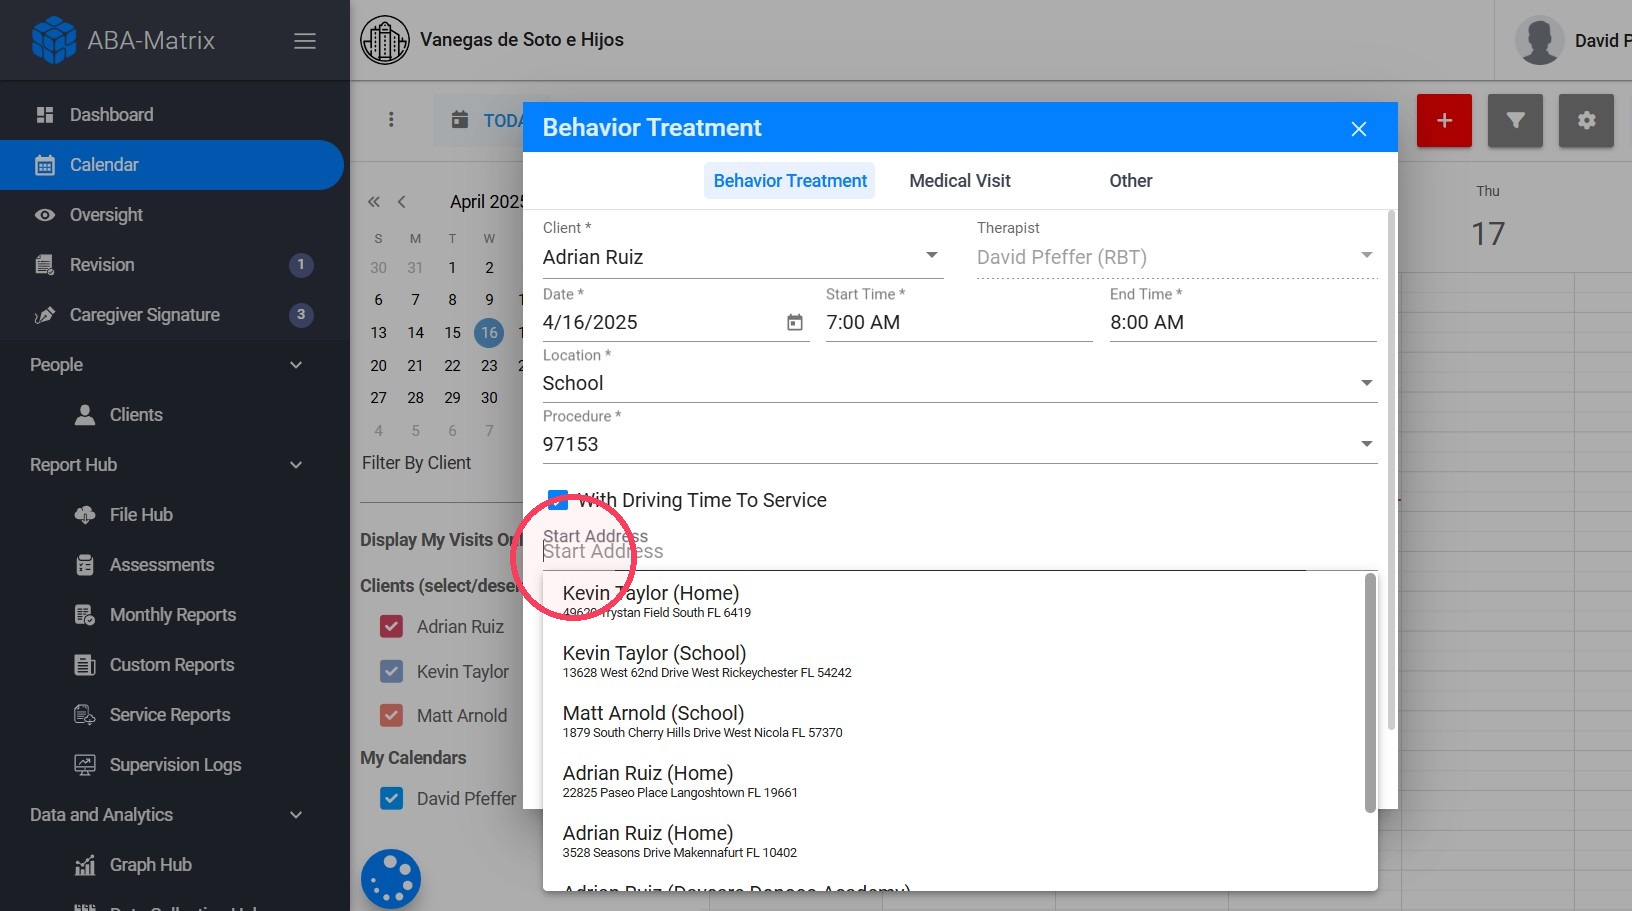
5. You can also manually type in any address if it's not listed in the client's profile
6. 🔹 Step 3: Select End Address
The end address will automatically show the address of the client for whom the visit is being scheduled.
This is where you’re headed, so it will be your destination.
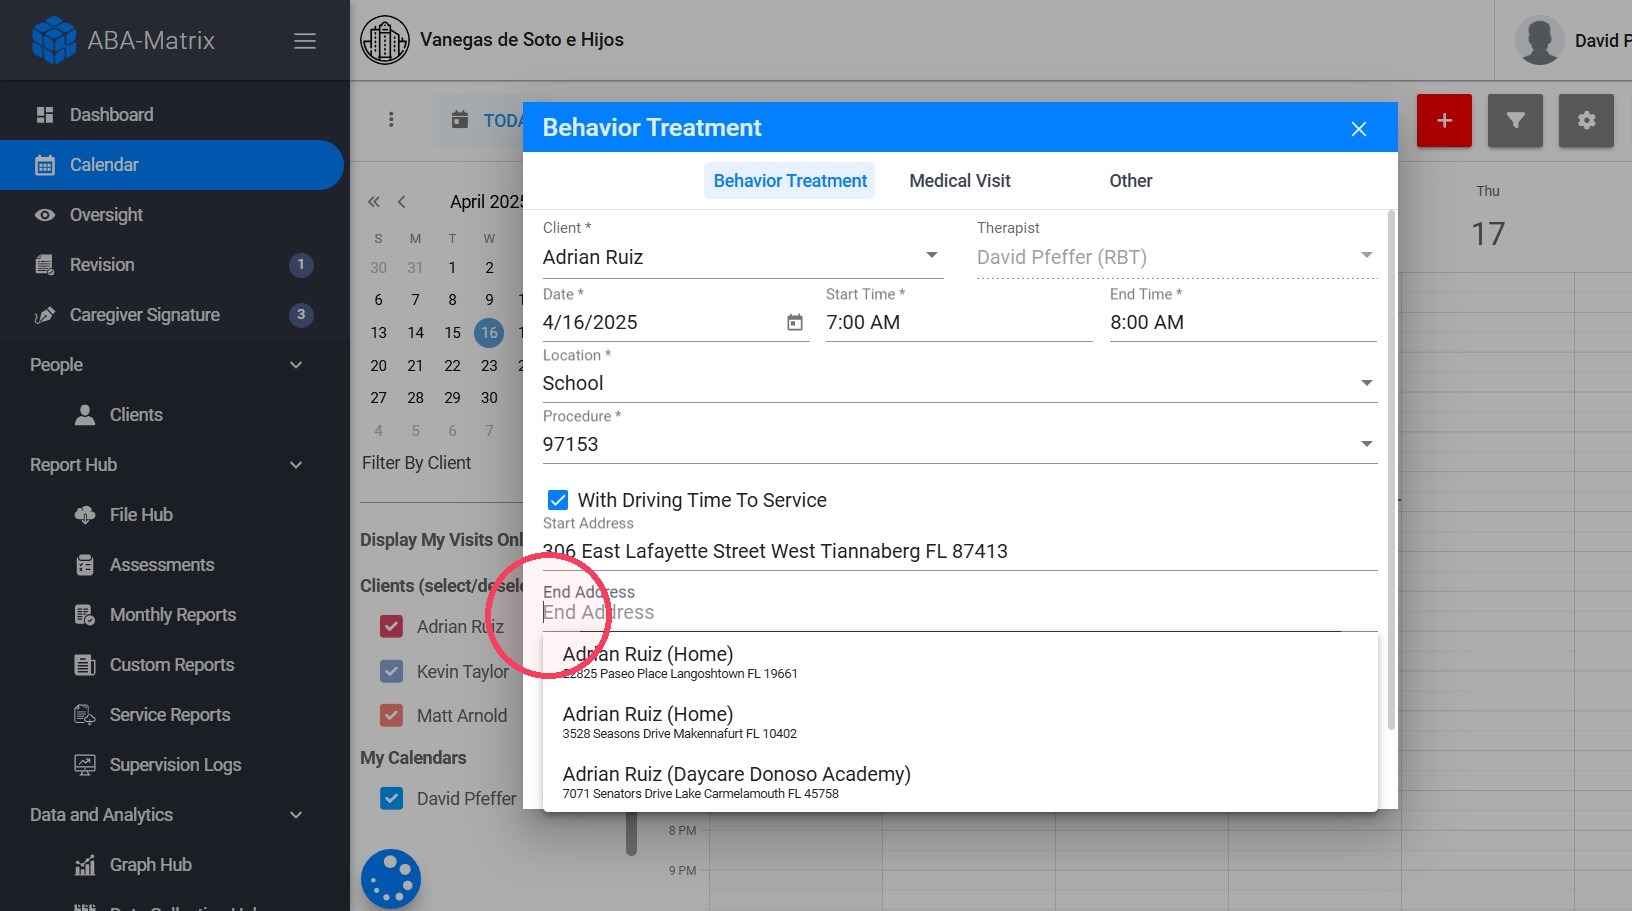
Alert: Automatically the system will not fill in the address based on the POS (Place of Service). You must select the correct address from the dropdown list or enter it manually to ensure accuracy.
7. 🔹 Step 4: Get Route (Optional)
Click “Get Route” and the system will calculate an estimate of:
- 📍 Distance (in miles)
- ⏱️ Duration (in minutes)
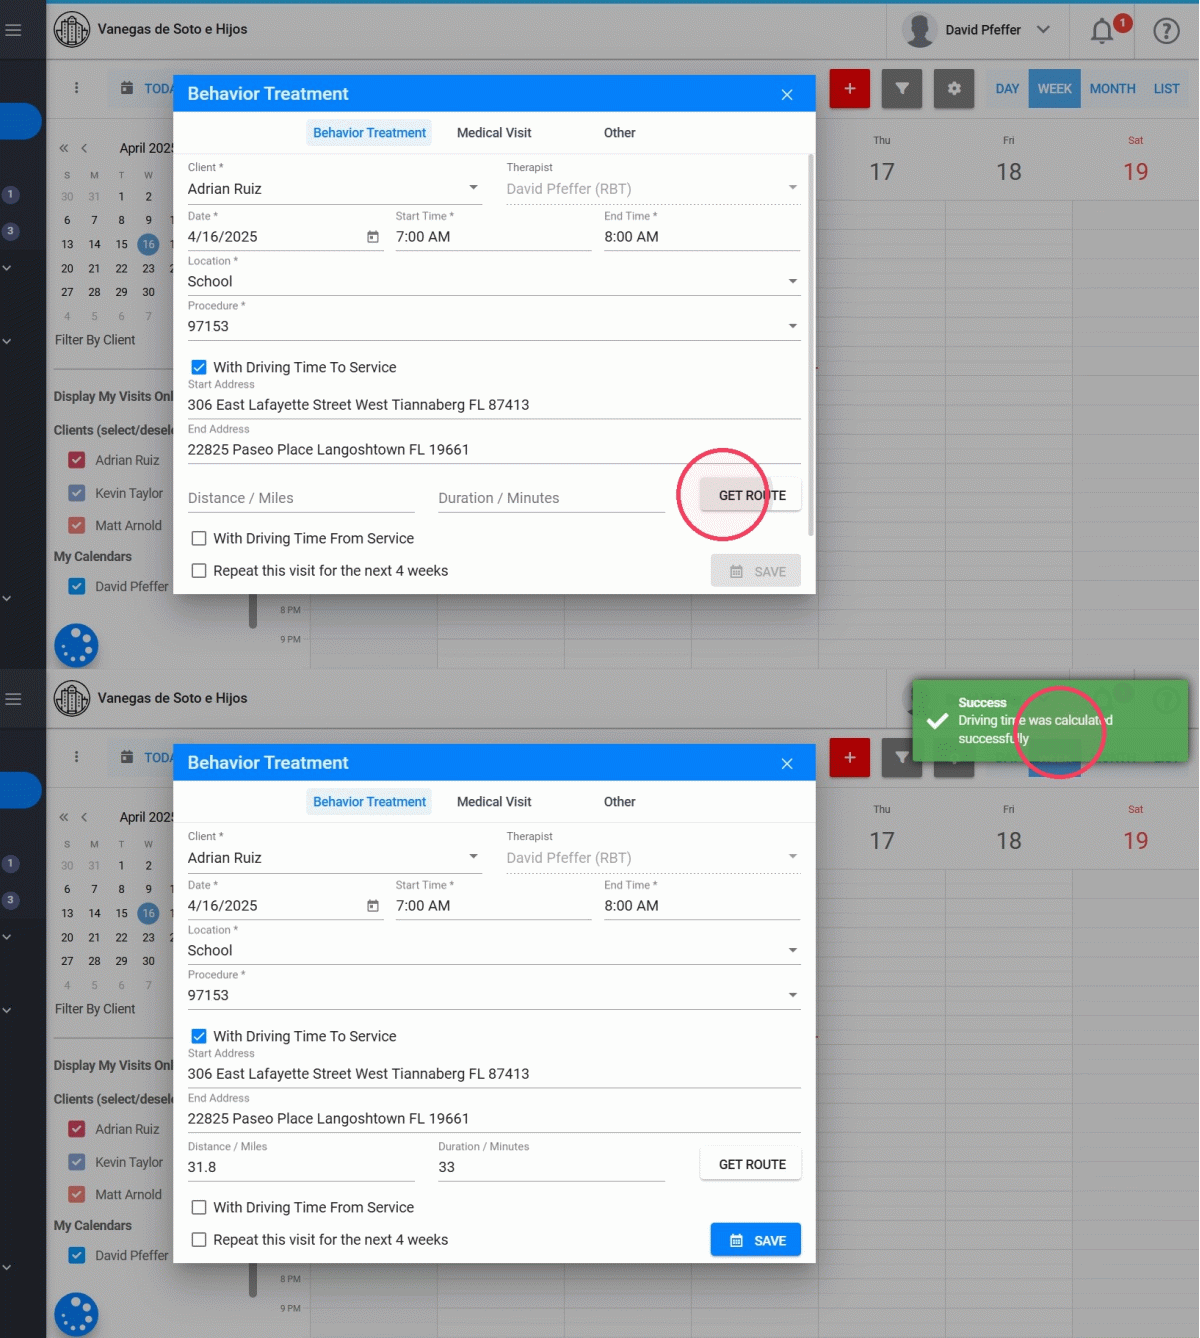
Tip: The system uses Google Maps to generate this info automatically.
8. ✏️ You can still edit the time or distance manually if the route seems off, or if you took a different path than the one suggested.
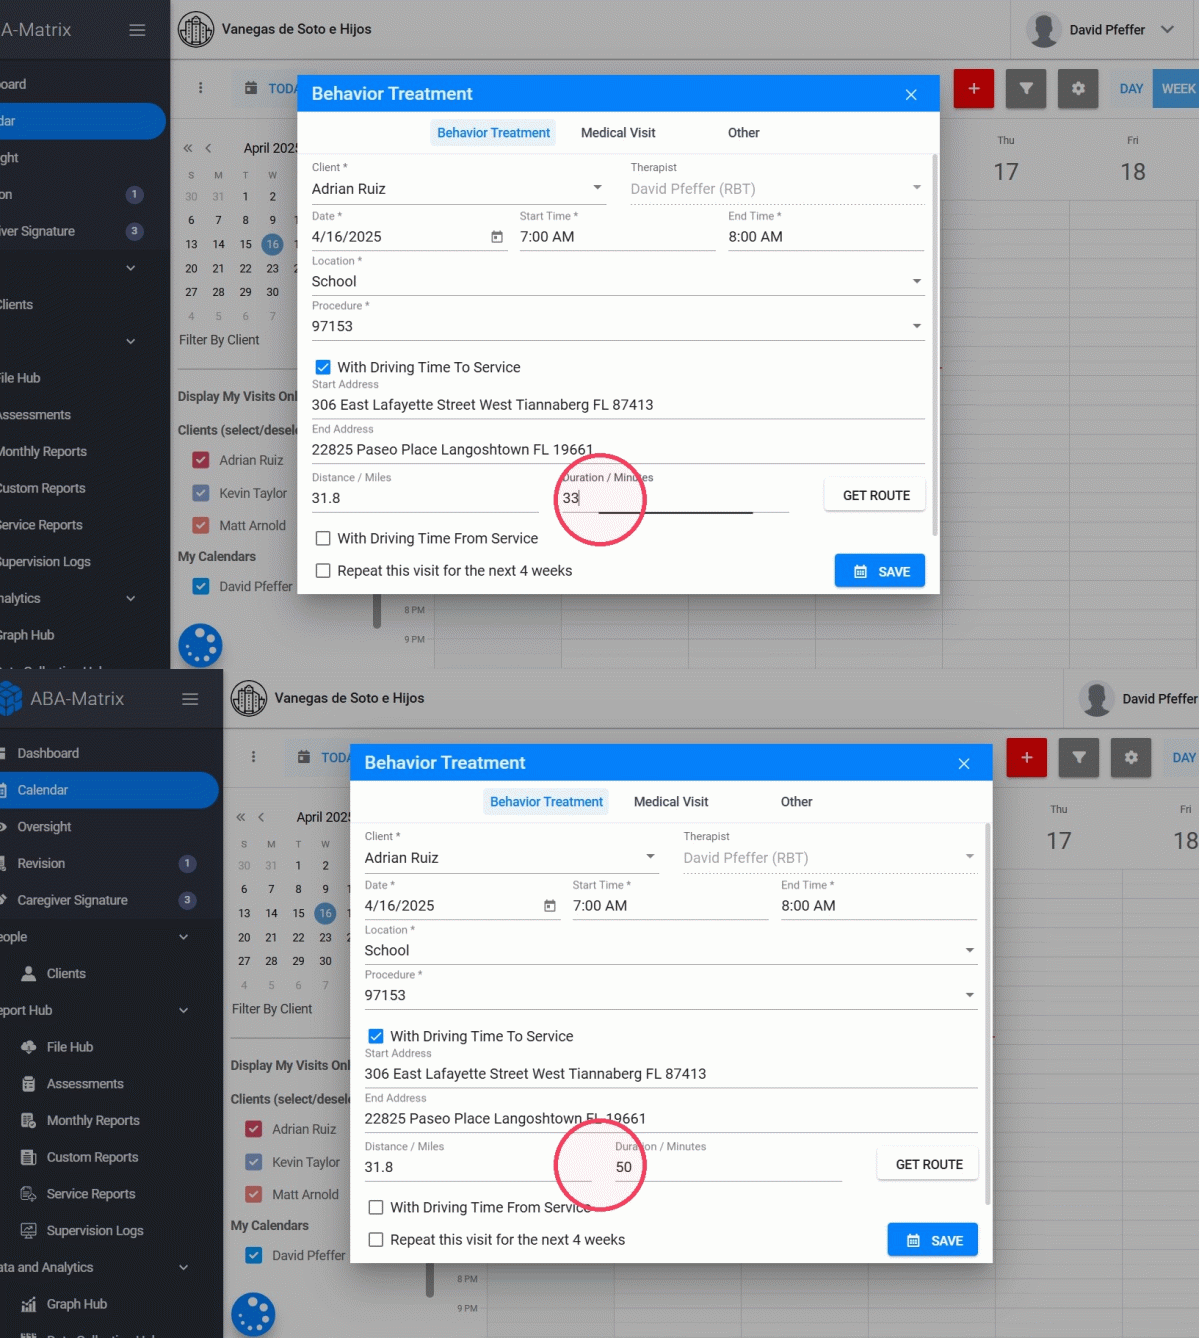
9. Click "SAVE" after finishing scheduling to create the visit with driving time and mileage.
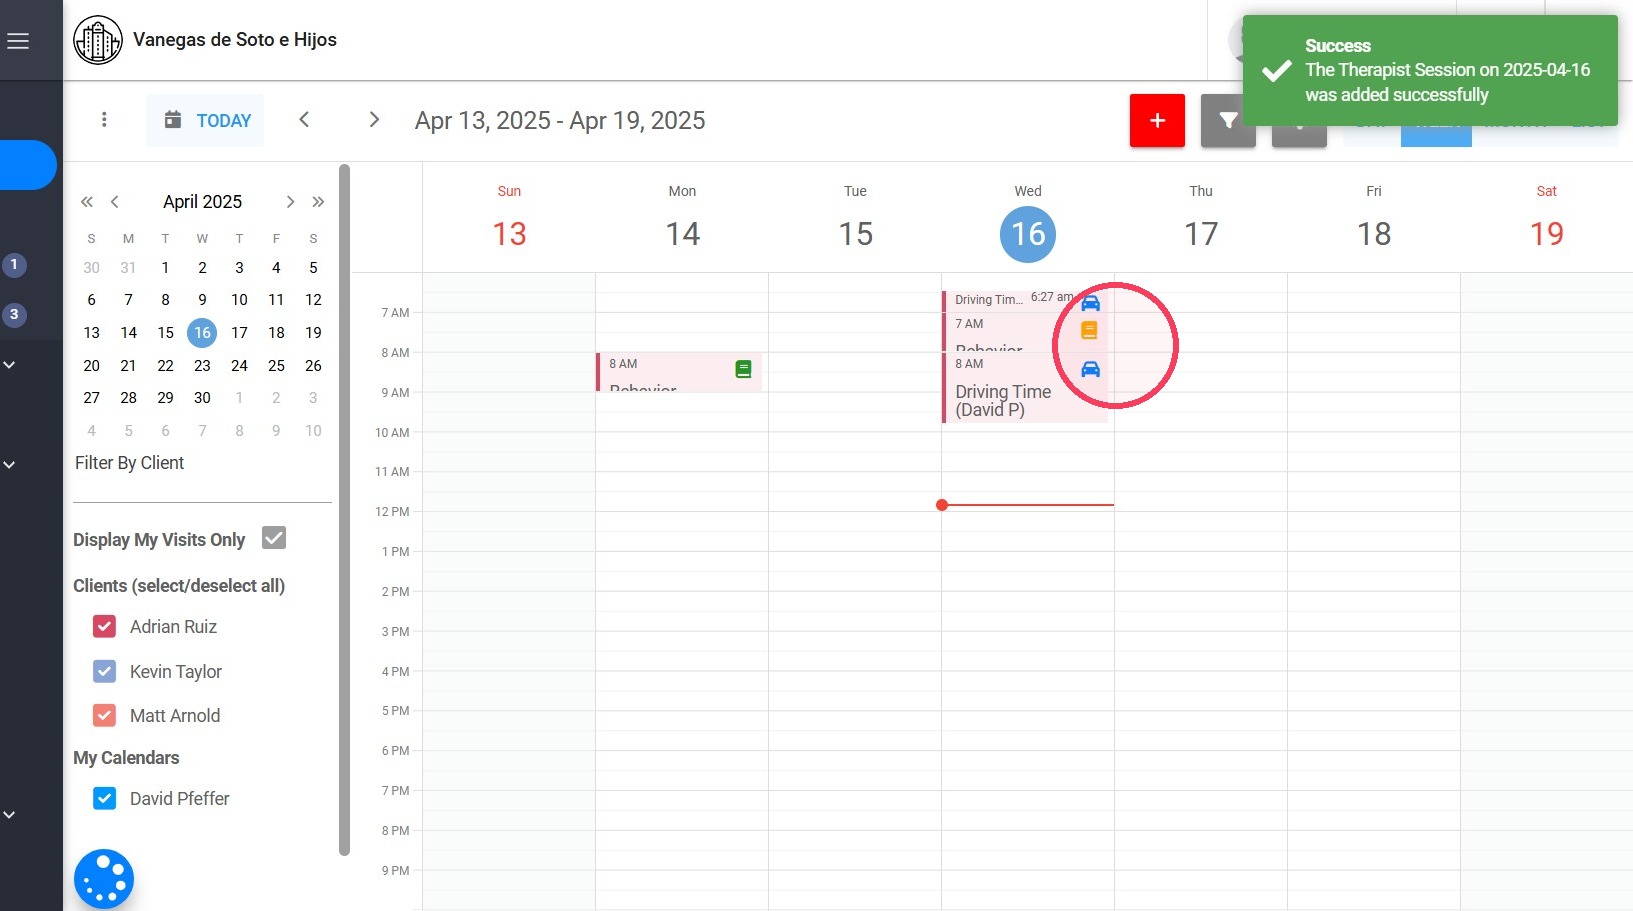
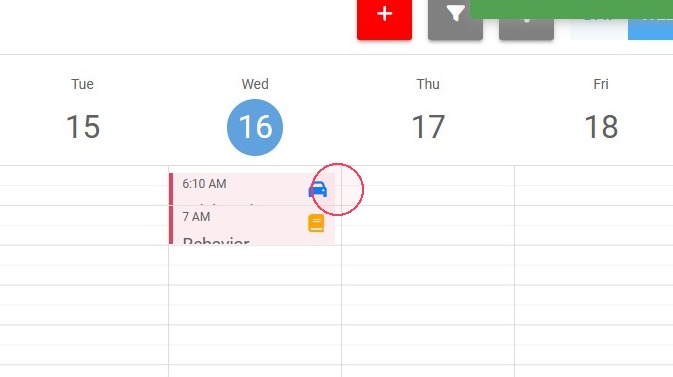
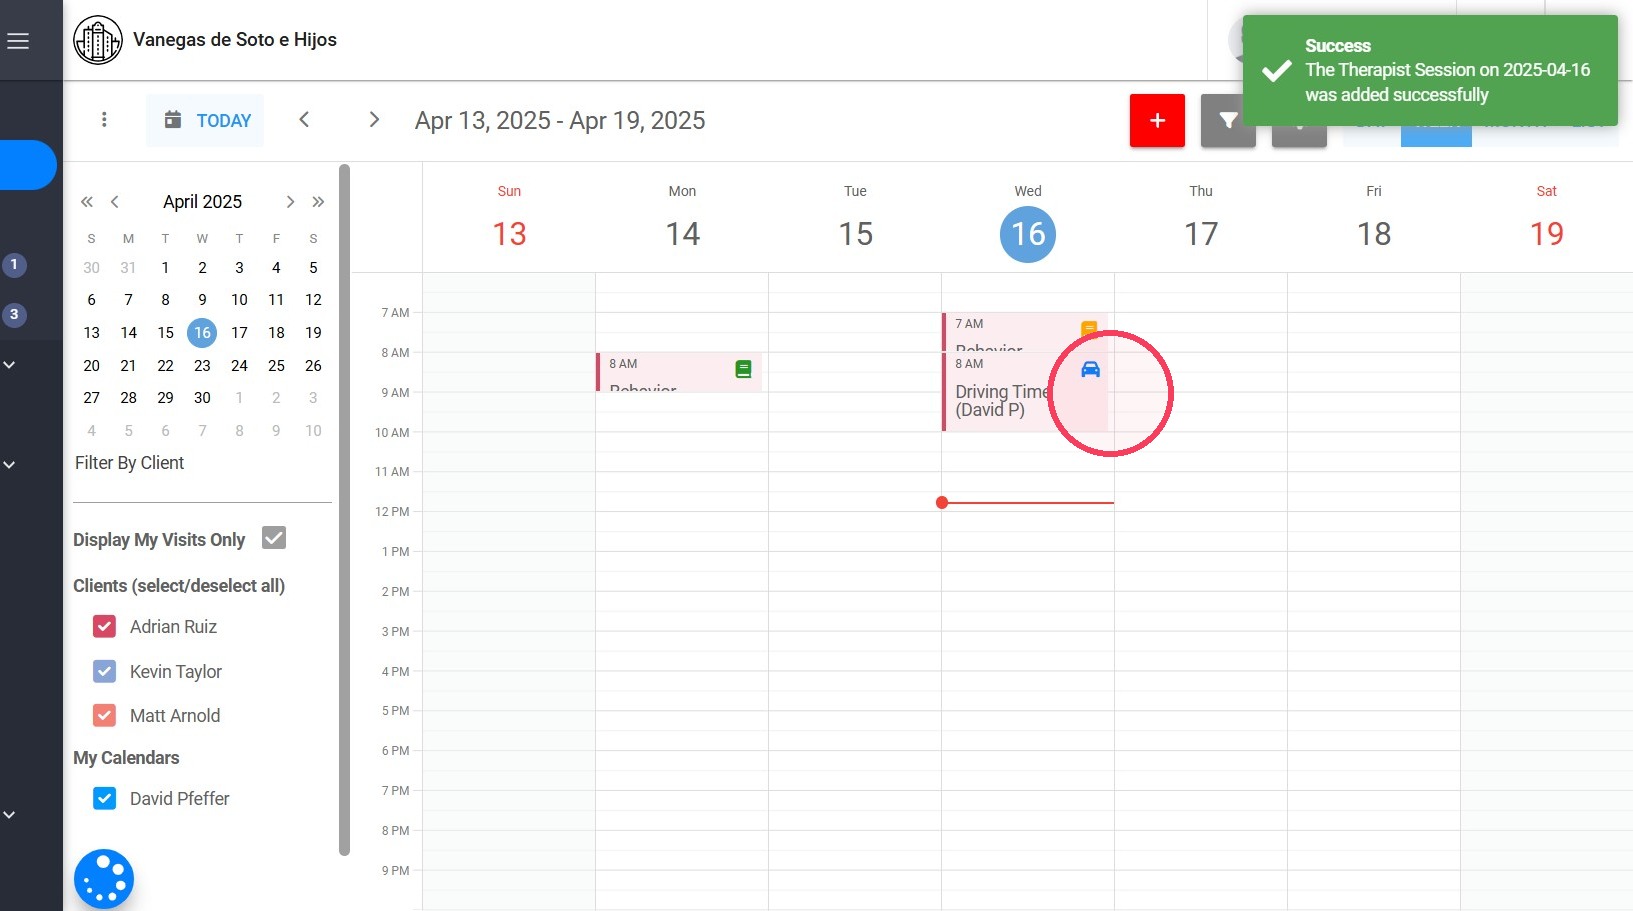
10. The driving time to service will appear in the Calendar as an event before the visit, automatically marked as completed. The scheduled visit will follow immediately after, starting at the time you selected.
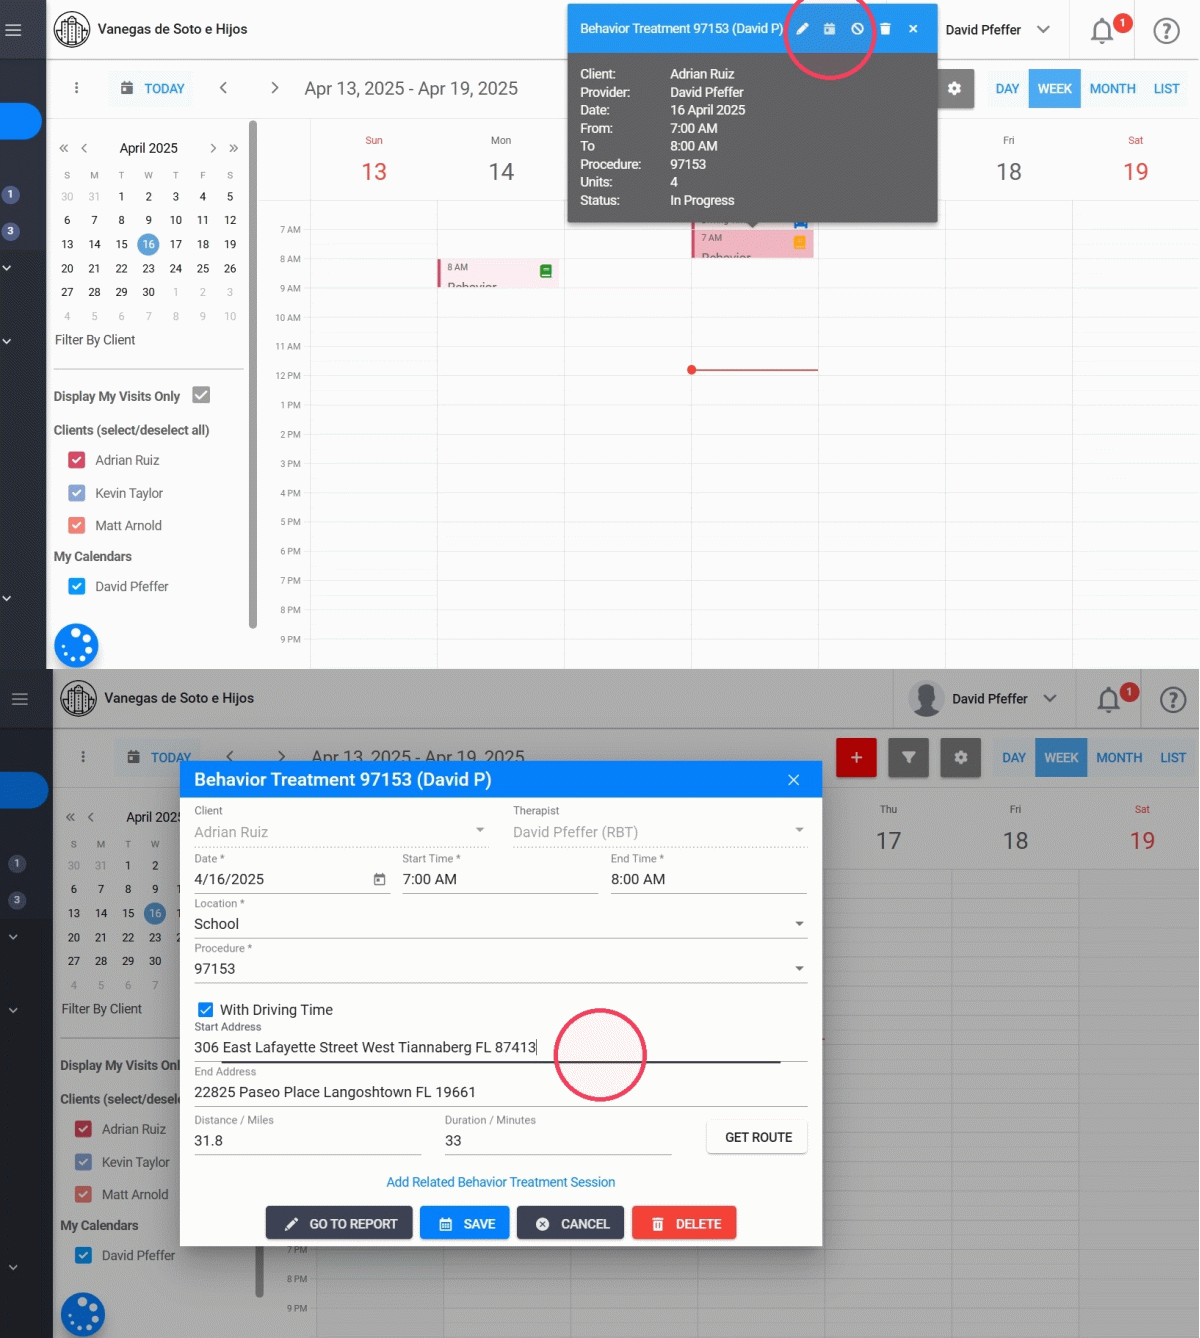
11. 🔹 Editing Driving Time
You can edit the event later and adjust:
- The start/end addresses
- The calculated duration or miles
- Whether you want to include driving time at all
Scheduling a Visit with Driving Time FROM Service
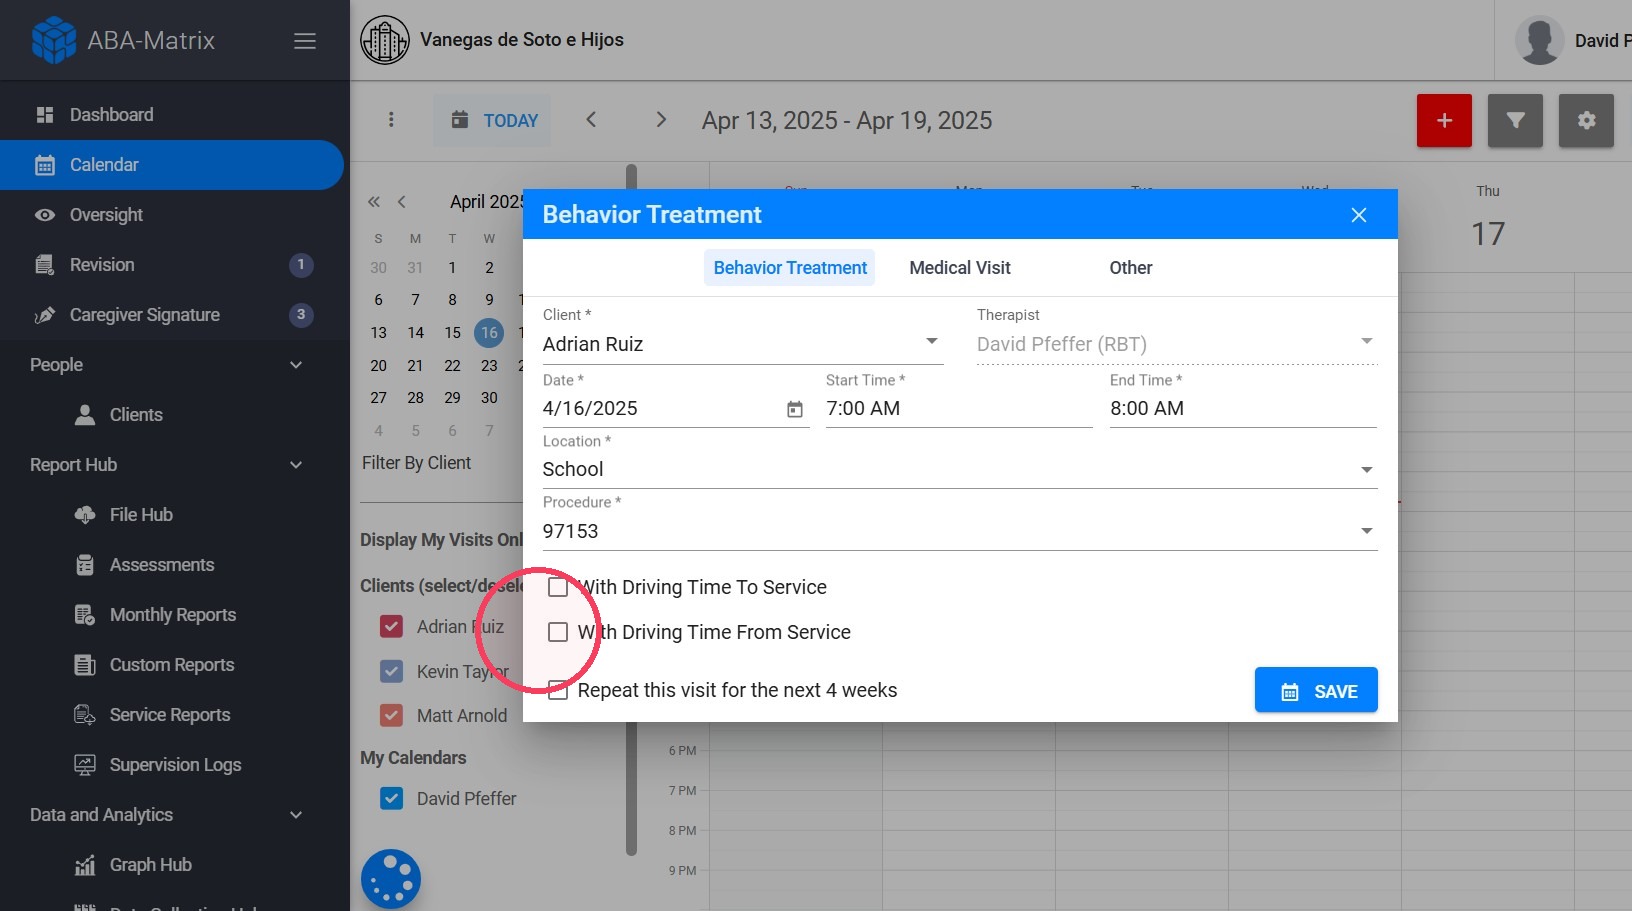
12. Now let’s say you want to record the time spent leaving the visit and heading to your next location.
🔹 Step 1: Enable Driving Time From Service
When scheduling the visit, check the option that says "With Driving time from Service". This adds a driving time block after the visit.
13.🔹 Step 2: Select Start Address
You'll see a dropdown list with the address of the client the visit is for. Select the correct one or enter it manually.
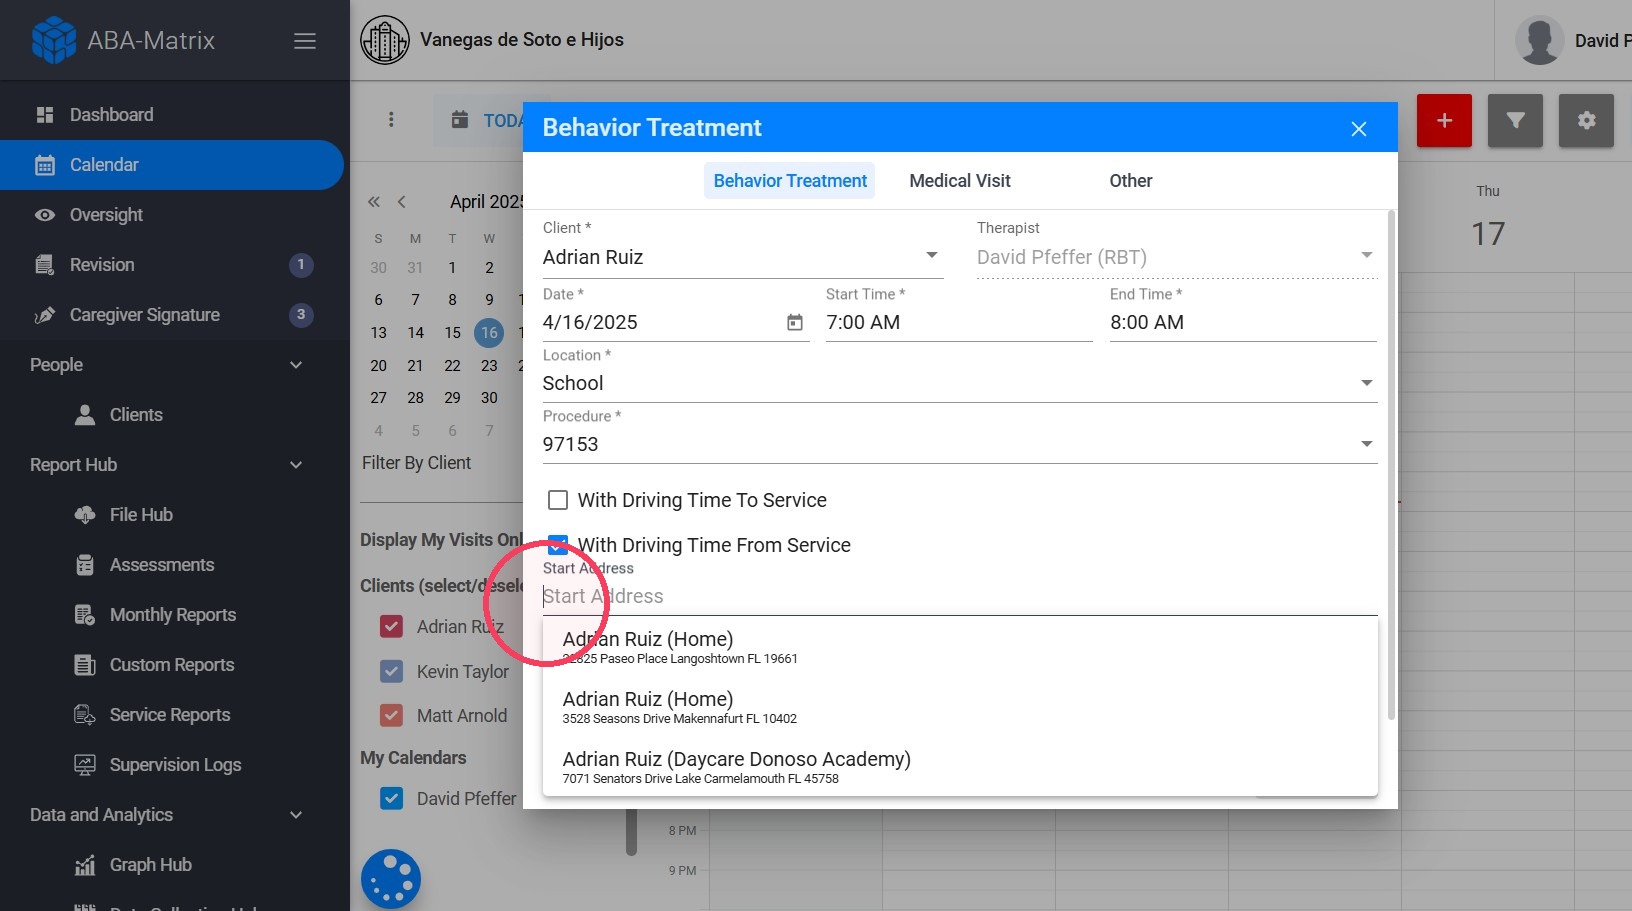
Alert: The system will not automatically fill in the address based on the POS (Place of Service). You must select the correct address from the dropdown list or enter it manually to ensure accuracy.
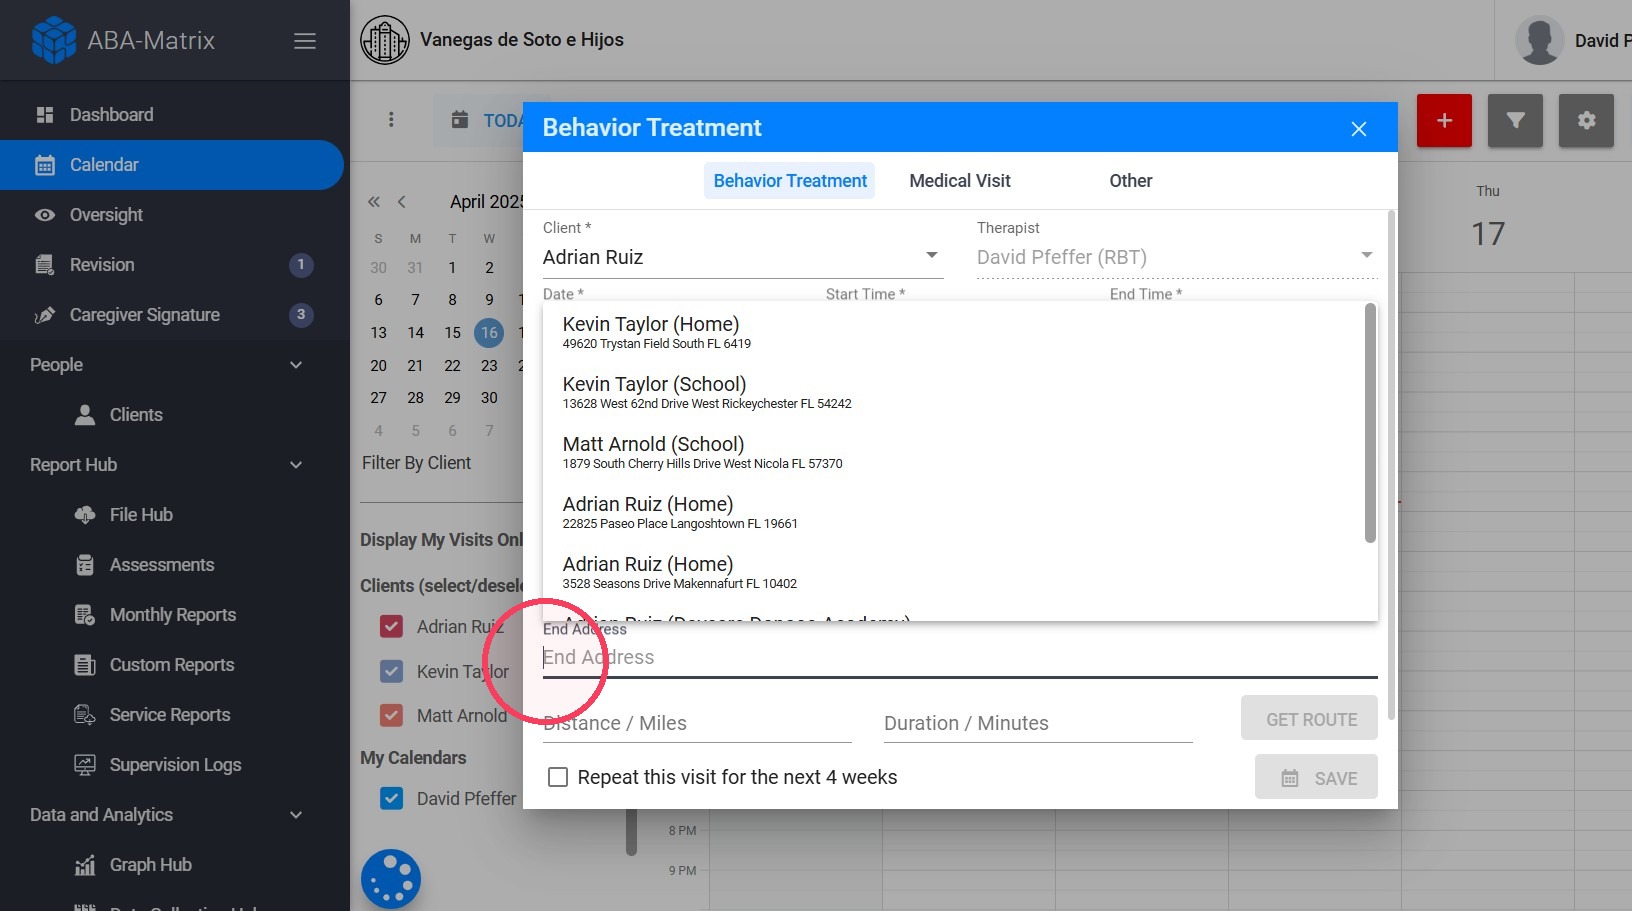
14. 🔹 Step 3: Select End Address
You'll see a dropdown list of possible destination addresses. This list includes:
- 👥 All clients assigned to you
- 🏡 Your own therapist address (if it’s been added to your profile)
15. 🔹 Step 4: Get Route (Optional)
Click “Get Route” and Google Maps will calculate the:
- Distance (miles)
- Duration (minutes)
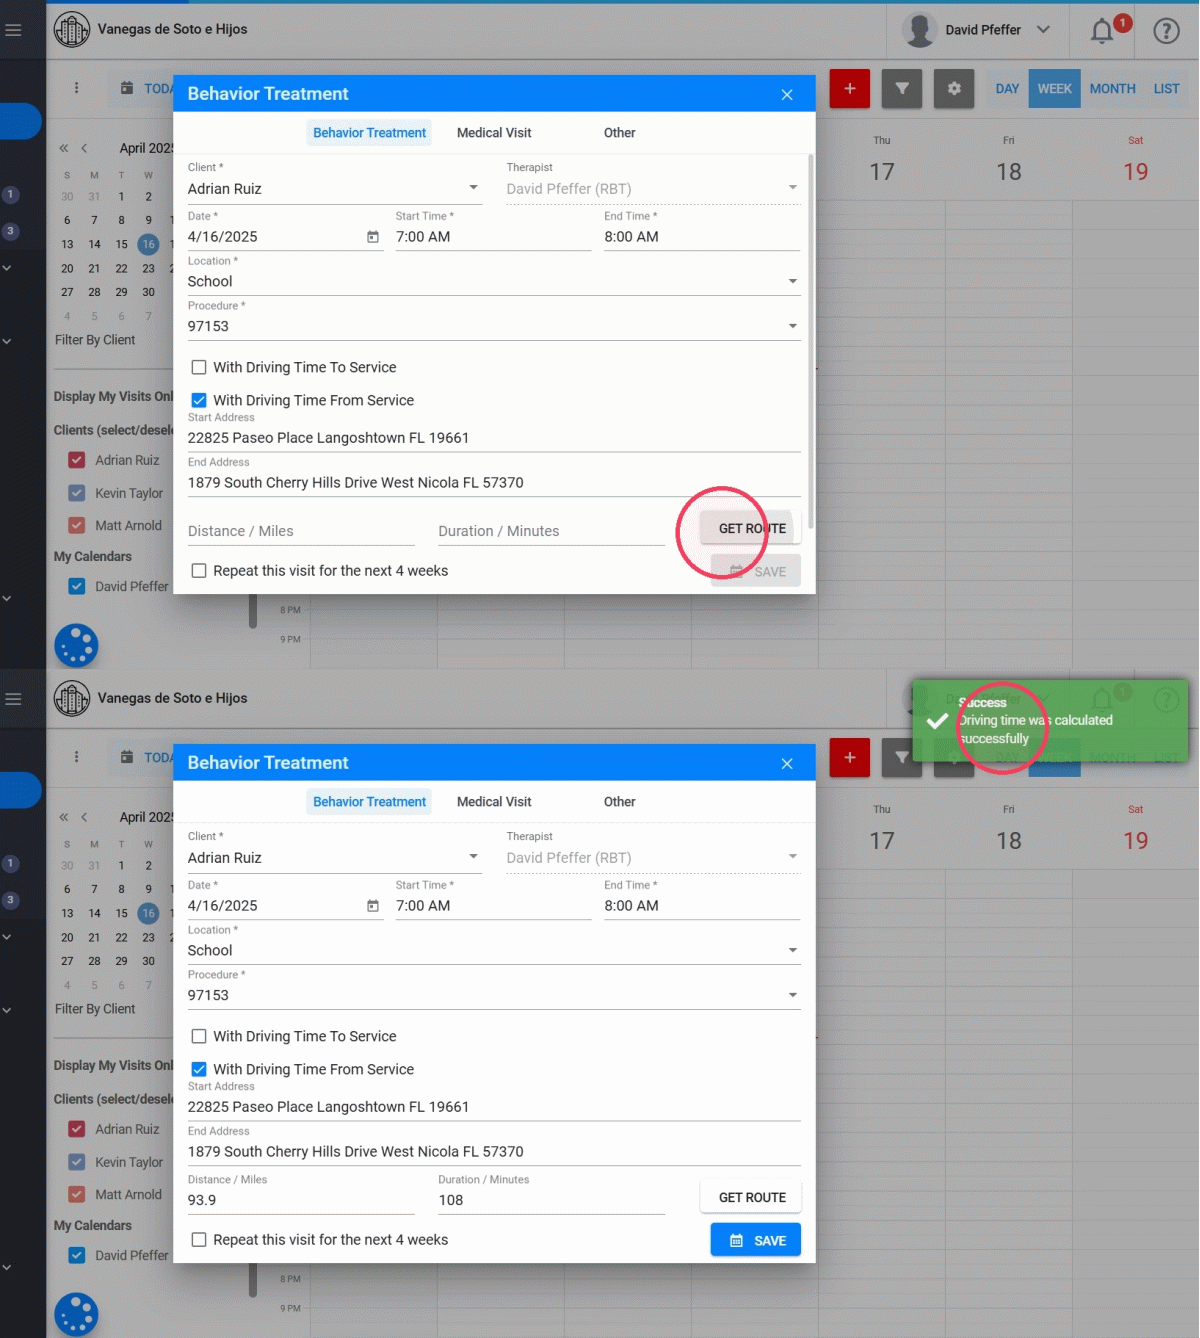
16. Just like before, you can edit the results manually if needed.
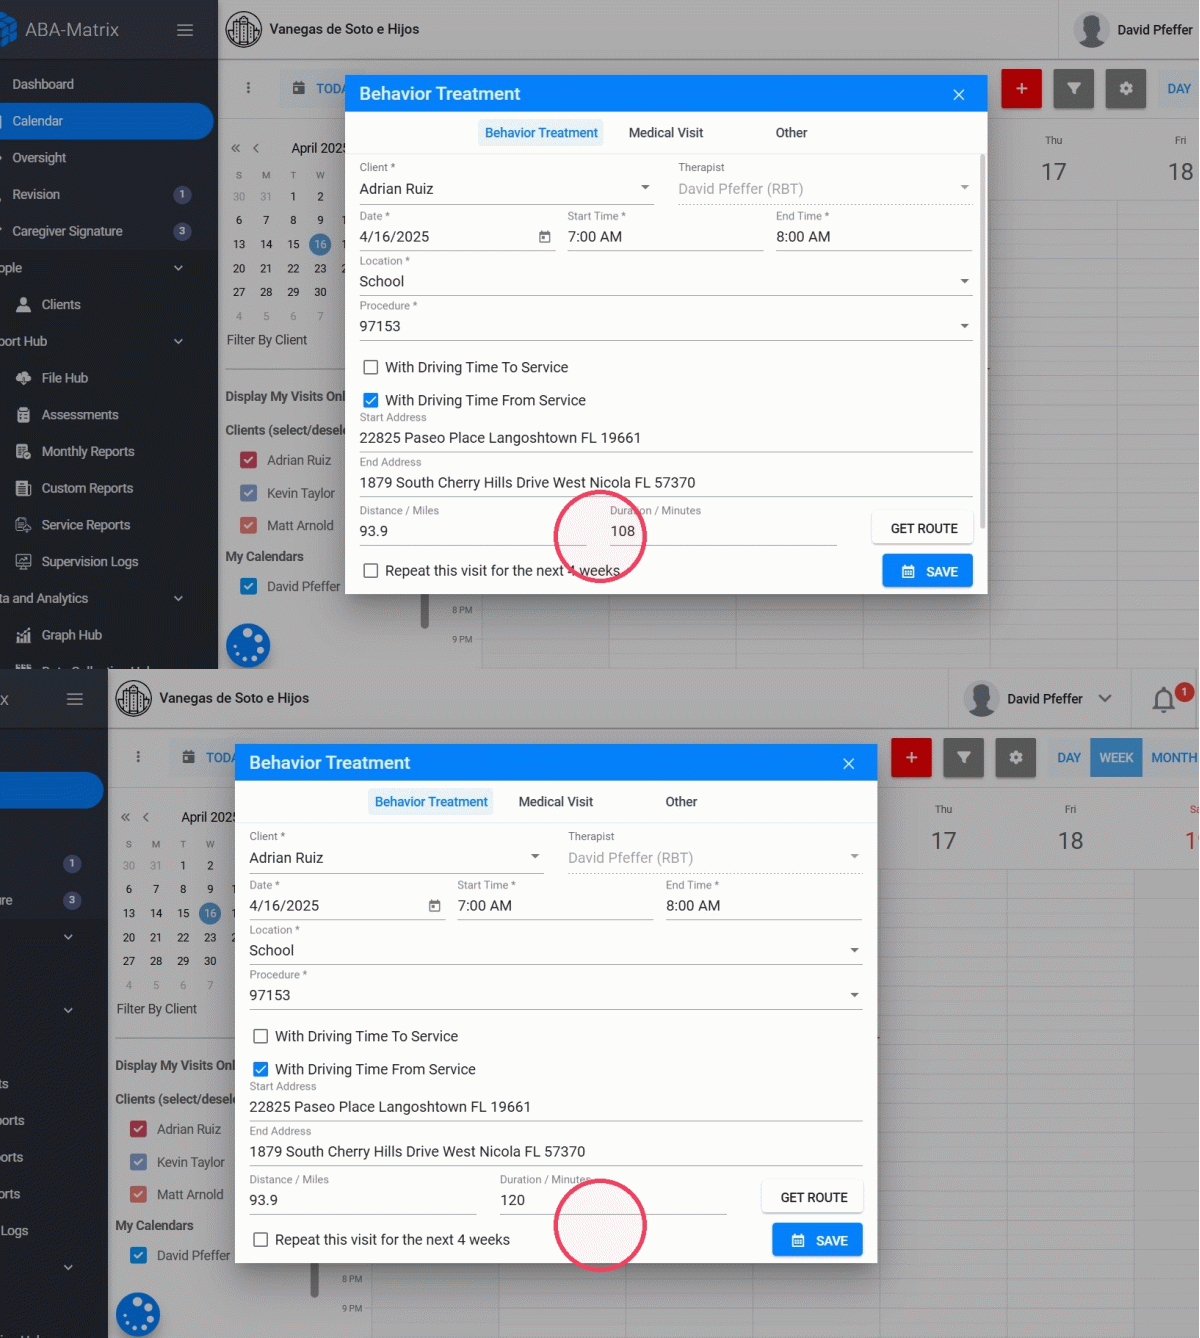
17. Calendar View
Once saved, your calendar will show:
- The scheduled visit at the time you selected
- A Driving Time event appearing directly after the visit
Driving Time TO and FROM Service
18. Let’s say you have a visit and you’re adding both, driving time To and From service:
- Driving To Service
- Visit
- Driving From Service
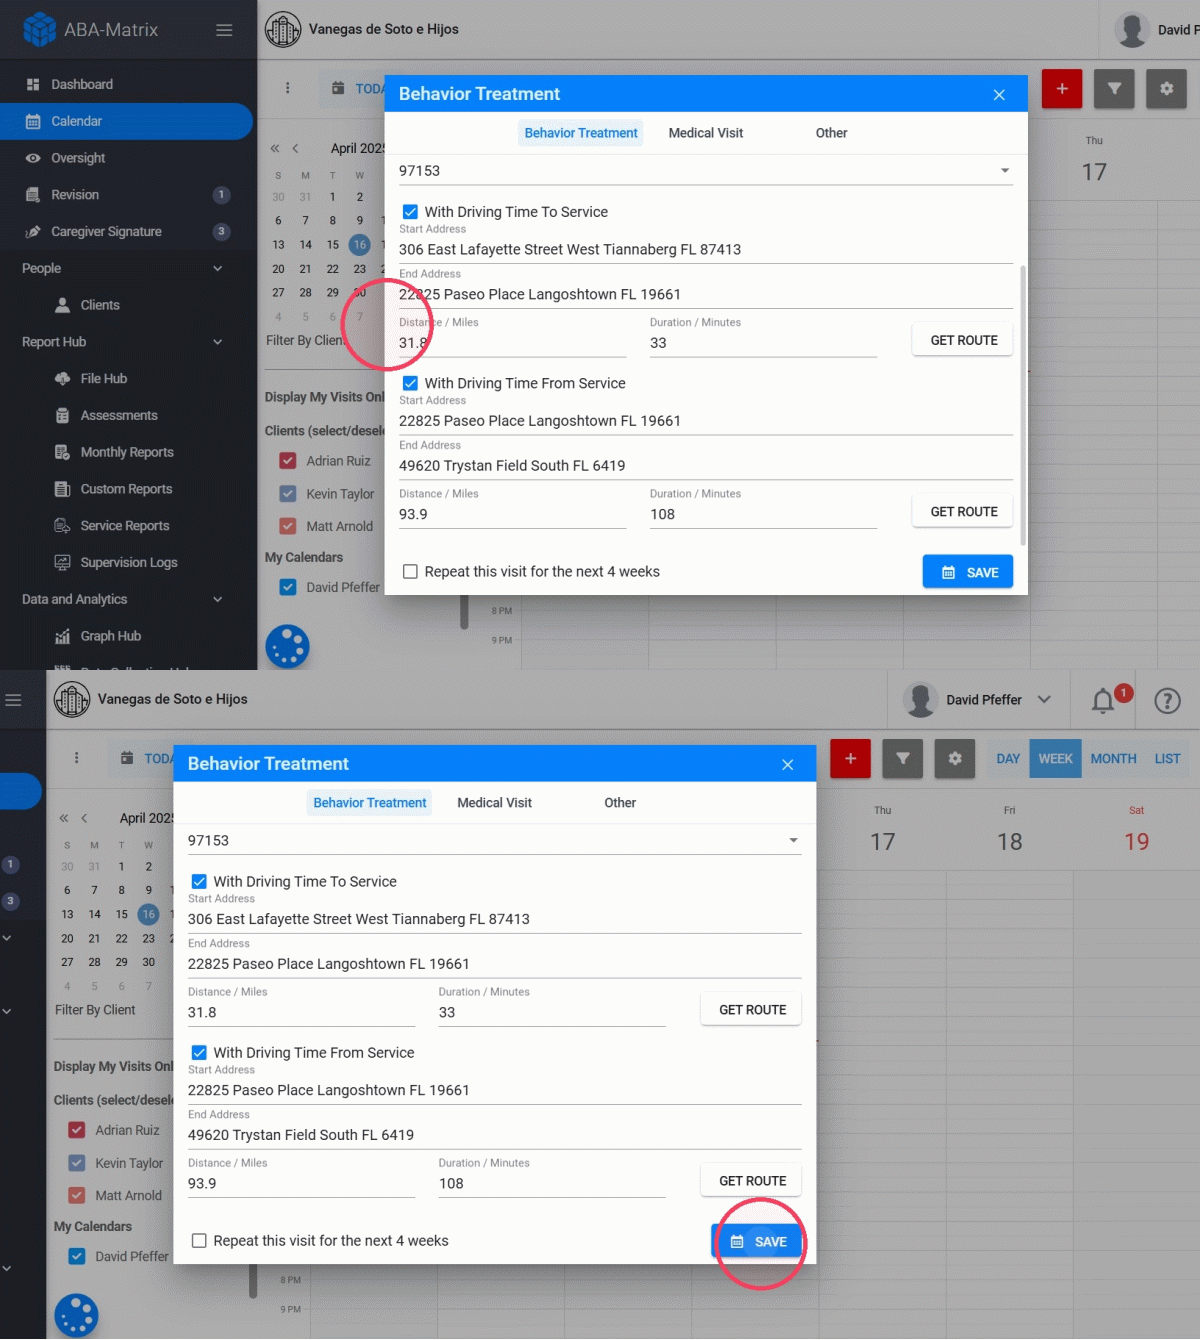
19. In the calendar you will see each driving time automatically marked as completed, while the visit behaves like any normal visit.
You can always:
- Change addresses
- Recalculate the route
- Edit the distance or duration
- Remove or re-add driving time