How to Manage Scheduling Restrictions (For Administrative Staff)
This guide shows how to set up and manage scheduling rules to prevent booking conflicts, enforce policies, and ensure compliance across locations, staff, clients, and visit types. It explains quick templates plus step-by-step creation (date, weekday, holiday), scope (places, clients/therapists), and targeted visit types. It also covers editing, viewing details, and deleting restrictions.
Scheduling Restrictions allow agencies to control when sessions can be scheduled by applying rules based on dates, weekdays, holidays, Place of Service (POS), specific clients or therapists, and visit types.
These configurable rules ensure that scheduling aligns with staff availability, operational policies, and compliance requirements, helping prevent conflicts and maintain consistency across all scheduled services.

1. Navigate to Agency → Scheduling Restrictions
From this section, you can:
- Create new restrictions
- View existing restrictions
- Edit or delete restrictions
Adding a new Restriction
Existing scheduling restrictions and blocked dates previously configured directly in therapist or client profiles were automatically transferred to the new Scheduling Restrictions feature.
These restrictions can now be viewed and managed from the centralized Scheduling Restrictions page. If any transferred restriction is no longer needed, it can be edited or deleted at any time.
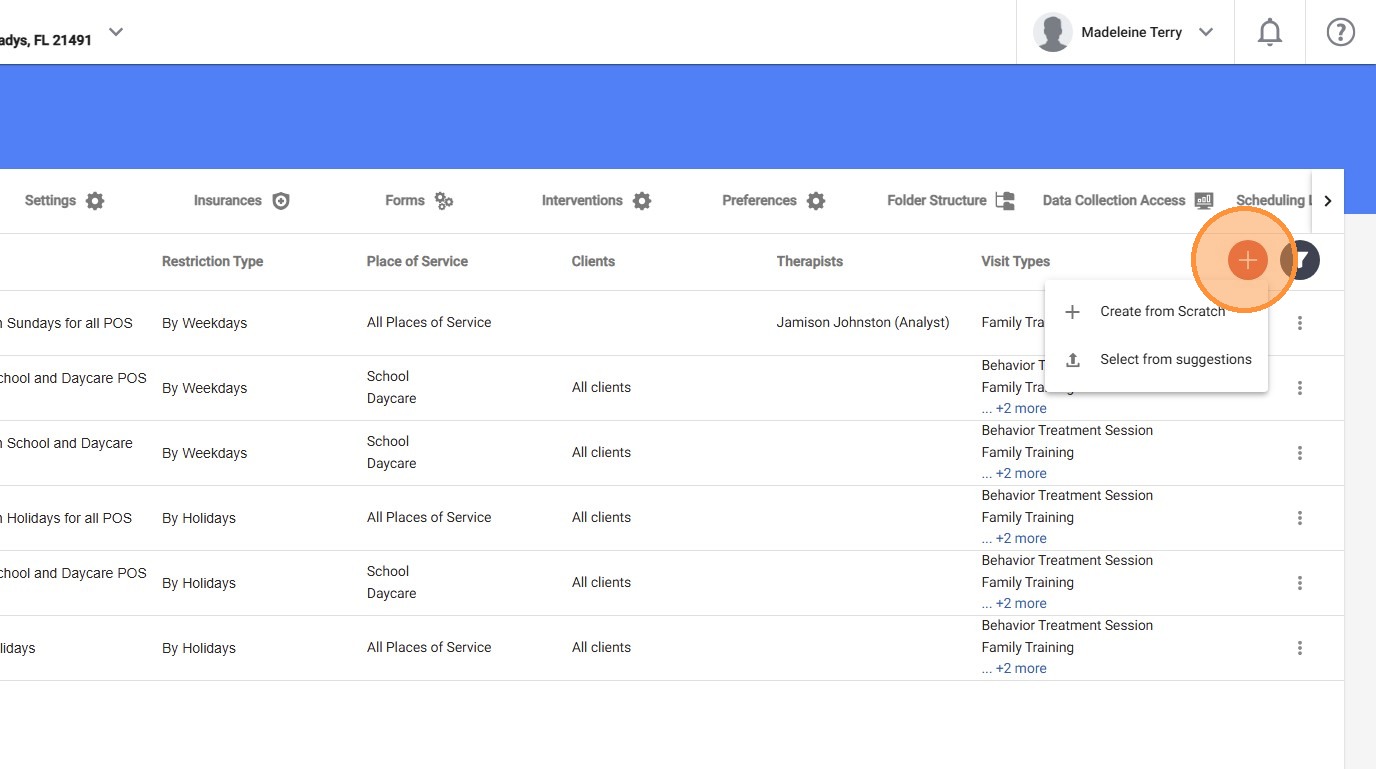
2. Click the “+” button, and you will see two options:
- Create from Scratch
- Select from Suggestions
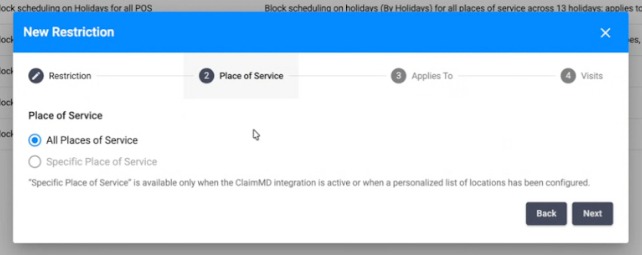
1. Selecting from Suggestions
Using Suggestions helps you quickly apply common scheduling rules without manual setup, ensuring consistency and saving time.

3. This option allows you to quickly create scheduling restrictions using predefined templates based on common use cases.
- Select the checkboxes for the desired restriction suggestions
- Click “Apply”
- After applying a suggestion, the restriction can still be edited to adjust details such as dates or time ranges, Place of Service (POS), Applies To (Clients or Therapists), and visit types.
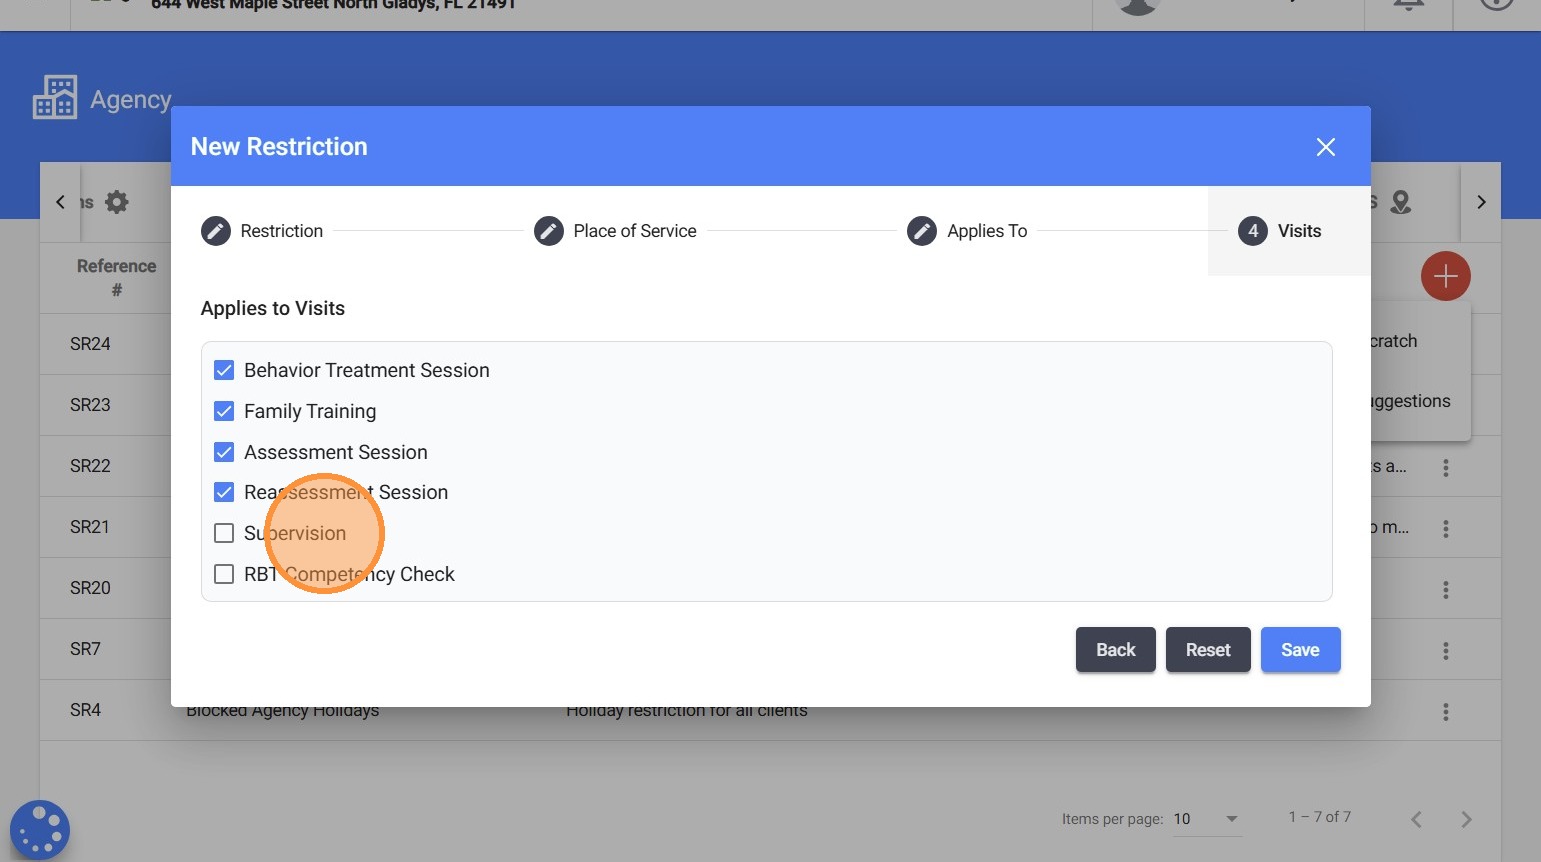
If the restriction you need is not available in the suggestions list, use Create from Scratch. This powerful option allows you to create highly customizable restrictions based on your agency’s specific scheduling needs.
2. Creating a restriction from Scratch
The setup process includes 4 steps:

- Restriction

- Place of service

- Applies to

- Visits
2.1 Restriction
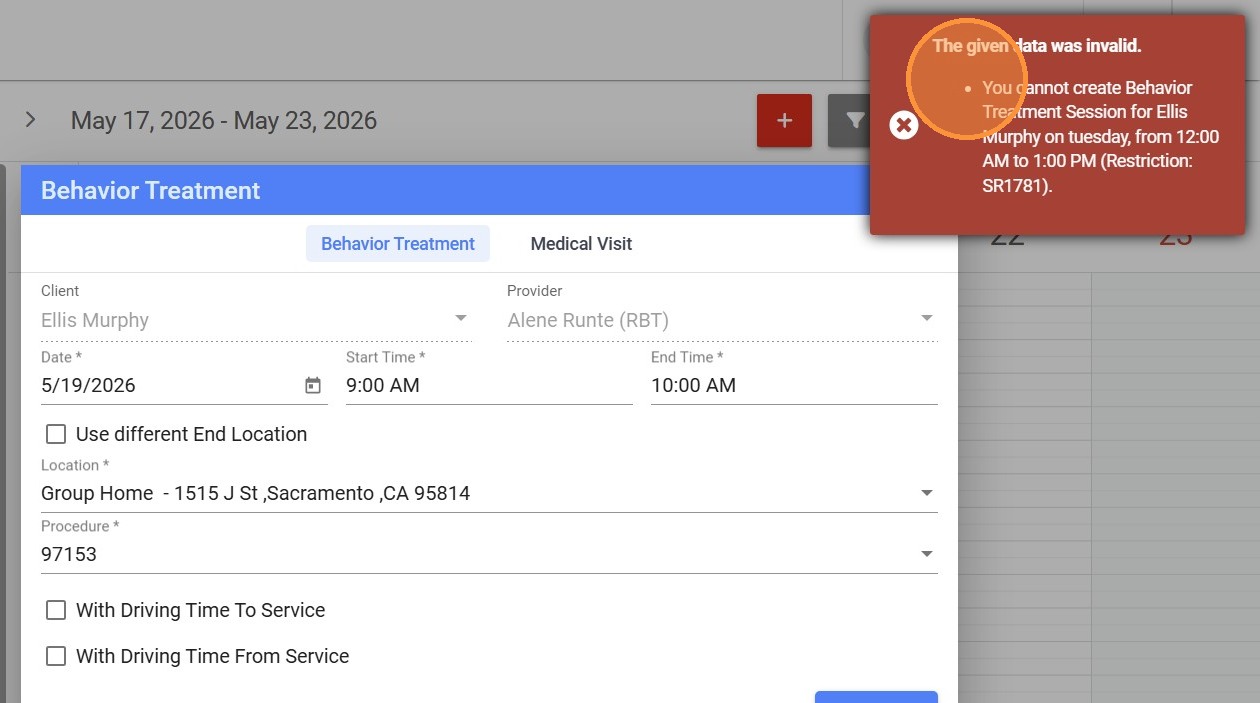
4. - Name: First, enter a name that clearly describes the purpose of the restriction.
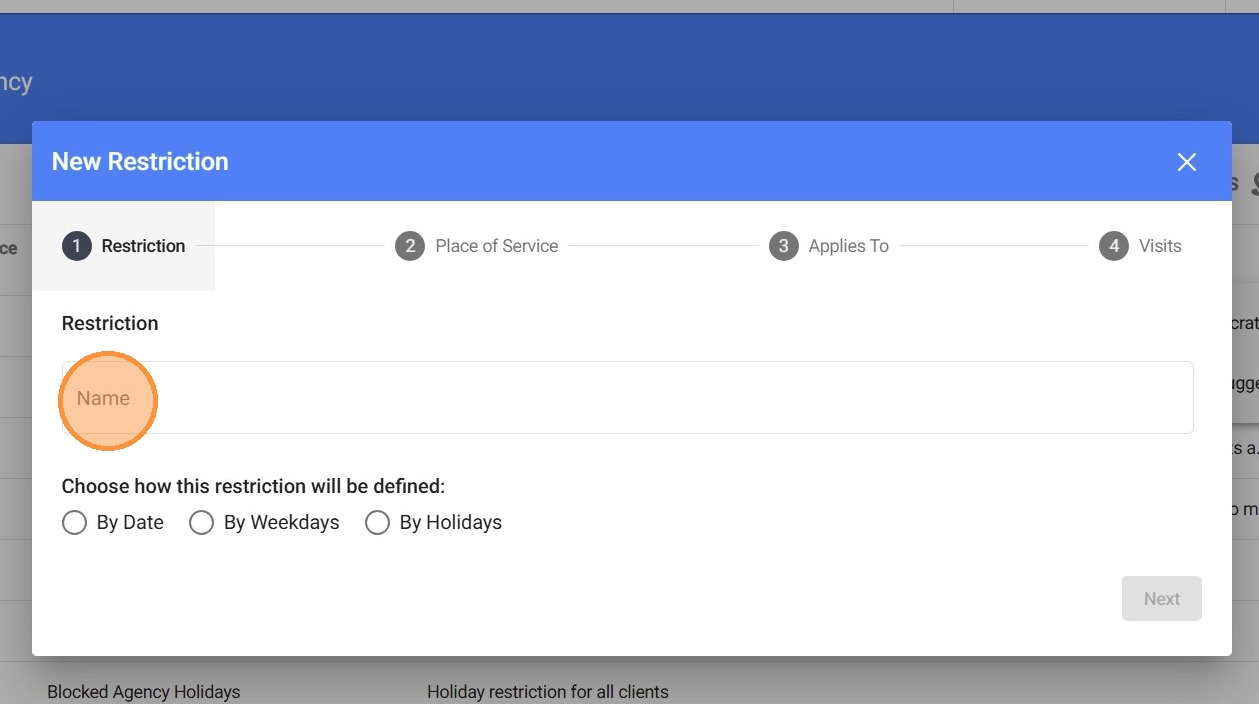
Use a name that allows you to quickly identify the rule later without opening it. Clear naming helps when managing multiple restrictions and avoids confusion when editing or troubleshooting. Example: Block School Sessions on Teacher Planning Days
5. - Choose how this restriction will be defined:
In this section, you choose how the system will determine when the restriction applies. There are three available options:
a) By Date
b) By Weekdays
c) By Holidays
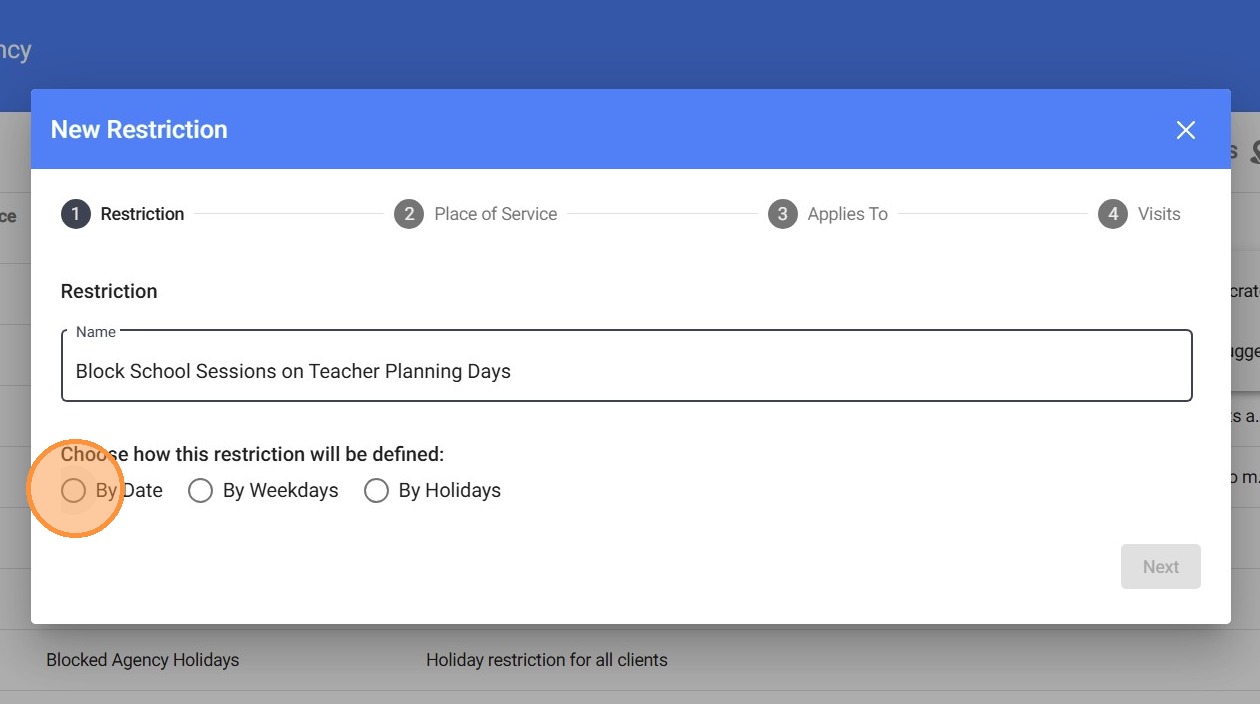
a) By Date
6. This option allows you to apply restrictions to specific dates or date ranges.
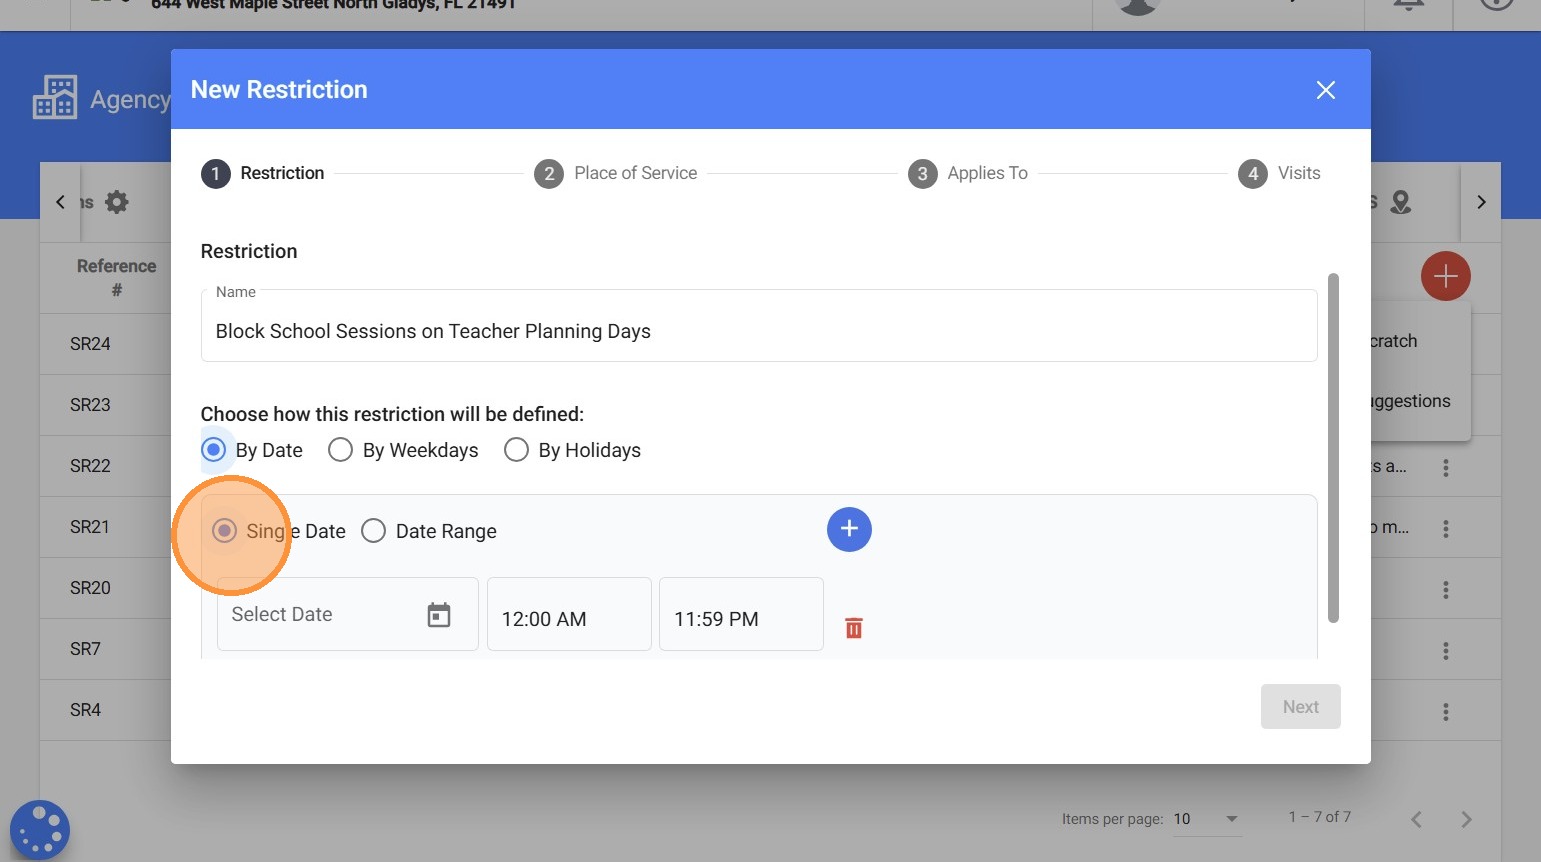
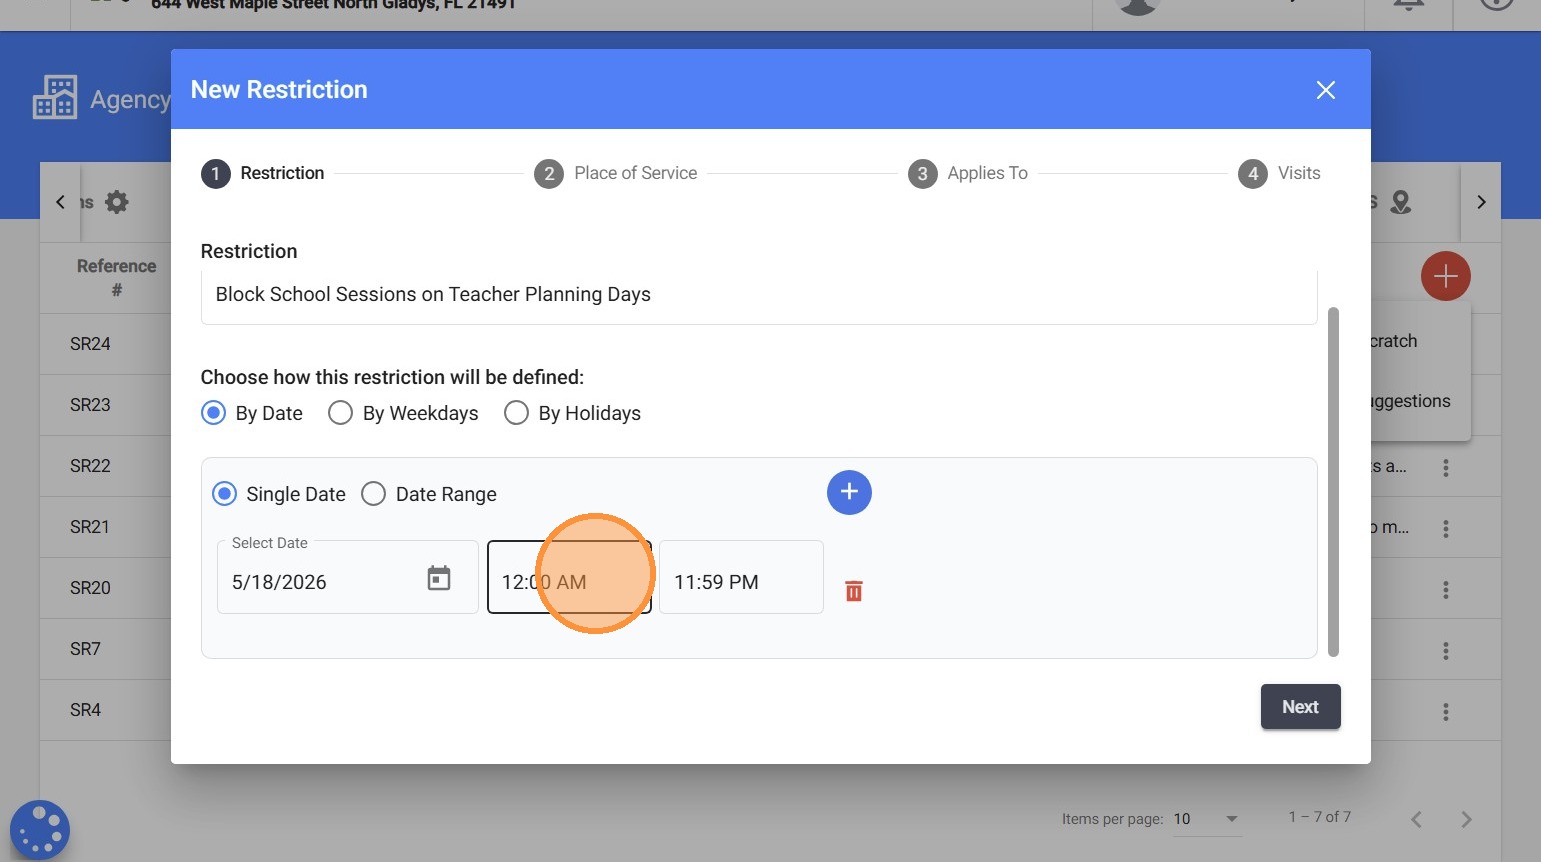
7. When using Single date, you can apply a restriction to either one specific date or several individual dates within the same rule.
- Single Date means the restriction applies to only one selected day.
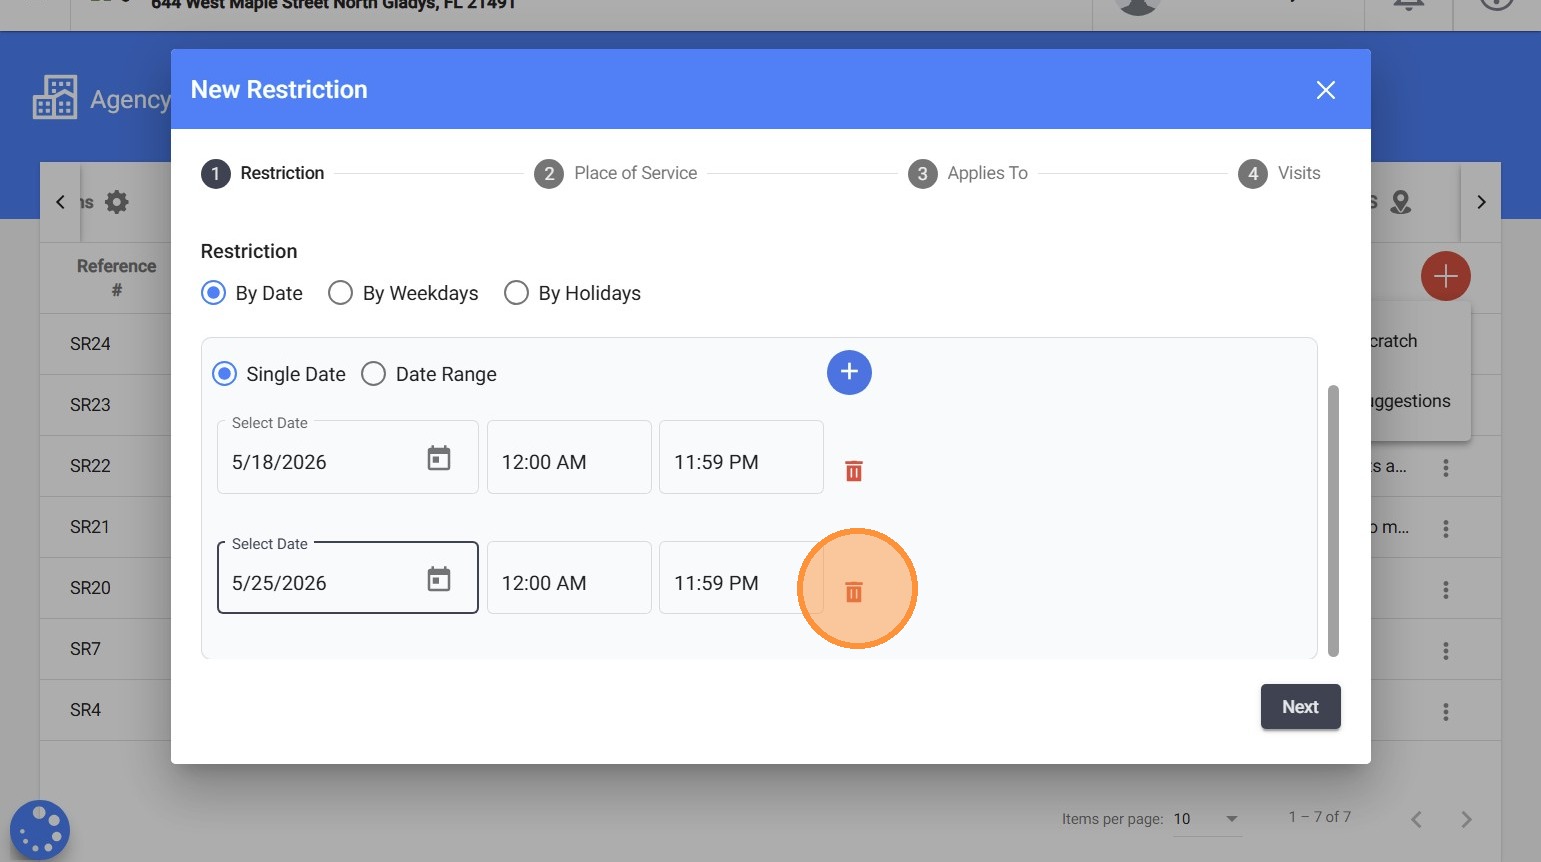
- Multiple Individual Dates allows you to add several separate days by clicking the “+” button, grouping them under the same restriction.

8. By default, the time is set from 12:00 AM to 11:59 PM, which means the entire day will be blocked. However, this time range can be adjusted if only part of the day needs to be restricted.
9. You can also remove any specific date from the list using the trash icon, allowing you to easily update the restriction without recreating it.

10. When using Date Range, you can apply a restriction to a continuous period of time between a start date and an end date.
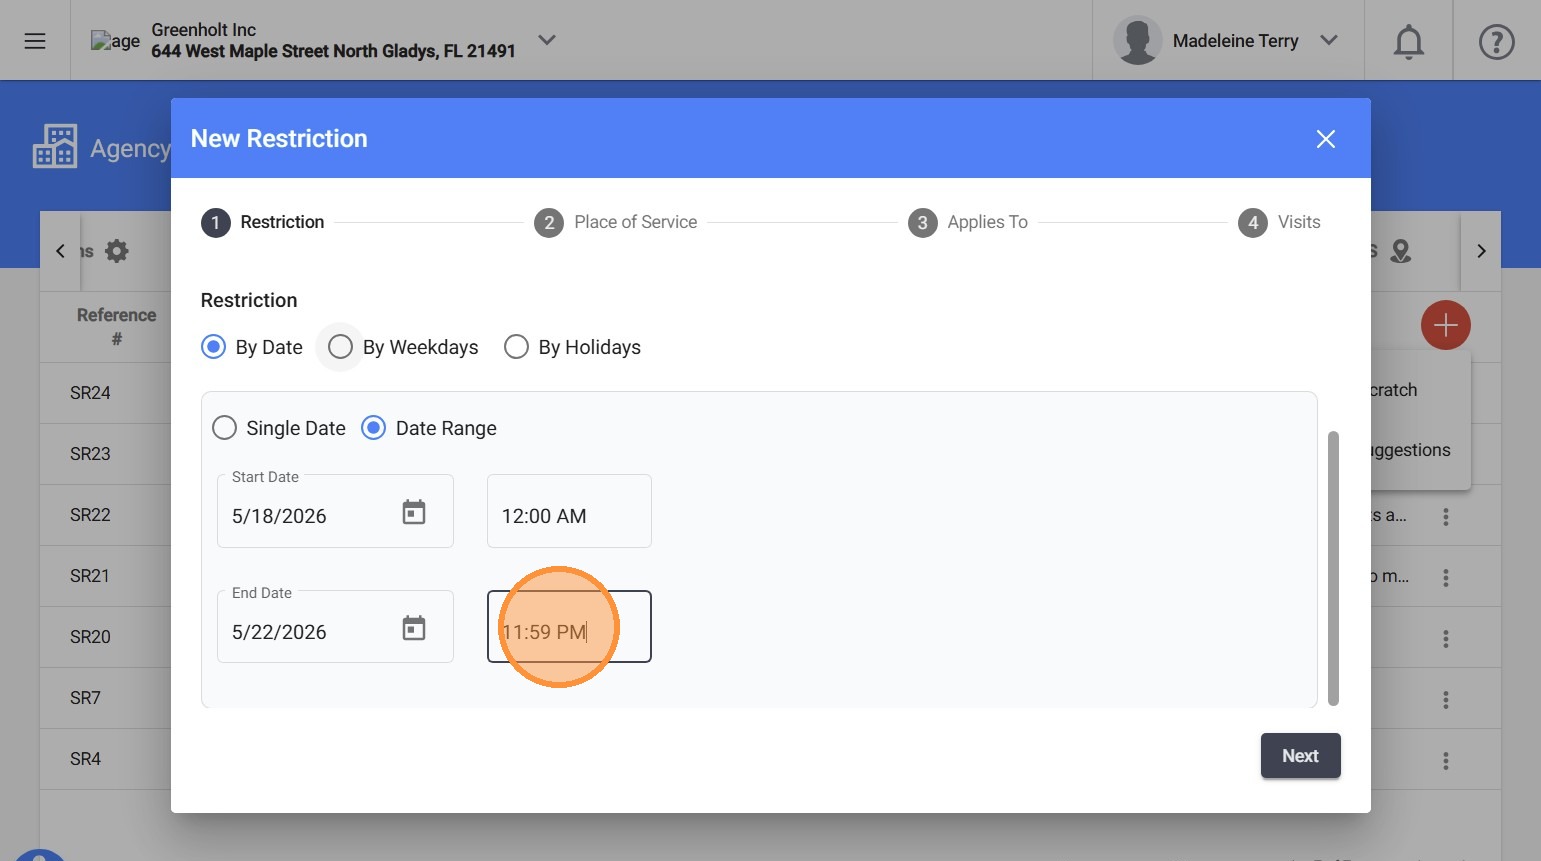
- Date Range means the restriction applies to every day between the selected Start Date and End Date. You define both dates, and the system will automatically include all days within that range under the same restriction.
11. By default, the time is set from 12:00 AM to 11:59 PM, which means each day in the range will be fully blocked. The time can be adjusted if needed.
b) By Weekdays

12. This option allows you to apply restrictions on a recurring weekly schedule. You can select one or more days.

13. You can choose to block:
- The entire day, or
- Set a specific time range
By default, the time is set from 12:00 AM to 11:59 PM, which means the selected weekday(s) will be fully blocked. This time can be adjusted if you only want to restrict part of the day, such as mornings, afternoons, or after a specific time.
c) By Holidays

14. When using By Holidays, you can apply a restriction based on predefined holidays selected from the system. You can select one or multiple holidays within the same restriction.
2.2 Place of Service

15. In this step, you define where the restriction will apply.
- You can select All Places of Service, or
- Choose Specific Place(s) of Service
The restriction will only apply to the selected Place(s) of Service, allowing you to control scheduling rules without affecting other service locations.
16. If your agency is not using the integration with Claim.MD, the Specific Place of Service option will not be available until POS settings are configured manually. By default, the system uses the addresses assigned directly to each client profile as the POS when scheduling visits.
If you enable the POS configuration setting, therapists will be able to select from all POS options configured in the system instead of only seeing the addresses assigned to individual clients.
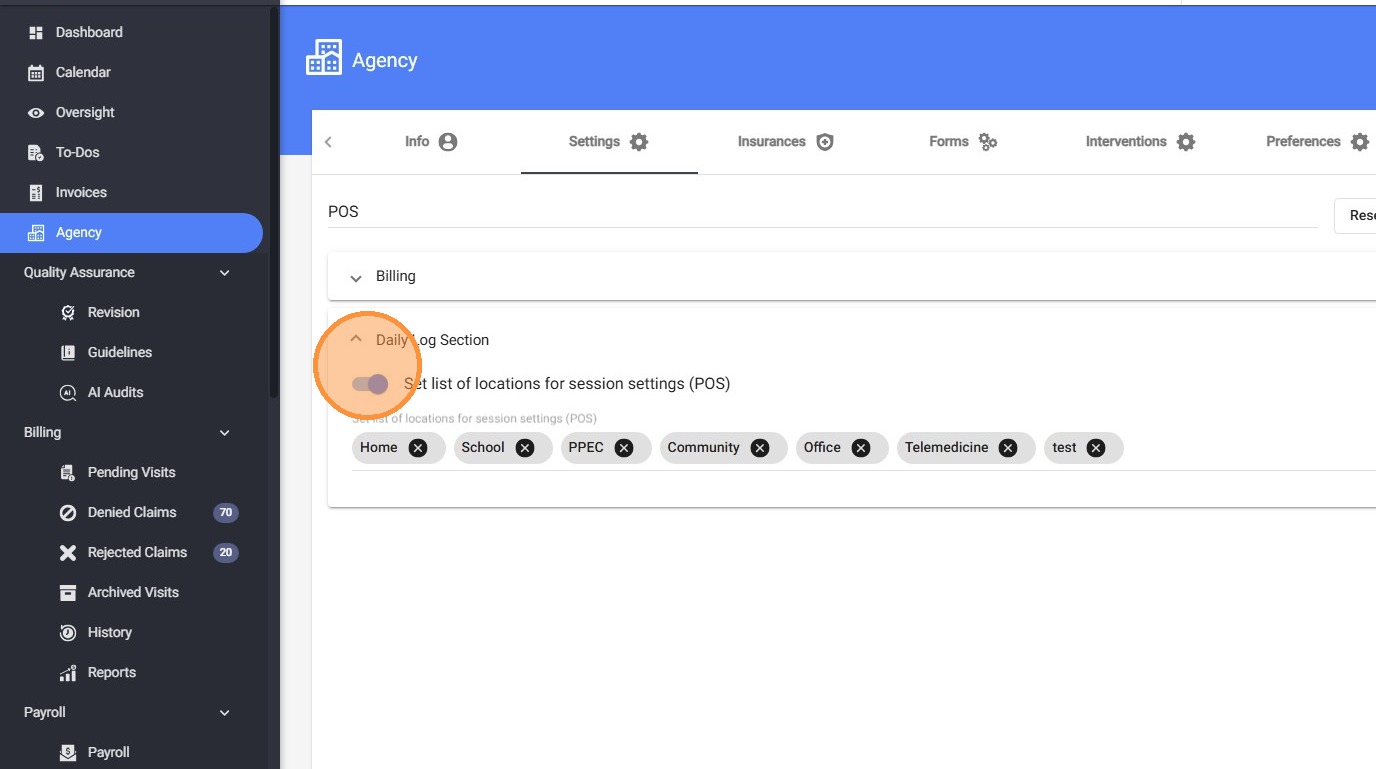
17. To manually configure POS options:
- Navigate to Agency Settings → Daily Log Section
- Enable the setting: “Set list of locations for session settings (POS)”
- Enter each POS location you would like to make available
- After typing each POS, press the Enter key so it is saved as an individual gray tag
- Save your changes once all POS locations have been added
After the POS list is configured, the Specific Place of Service option will become available when creating Scheduling Restrictions.

2.3 Applies to
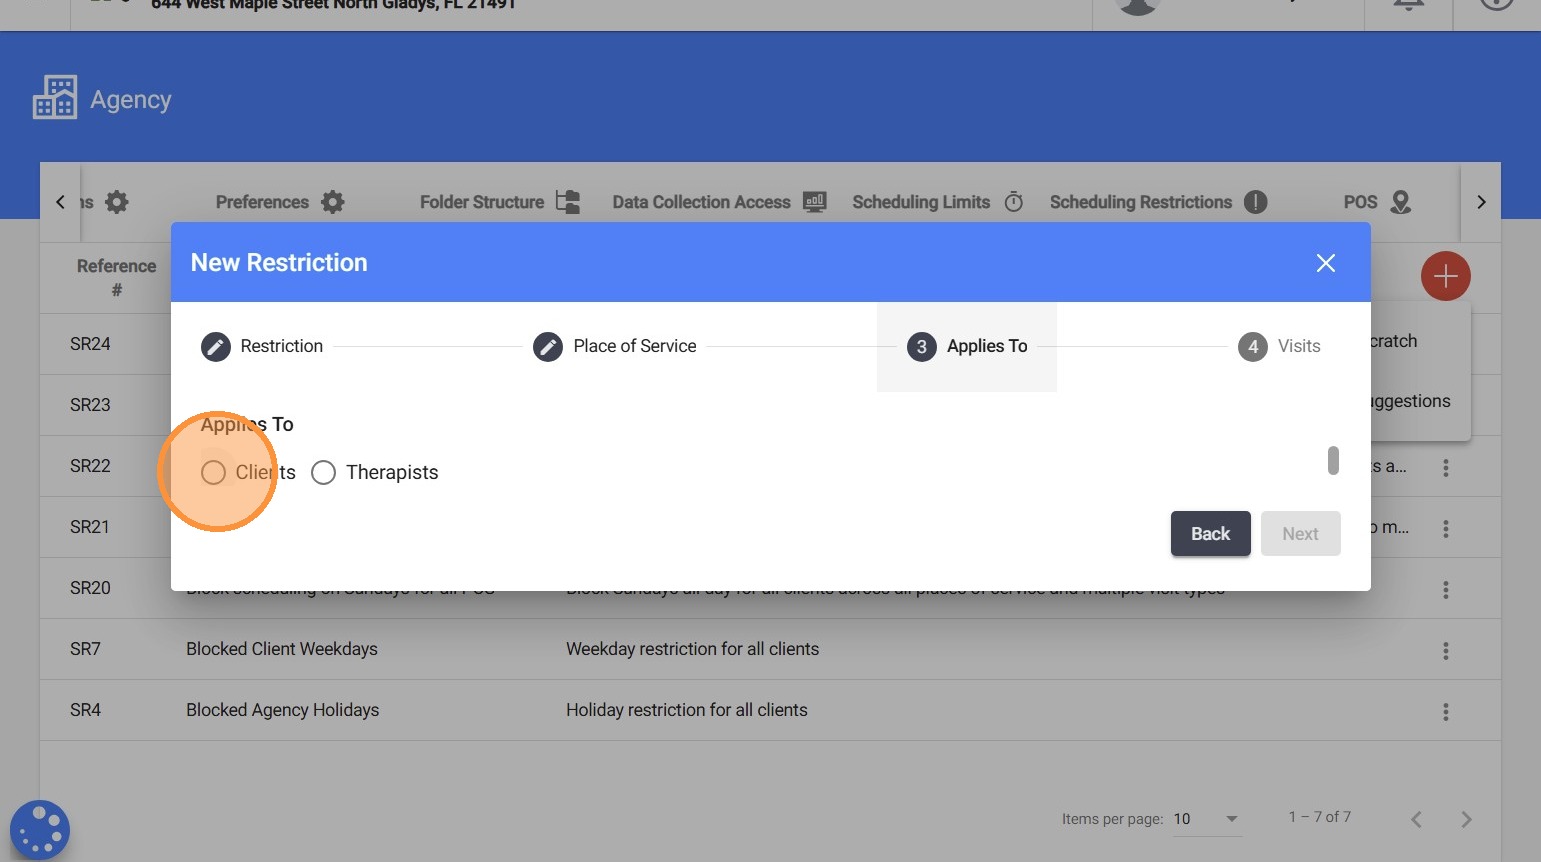
18. In this step, you define who the restriction will affect. You can select:
- Clients, or
- Therapists
19. Then choose:
- All: Applies the restriction to everyone in that category
- Specific individuals: Allows you to select individual clients or therapists to apply the restriction to

20. This gives you flexibility to apply restrictions broadly or only to certain users.
2.4 Visits
21. In this step, you define which visit types will be affected by the restriction. You can select one or multiple visit types, such as:
- Behavior Treatment Session
- Assessment Session
- Reassessment Session
- Supervision
- Family Training
The restriction will only block scheduling for the selected visit types. Other visit types will still be allowed unless included.
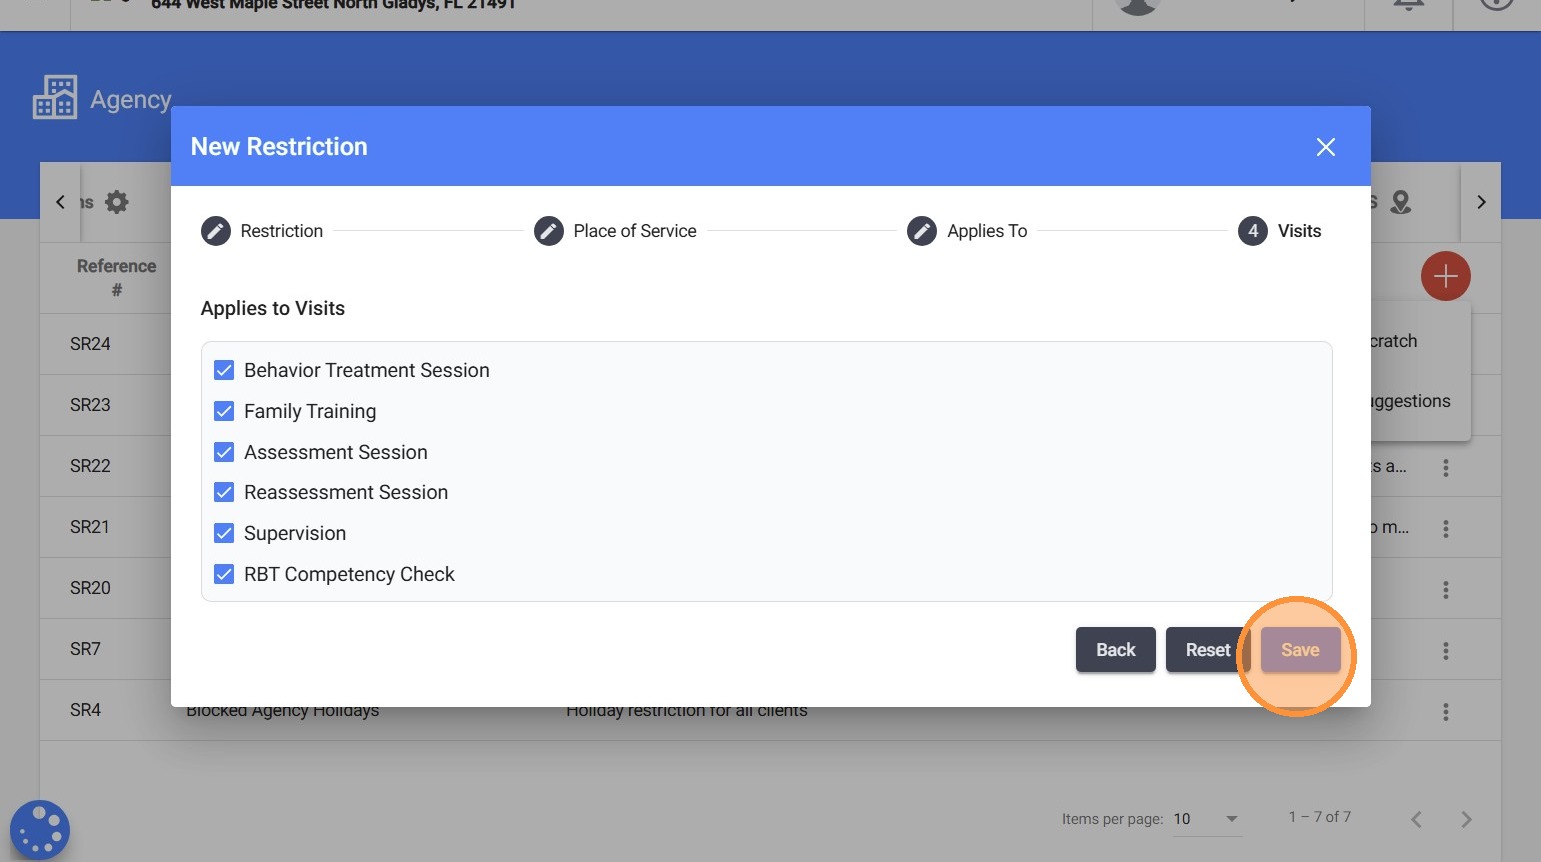
22. Click Save to apply the restriction. Once saved, the system will prevent scheduling that does not meet the defined conditions.
Managing Existing Restrictions
23. From the main Scheduling Restrictions page, you can review all existing restrictions, including:
- Restriction reference number
- Name
- Restriction type
- Place of Service (POS)
- Clients
- Therapists
- Visit types associated with each rule.
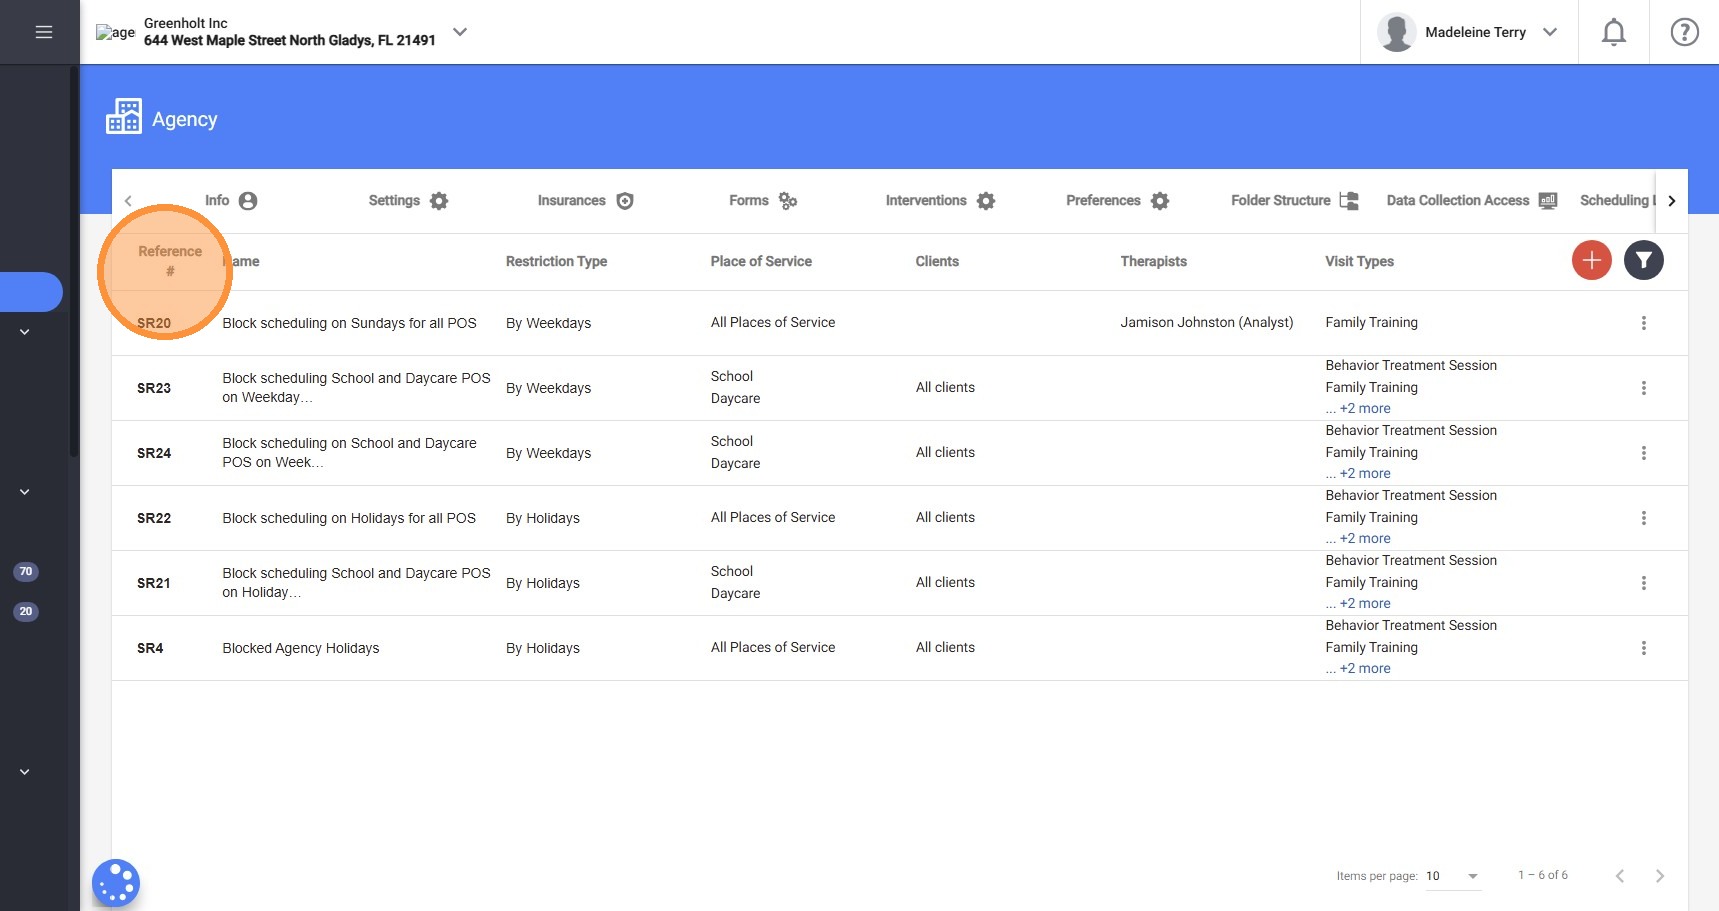
24. When a restriction includes multiple clients, therapists, or visit types, the system may display a “+X more” option. Clicking this option will expand the list and display all additional items included in that restriction.
25. Filtering existing Restrictions:
To help quickly locate specific restrictions, click the filter icon. The filter window allows you to search restrictions by:
- Client
- Therapist
- Restriction Reference Number
- Place of Service (POS)
- Visit Type
After selecting the desired filters, click Apply Filter to display matching restrictions. To remove all filters and return to the full list, click Clear Filter.
26. Viewing Restriction Details:
To view a restriction, you can either click directly on the restriction name or use the three dots (⋮) menu and select Details.
This view displays a summary of the restriction configuration, including:
- Restriction type
- Place of Service (POS)
- Applies To selections
- Visit types
- Created and modified dates
The sections for Place of Service, Applies To, and Applies to Visit Types include a pencil icon, allowing those selections to be edited directly from the details view.
27. Editing existing Restrictions:
To fully edit a restriction, use the three dots (⋮) menu and select Edit, or open the restriction details and click the Edit button. When editing a restriction, you can update:
- Dates, weekdays, or holidays
- Time ranges
- Place of Service (POS)
- Applies To selections
- Visit types
Click Reset to revert all changes to the original setup. Once updates are complete, click Save to apply the changes.

28. Deleting Restrictions:
To delete a restriction, open the three dots (⋮) menu and select Delete. The system will ask you to confirm the action before permanently removing the restriction.
What happens when a Restriction is triggered
29. When a therapist or scheduler attempts to create a visit that conflicts with an active Scheduling Restriction, the system will display an error message explaining why the visit cannot be scheduled.
The message also includes the Restriction Reference Number, making it easier for administrators to quickly locate and review the restriction involved.