How to Collect Data in the ABA Matrix Mobile App
This guide shows how the ABA Matrix Mobile App makes session data collection fast, reliable, and flexible—covering offline use, intuitive navigation, and centralized timers so you can keep working without interruption. It explains how to record every measurement type (frequency, percentage, interval, intensity, duration, task analysis, targets, and prompts), review and edit entries, and manage active items for streamlined workflows. Use it to confidently collect accurate, auditable client data during sessions.
1. Once you log in to the app, use the options at the top of the screen to navigate between dates and find the session you need:
- Tap the left and right arrows to view sessions from previous or upcoming dates
- Tap the date in the center to open the calendar and select a specific date
- Tap Today to quickly return to the current day’s schedule

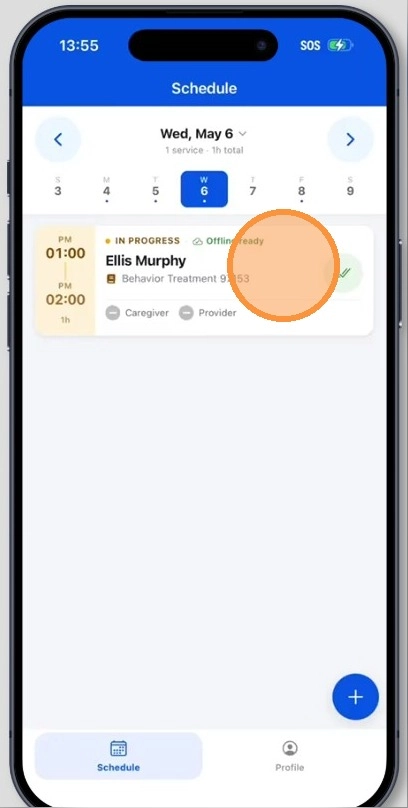
2. Each visit appears as a session card. These session cards are designed to give you a quick overview of the most important session details:
- Session status (like In progress, Completed)
- Client name
- Service type and code
- Session time
- Signature status for caregiver and provider
- Offline Ready tag
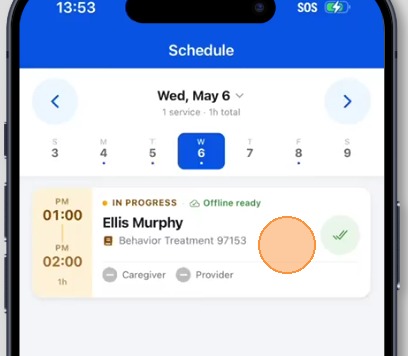
The Offline Ready tag indicates that the session is available for use even if the device loses internet connection. Any data entered offline is securely stored and will automatically sync with ABA Matrix once the connection is restored. Users can still perform key tasks such as data collection, and capturing caregiver and provider signatures.
1. Data Collection Layout
3. To collect data:
- Tap the session card to open the Session Tools
- Select Data Collection
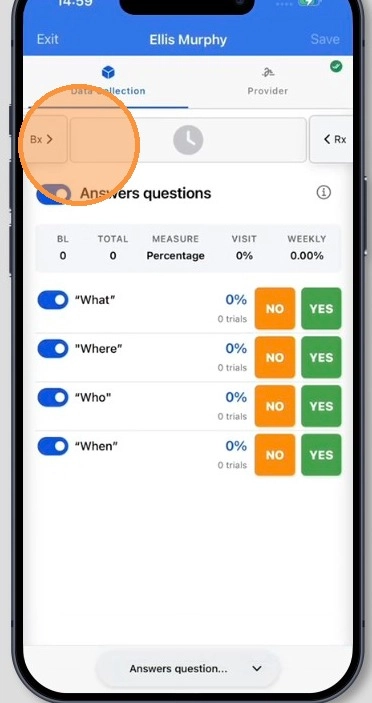
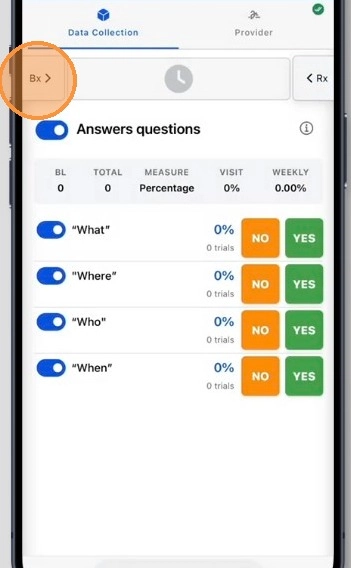
4. The Data Collection screen is designed to keep the most important information visible while allowing providers to move easily between different behaviors and skills during a session.
The screen is divided into several main areas:
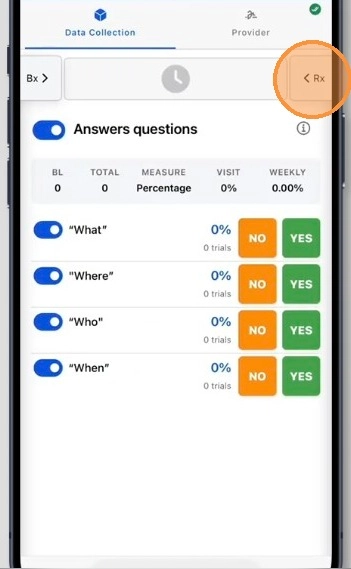
- Left panel (Bx): Displays the client’s ongoing Behaviors
- Right panel (Rx): Displays the client’s ongoing Replacements and Skills (listed in alphabetical order: replacements first, then skills)
- Top bar: Displays active duration timers for ongoing data collection
- Center: Shows the detailed view of one skill or replacement at a time.
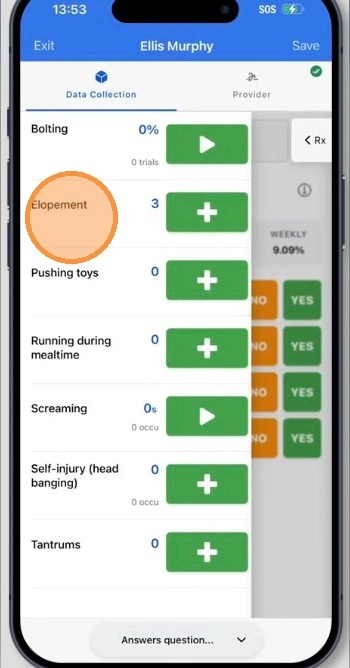
1.1 Maladaptive Behaviors: Left panel
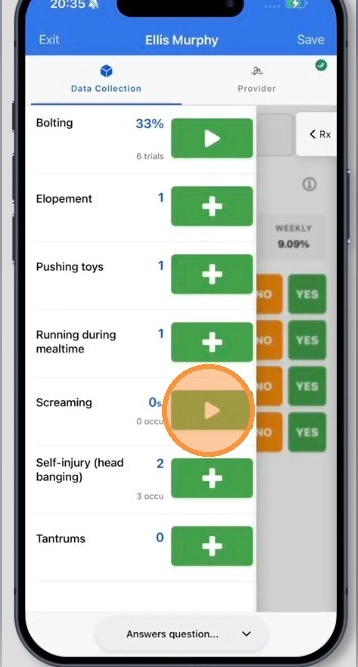
5. Maladaptive behaviors are listed in the left pane. When expanded, this section displays the ongoing behaviors assigned to the client, these are the behaviors that may need to be tracked during therapy.
Depending on the behavior’s measurement type, you will see different options for collecting data (for example, a timer for duration-based behaviors or a “+” button to record frequency and add incidents).
Each measurement type is explained in detail later in this guide.
6. If you need to review a behavior in more detail or manage collected data, tap on a behavior to open the Full View. In this view you will see:
- Basic Information – Key details about the behavior, including:
- Baseline (BL)
- Measurement type
- Visit/Weekly Values
- Session Data – Allows you to review and manage collected data during sessions:
- View all recorded entries
- Add new entries
- Edit or correct existing entries
- Remove entries
- Extra Details accessible through the info icon (i) –This section includes additional context such as:
- Topography
- Functions
- Interventions
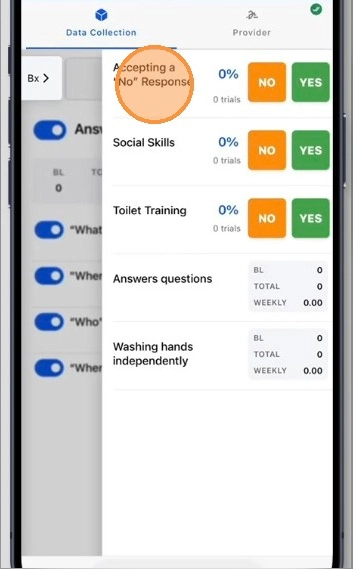
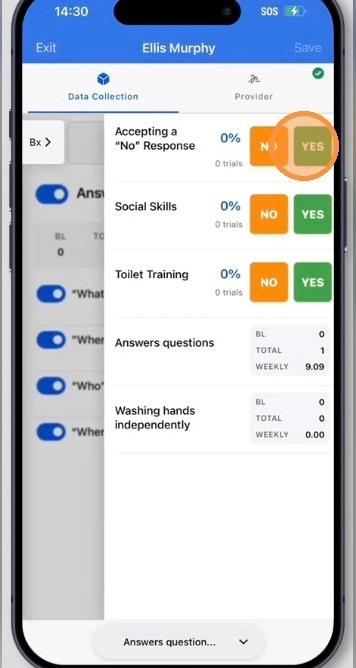
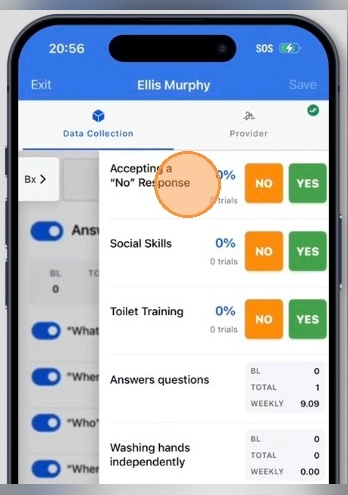
1.2 Replacements and Skills: Right panel
7. Replacement behaviors and skills are listed in the right pane. When expanded, this section displays the ongoing replacement behaviors and skills assigned to the client, these are the skills or replacement behaviors that may be targeted during treatment.
Depending on the program’s measurement type, you will see different options for collecting data (for example, Yes/No options for percentage-based data collection or the ability to add prompts when recording responses).
Each measurement type is explained in detail later in this guide.
8. If you need to review a skill or replacement in more detail or manage collected data, tap on it to open the Full View. In this view you will see:
- Basic Information – Key details about the program, including:
- Baseline (BL)
- Measurement type
- Visit/Weekly Values
- Session Data – Allows you to review and manage collected data during sessions:
- View targets or task analysis steps
- View all recorded entries
- Add new entries
- Edit or correct existing entries
- Remove entries
- Extra Details accessible through the info icon (i) –This section includes additional context such as:
- Procedure
- Definition
- Barriers
1.3 Active timers: Top bar
9. At the top of the main data collection screen, there is a section for running duration measurements. This is important for duration-type behaviors because it allows you to continue collecting data for other behaviors or skills while still seeing the active timers.
Instead of reopening the specific behavior to manage the timer, you can monitor and stop the running duration directly from the main section at the top of the screen.
1.4 Program Detailed view: Center section
10. This section displays the detailed view of the client’s currently been worked on skill and replacement, one at a time. In this view, you will see:
- Basic Information – Key details about the program, including:
- Baseline (BL)
- Measurement type
- Visit/Weekly Values
- Session Data – Allows you to collect and review data during sessions. Depending on the program’s measurement type, different data collection options will be available. In this section, you may see:
- Targets or task analysis steps
- Trials and response options
- Options to edit or correct existing entries
- Options to remove entries
- Extra Details accessible through the info icon (i) –This section includes additional context such as:
- Procedure
- Definition
- Barriers
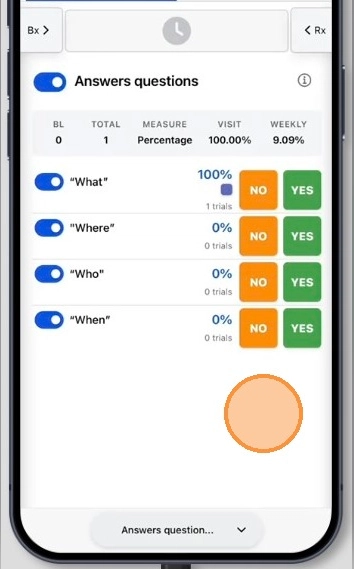
11. You can switch between skills and replacements by:
- Swiping left or right, or
- Using the selector at the bottom, which opens a dropdown list of all available skills and replacements (listed in alphabetical order: skills first, then replacements)
The center section is ideal for actively collecting data on a program while allowing you to track both behaviors (Bx) and replacements/skills (Rx). Opening and closing the left and right panels will not affect the performance of the center panel.
2. Collecting Data
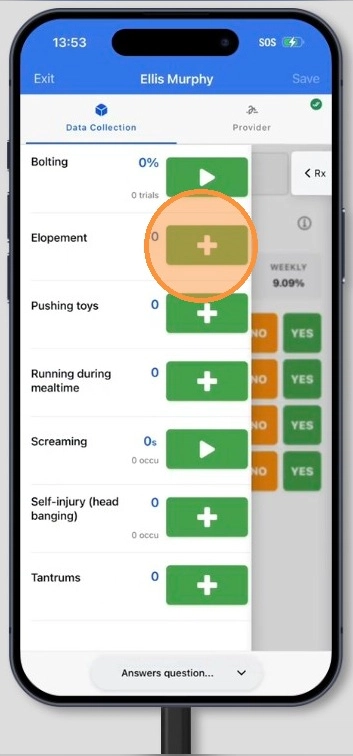
2.1 Frequency/Rate
12. To collect frequency/rate data, simply
- Tap the “+” button each time the behavior occurs. Each tap records one occurrence of the behavior.
As you collect data, you can see the number of incidents recorded so far, allowing you to track the total during the session in real time.
13. If you need to review or modify the data collected, tap the behavior to expand its information and open the Full View. There you will be able to:
- See all recorded incidents
- Use “+” to add more occurrences
- Use “–” to remove occurrences as needed
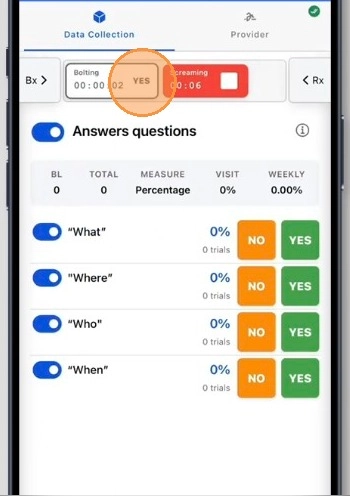
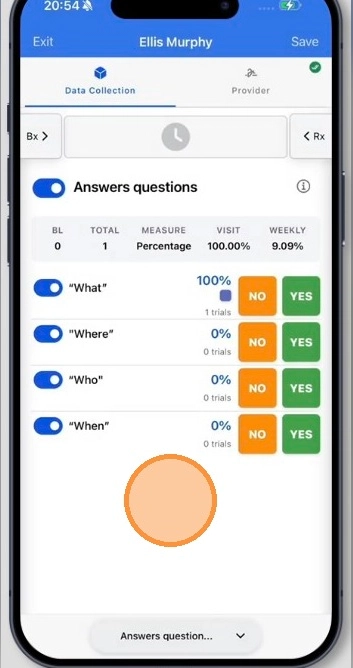
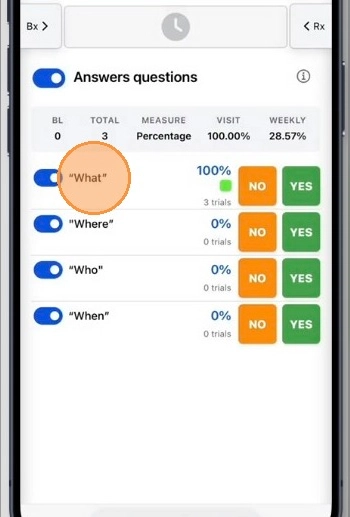
2.2 Percentage
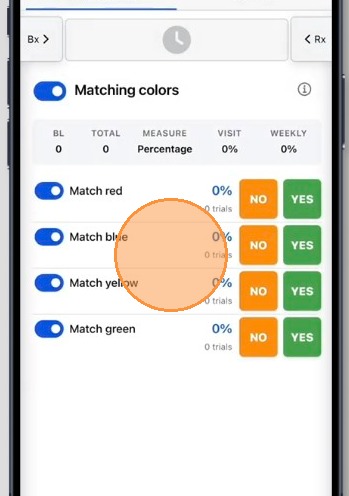
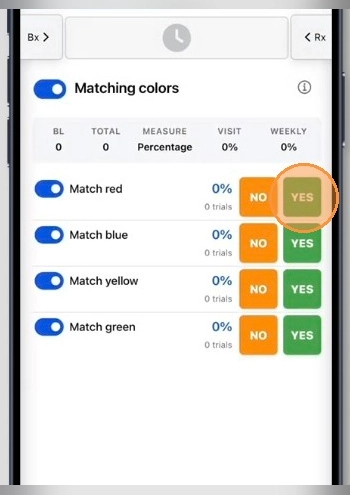
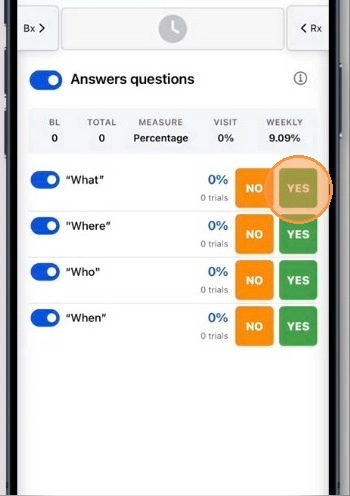
14. To collect percentage-based data, simply:
- Tap YES each time you want to record a successful trial
- Tap NO each time a trial is unsuccessful
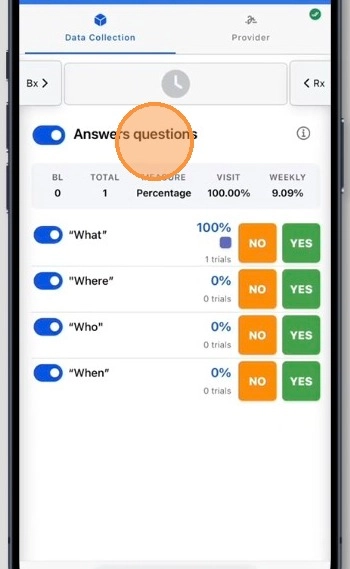
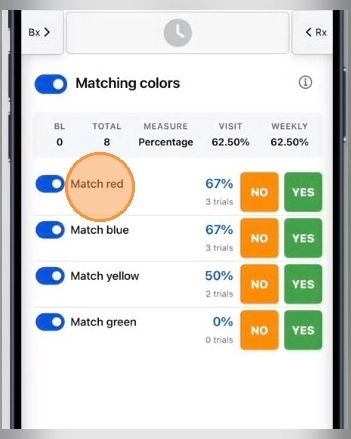
As you record trials, the app shows the number of trials recorded so far and the percentage of successful responses so far. This allows you to monitor progress while the session is in progress.
15. If you want to view, add, or modify trial information, tap the replacement behavior or skill to open the Full View. There you can:
- Review all recorded trials
- Add additional successful or unsuccessful trials
- Remove trials
- Correct previous trial results (tap a trial to switch between Yes and No)

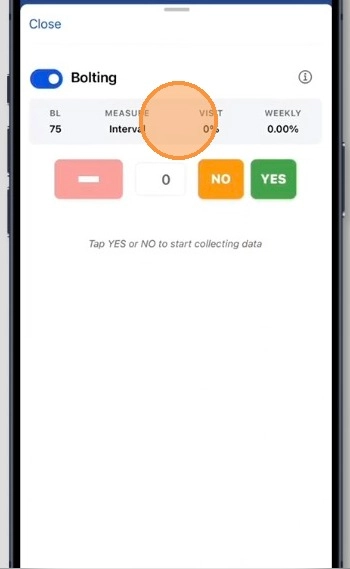
2.3 Interval
Interval recording uses a timer to automatically create time segments, or intervals. For example, a behavior may be configured to use intervals of 5 minutes, 1 minute, or 10 seconds.
16. 1. Start the timer
- Tap Start to begin interval collection.
- Once started, the system begins creating intervals one after another automatically.
2. Record whether the behavior occurred during each interval
- During each interval, tap YES if the behavior occurs at any point during that interval.
- If the behavior does not occur during the interval, simply leave it unmarked.
- When one interval ends, the result for that interval is recorded in the data collection and the next interval starts automatically. You then continue marking YES only if the behavior occurs during that new interval.
If the behavior occurs more than once within the same interval, you do not need to press YES multiple times. You only need to make sure the YES button remains active for that interval.
17. For timer-based measures such as interval, the running timer is displayed in the top bar of the main screen, allowing you to monitor it and record responses (e.g., mark Yes if the behavior occurs) while continuing to work on other items.
This allows you to collect data efficiently without needing to reopen the same behavior.
18. 3. Stop the timer
- When you finish collecting interval data, tap Stop. This ends the interval sequence and no more intervals will be added to the data collection.
19. If you want to view, add, or modify interval data, tap the behavior to open the Full View. There, you can:
- Review all recorded intervals
- Adjust each interval by tapping it to switch between Yes and No
- Add new intervals
- Remove intervals as needed
2.4 Intensity
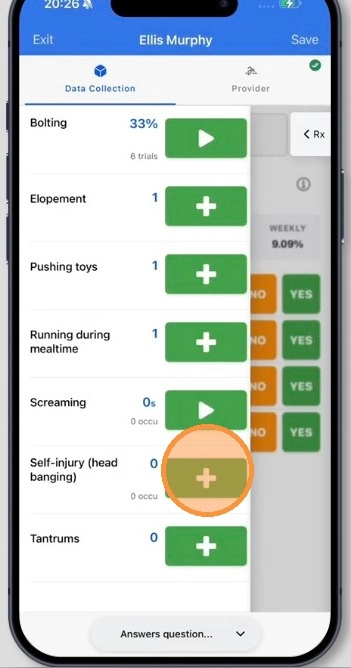
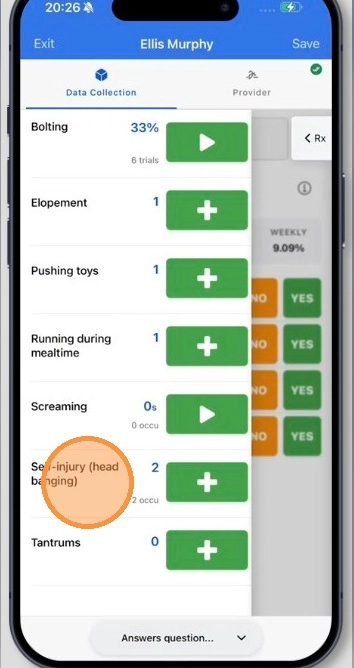
20. To collect intensity data, simply:
- Tap the “+” button each time the behavior occurs.
- The app will prompt you to select the intensity level for that incident.
This ensures each occurrence is recorded along with its severity or magnitude.
21. If you need to review or edit intensity entries, open the behavior to access the Full View. There, you can:
- View all recorded incidents
- Change the intensity level for any incident:
- Tap the incident
- Select the new intensity level
- Add new incidents with an assigned intensity
- Remove incidents as needed
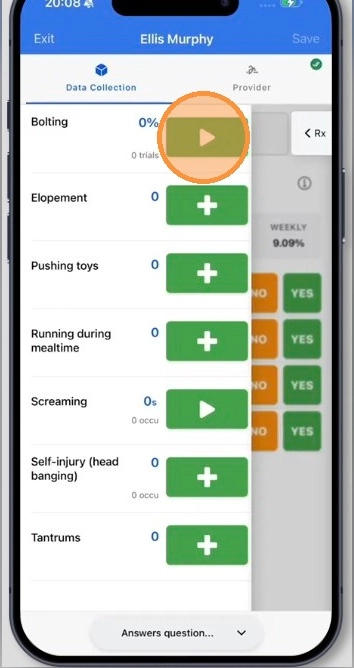
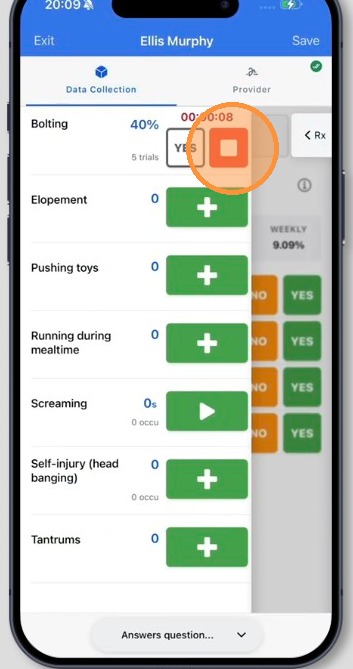
2.5 Duration
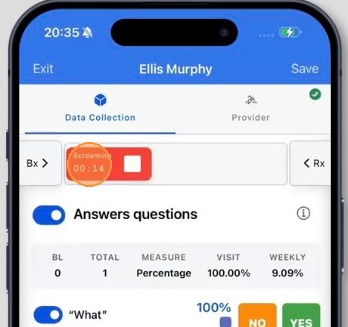
22. To collect duration data, use the built-in timer.
1. Start the timer
- Tap Start when the behavior begins.
- The timer will begin running immediately.
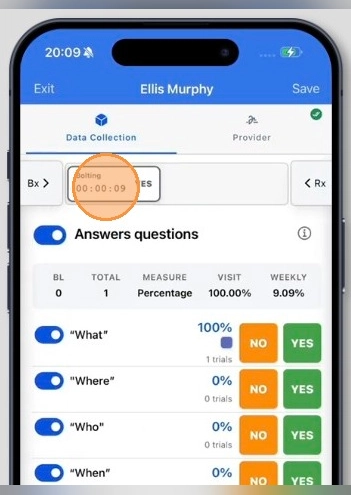
23. For duration-based measures, like duration, the running timer is displayed at the top bar of the main screen, where you can monitor it while continuing to work on other items.
This allows you to continue collecting data efficiently without needing to reopen the same behavior.
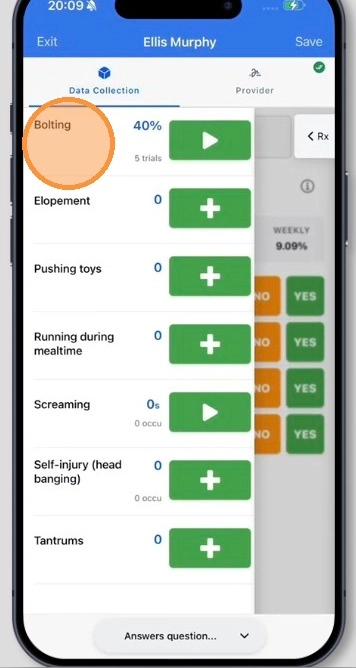
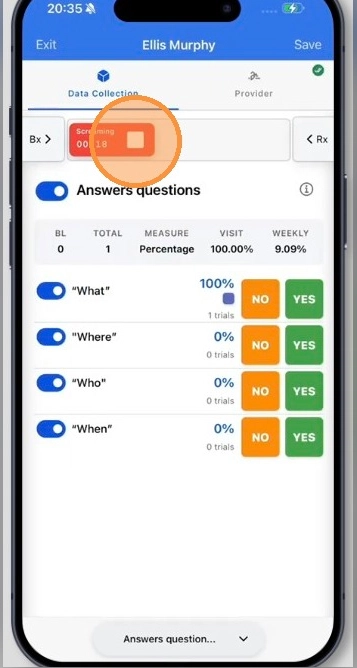
24. 2. Stop the timer
- Tap Stop when the behavior ends.
- You can stop the timer either:
- from the running timer at the top bar of the main screen, or
- from the side panel when locating the behavior.
- The app will automatically record the duration of that incident.
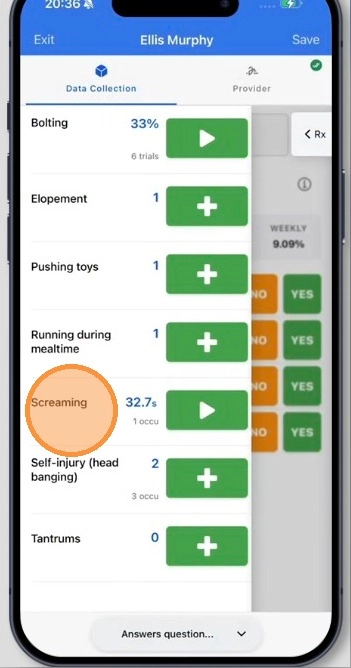
3. Repeat for each occurrence
- Each time the behavior occurs again, repeat the same Start/Stop process.
25. If you want to view, add, or modify incidents or their durations, tap the behavior to open the Full View. There, you can:
- Review all recorded incidents
- Adjust the duration of any incident:
- Tap the incident
- Manually enter the value
- Add new incidents with their duration manually
- Remove incidents as needed
2.6 Task Analysis
Task Analysis is used when you need to record how the client performs each step of a multi-step skill. This makes it possible to score performance step by step rather than only recording one overall result.
26. You can collect task analysis data in two ways:
- From the center section: All steps are displayed at once, allowing you to record data while still expanding or collapsing the side panels as needed.
- Use the selector at the bottom to choose the correct item, or swipe left or right to navigate between items.
- From the Rx panel: Open the panel and tap the desired skill or replacement to access the full view.
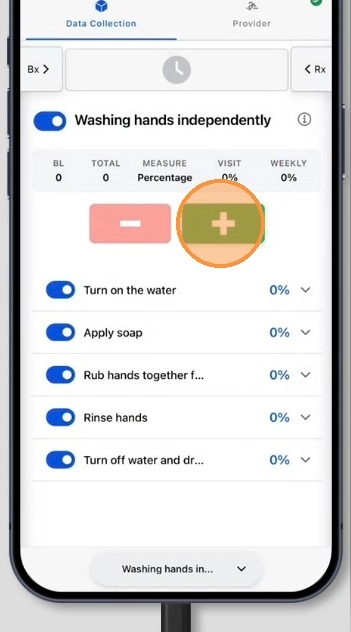
27. 1. Adding Trials
- Tap the “+” button to add a new trial.
- Each trial automatically includes all the steps in the task analysis.
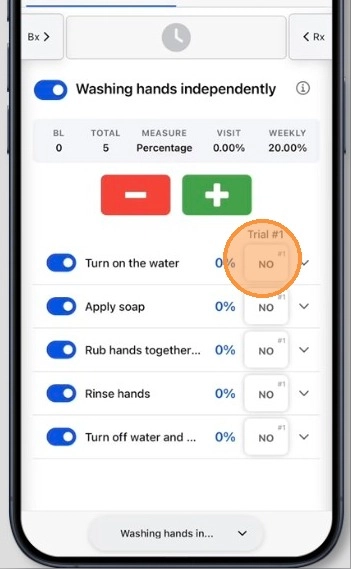
28. 2. Scoring Each Step
You can score performance for each step within a trial in two ways:
- Per trial: Each time you add a new trial, you can mark whether each step was completed correctly. Simply:
- Tap the trail for each step to toggle between Yes or No.
For example, in Trial #1, the first step (Turn on the water) may be marked as Yes, while the second step (Apply soap) may be marked as No.
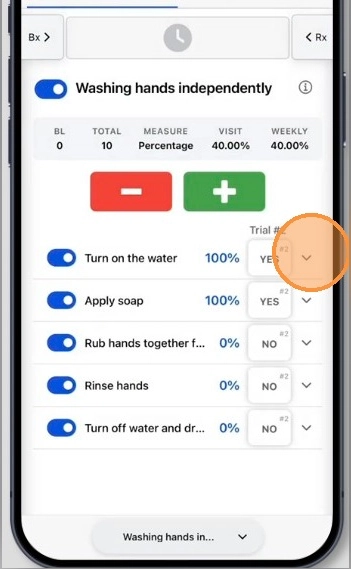
29. - Per step: You can expand each step to view all associated trials. From there, you can:
- Tap each trial to toggle between Yes and No
For example, in the first step (Turn on the water), the first trial may be marked as Yes, while the second trial may be marked as No.
30. If you want to view or modify trial information, tap the step to open the Full View. There you can:
- Review all recorded trials
- Correct previous trial results (tap a trial to switch between Yes and No)
2.7 Targets
31. When a program includes targets, each target appears as its own item, and you can collect data in two ways:
- From the center section: All targets are displayed at once, allowing you to record data while still expanding or collapsing the side panels as needed.
- Use the selector at the bottom to choose the correct item, or swipe left or right to navigate between items.
- From the Rx panel: Open the panel and tap the desired skill or replacement to access the full view.
32. You can record data independently for each target:
- Tap YES for a successful trial
- Tap NO for an unsuccessful trial
Each trial automatically updates the program totals.
33. If you want to view, add, or modify trial information for a specific target, tap the target to open the Full View. From there, you can:
- Review all recorded trials
- Add additional successful or unsuccessful trials
- Delete trials
- Edit previous trial results (tap a trial to switch between Yes and No)
2.8 Prompt-level data
34. For programs that track prompt levels, the process is similar to percentage collection.
- Select YES or NO for the trial.
- Choose the prompt level used (such as independent, gestural, partial physical, or full physical).
35. If you want to view, add, or modify prompt information, tap the replacement, skill, or target to open the Full View. From there, you can:
- Review all recorded trials and their prompt levels
- Add additional successful or unsuccessful trials with the corresponding prompt level
- Delete trials
- Edit previous trial results. Tap a trial to:
- switch between Yes and No and
- update the prompt level
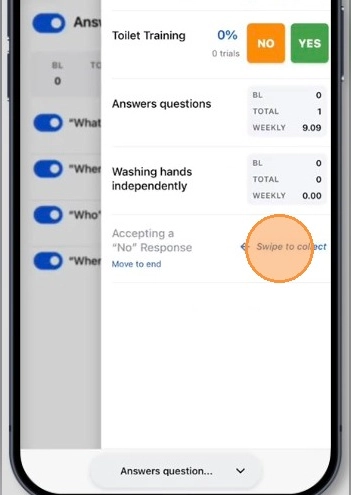
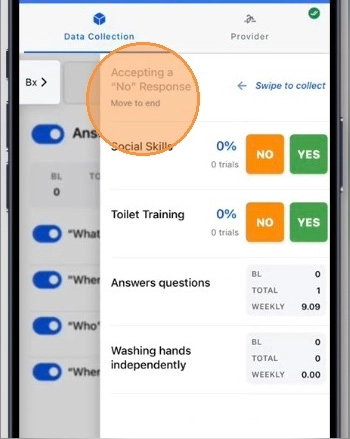
3. Managing active data collection
36. If you are not collecting data for a specific behavior or skill, you can temporarily remove it from active collection:
- Swipe left on the behavior or skill
- Select Remove from Collection to remove it from active collection
37. You can also move it to the end of the list to keep your session view organized. Simply tap Move to End.
38. You can also open the Full View and toggle the collection icon off.

39. To add the item back to collection, you can either:
- Swipe left on the behavior or skill and select Add to Collection to return it to the active list
- From the Full View, toggle the collection icon on