How to navigate ABA Matrix Oversight (for all users)
This guide offers a comprehensive overview of the enhanced Oversight features in ABA Matrix, designed to streamline workflows and improve session management. Users will learn how to customize their oversight views, utilize advanced filtering options, efficiently manage session data and export the information to excel. Viewing this guide can significantly elevate your team's productivity and oversight capabilities.
1. Get ready to elevate your workflows and supervision standards! The improved Oversight experience in ABA Matrix is packed with powerful tools that give your team unmatched control over session visibility, filtering, customization, and session management—all in one intuitive interface.
Smarter Time Views: Daily, Weekly, Monthly
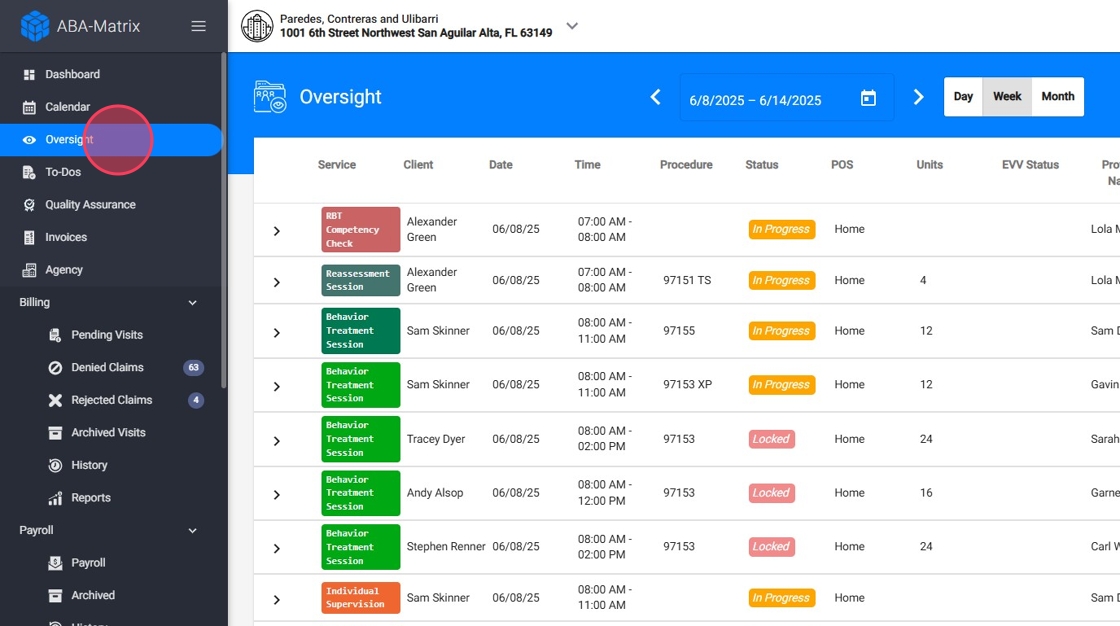
2. Now you can toggle between day, week, and month views. Whether you’re verifying daily submissions or conducting monthly audits, you’re in control of your time scope.
3. Click “Day” and select a specific day on the calendar to focus on just that date’s sessions.
4. Click “Week” and select a week to display all events within that week.

5. Click “Month” and select a month to review all relevant visits and trends for that time period.
Advanced Filtering Options
6. Users can filter Oversight data by several dimensions to quickly locate the specific sessions or visits they need to manage.
7. Available Filters:
- Client – Filter by individual clients.
- Include Inactive – Includes inactive clients or providers in the results.
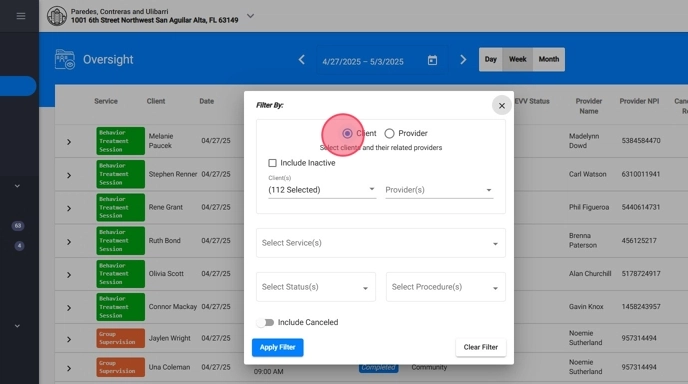
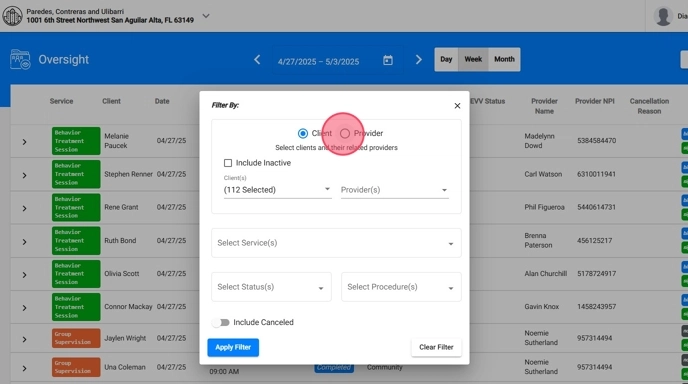
8. Provider – Filter by therapists.
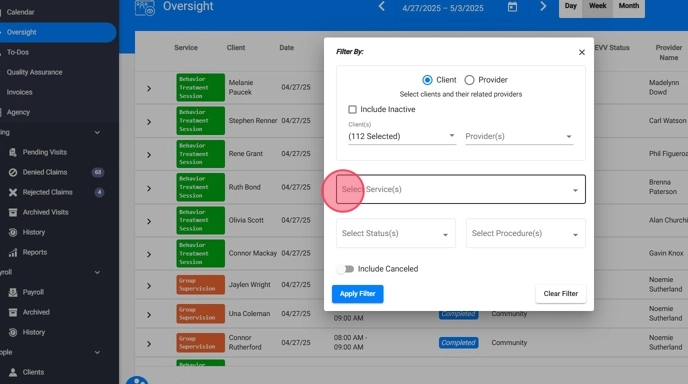
9. Service Type – Choose from services like:
- Behavior Treatment Session
- Individual/Group Supervision
- RBT Competency
- Family Training
- Medical Visit
- Assessment / Reassessment Sessions
- Reports (Monthly, Assessment, Reassessment)
- Other
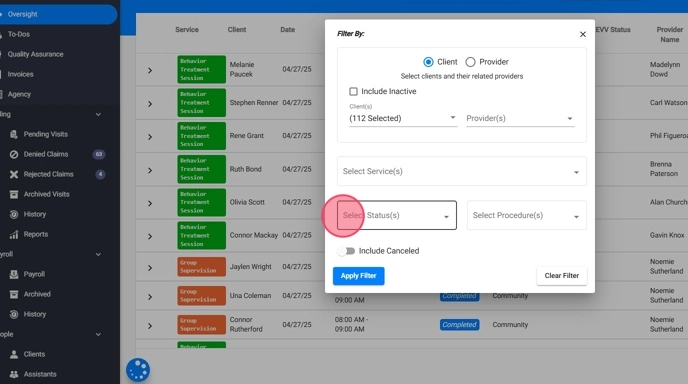
10. Status – Filter by session progress:
- Locked
- In Progress
- Reviewing
- Completed
- Incomplete
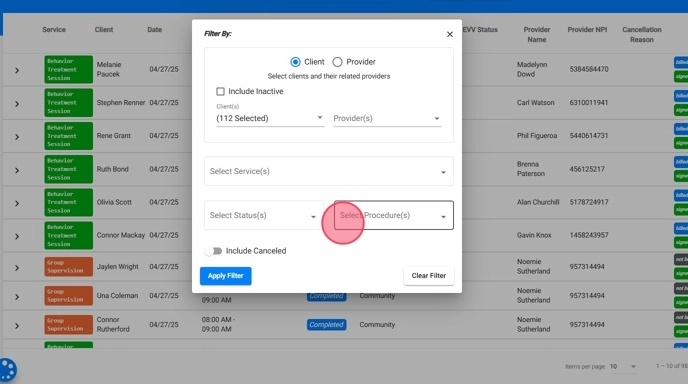
11. Procedure – Select from all procedures configured in your agency.
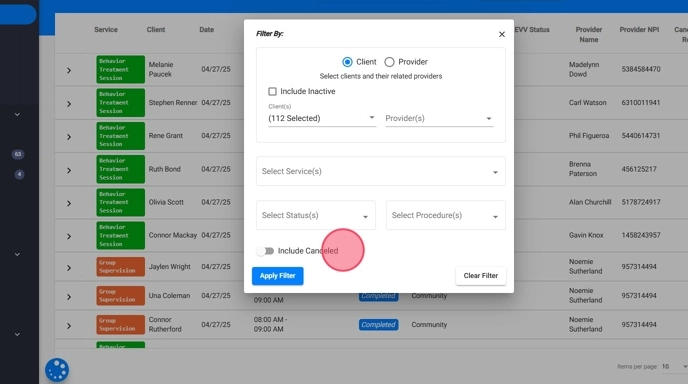
12. Include Canceled – Toggle to include or exclude canceled sessions.
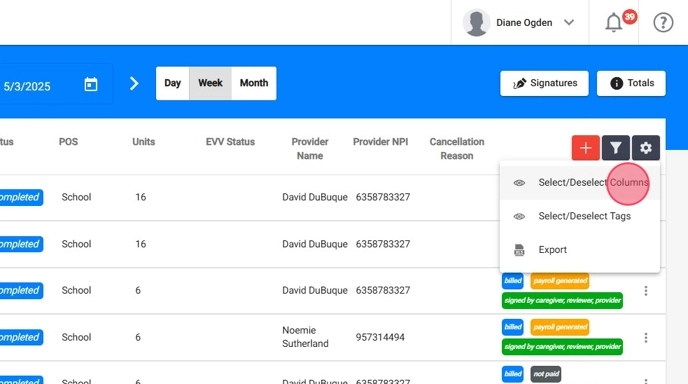
Configure Your Oversight View
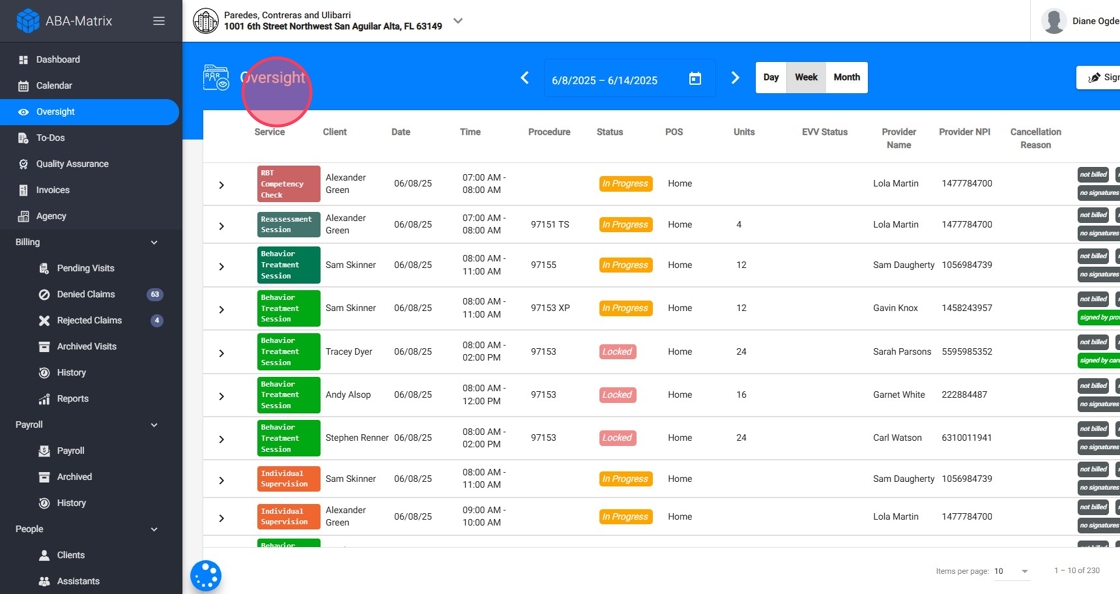
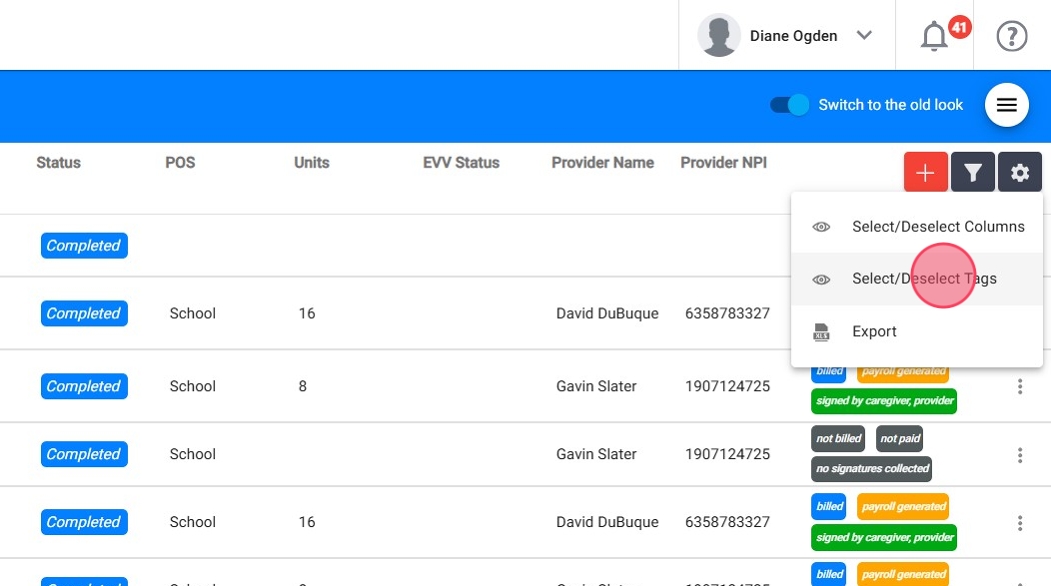
13. Users can customize which data columns and tags appear in the Oversight table, enhancing visibility into the information that matters most.
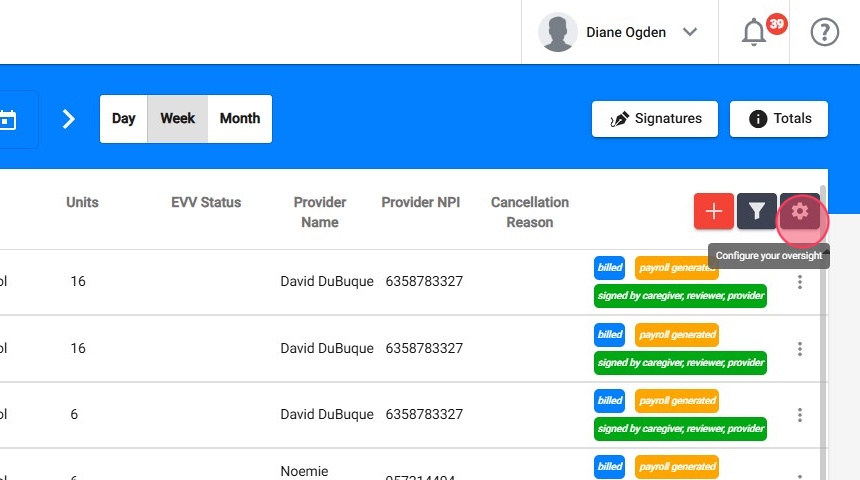
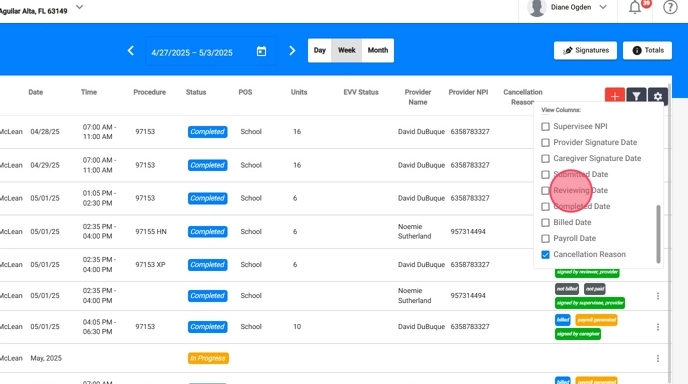
14. Columns (You Can Show/Hide):
You can choose which fields to display, such as:
- Service, Client, Date, Time, Procedure (always shown)
- Status
- POS (Place of Service)
- Units
- EVV Status
- Provider Name, License, NPI
- Supervisee Name, License, NPI
- Signature Dates (Provider, Caregiver)
- Submitted, Reviewing, Completed, Billed, Payroll Dates
- Cancellation Reason.
15. Select/deselect columns and tailor your Oversight table to your workflow. Choose which data fields you want to display—whether it's provider credentials, billing dates, or session status—so the Oversight table reflects what matters most to you.
You can also sort the displayed visits by clicking on any of the column headers you've added, allowing you to quickly organize sessions by date, status, units, provider, or any other relevant metric.
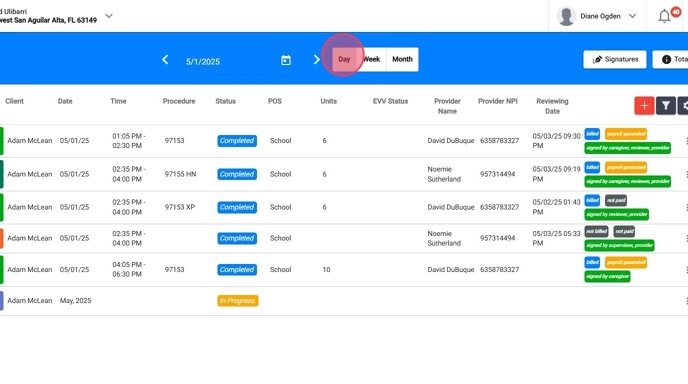
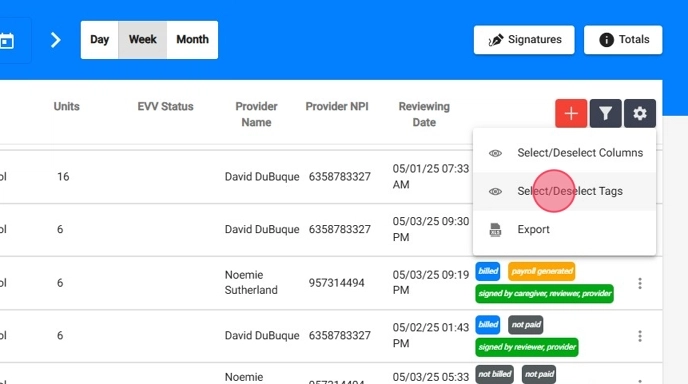
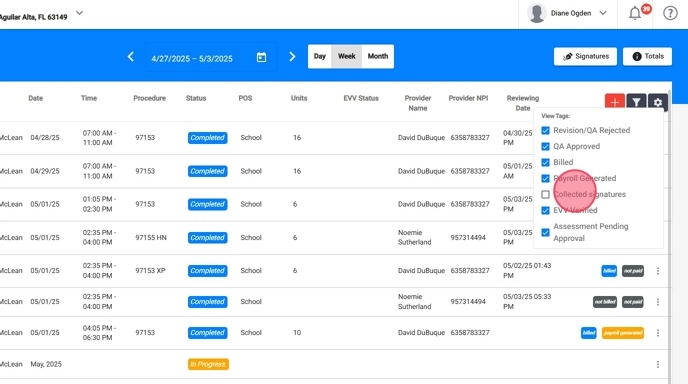
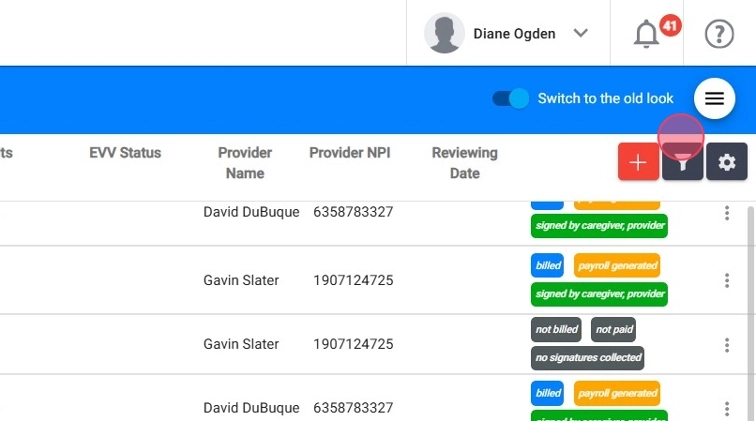
16. Tags (Optional Visual Labels):
Tags are labels that highlight special statuses for quick reference. Available tags include:
- Revision/QA Rejected
- QA Approved
- Billed
- Payroll Generated
- Collected Signatures
- EVV Verified
- Assessment Pending Approval
17. This section empowers users to tailor their workspace, improving efficiency and clarity.
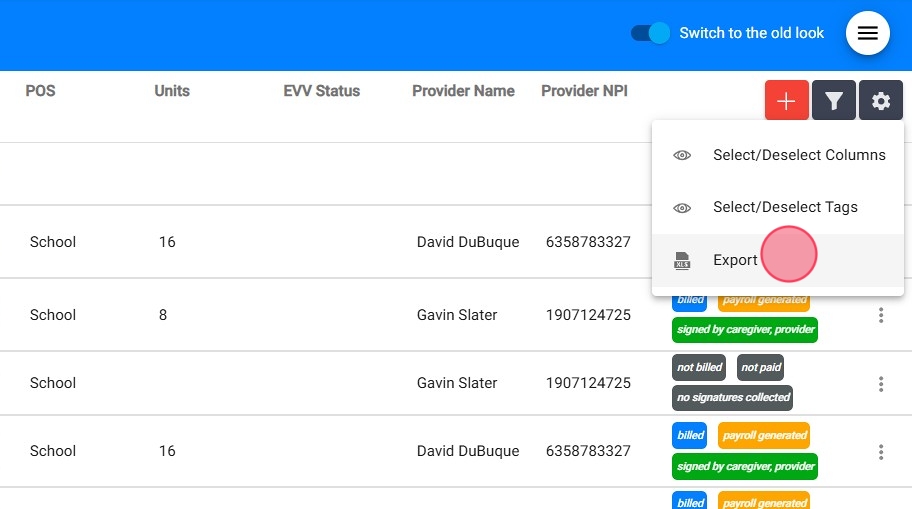
Export Oversight Data to Excel
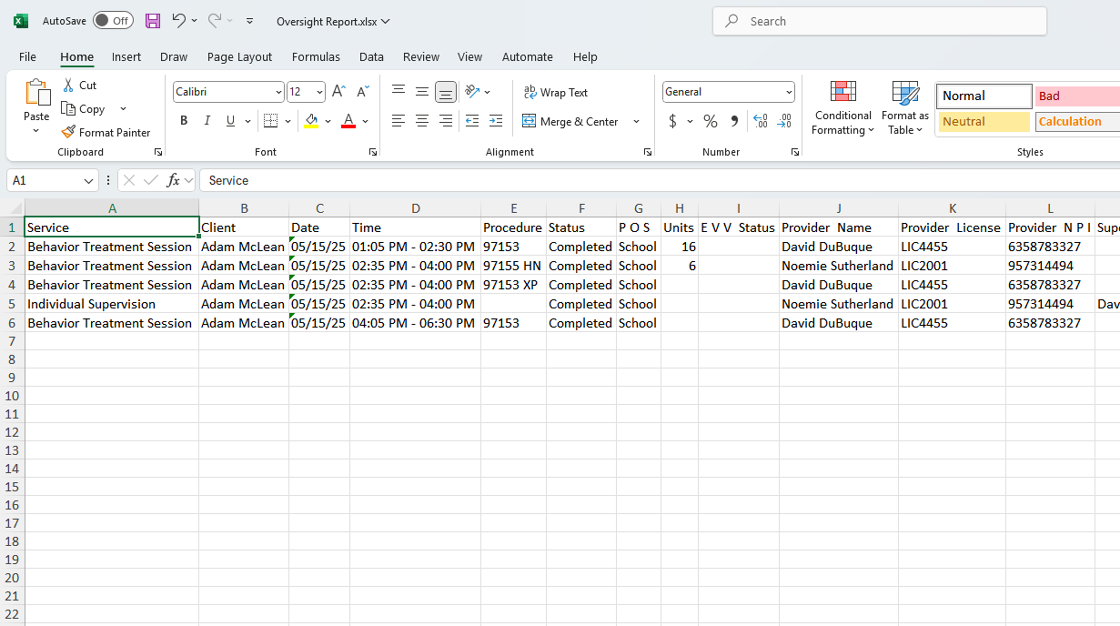
18. You can now export all filtered Oversight data into a downloadable Excel spreadsheet.
- Apply your desired filters (e.g., by client, provider, service type, date range, etc.).
- Go to Oversight settings
- Click Export
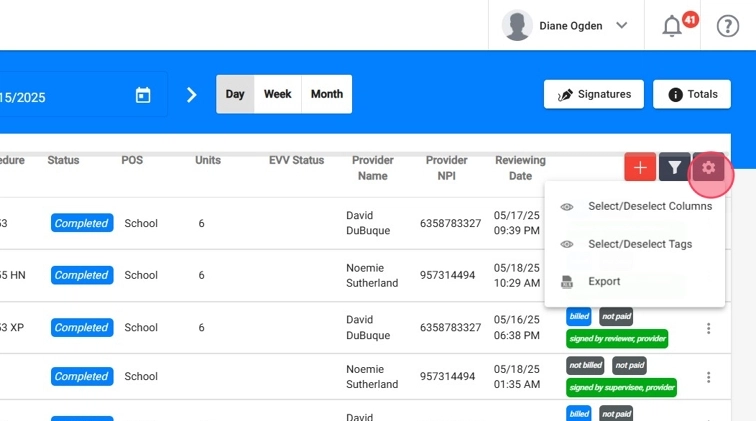
19. The file will download automatically.
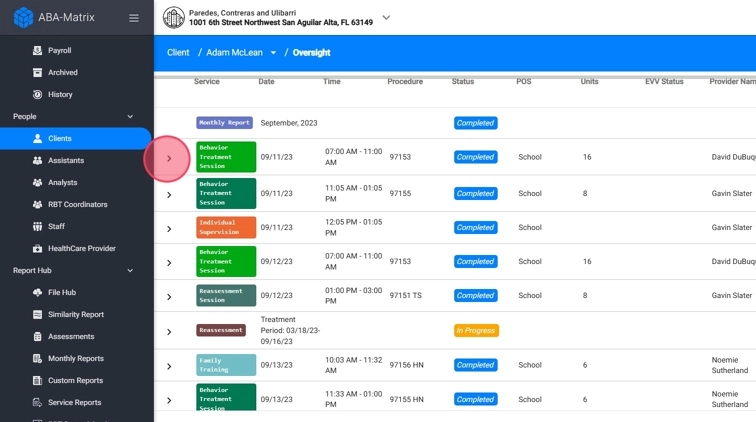
Oversight Display
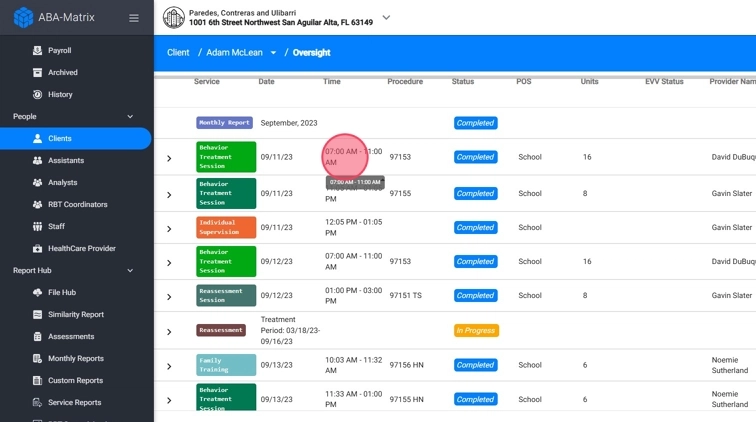
20. Oversight presents a list of all session events matching the filters applied. Each row represents one session, event or report.
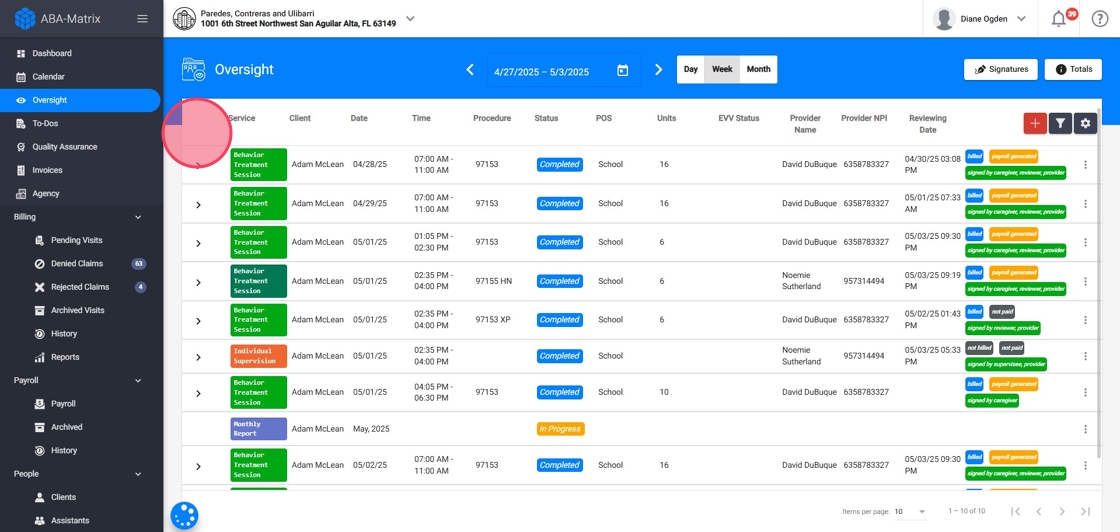
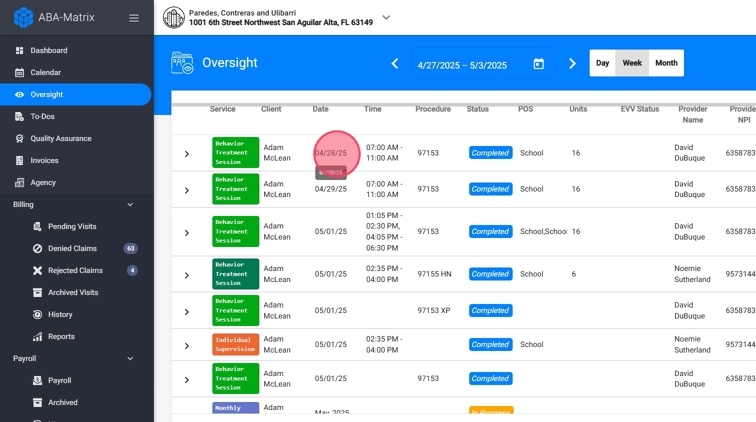
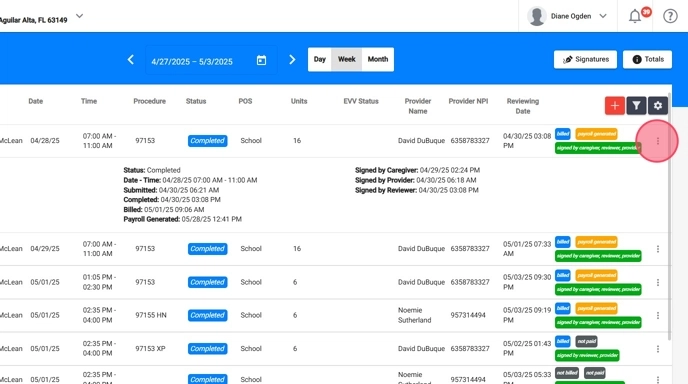
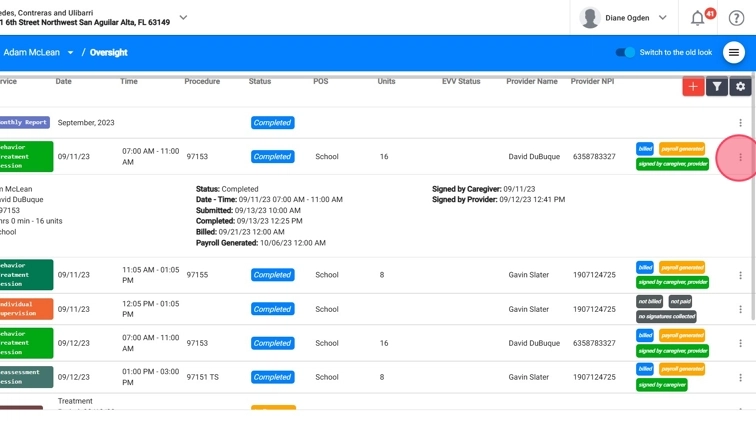
21. For each visit, users can:
View the event Details
Click the arrow on a session row to reveal detailed information about the visit, including key data such as the Client, Provider, Procedure, Duration, Location, Status, and the Date and Time of service. You'll also see important timeline fields like the Submitted Date, Completed Date, Billed Date, and Payroll Date, along with signature timestamps from the Caregiver, Provider, and Reviewer.

22. Access the File Overview
If you click directly on the event, you’ll be taken to the full visit overview, where you can see all the session details in context.
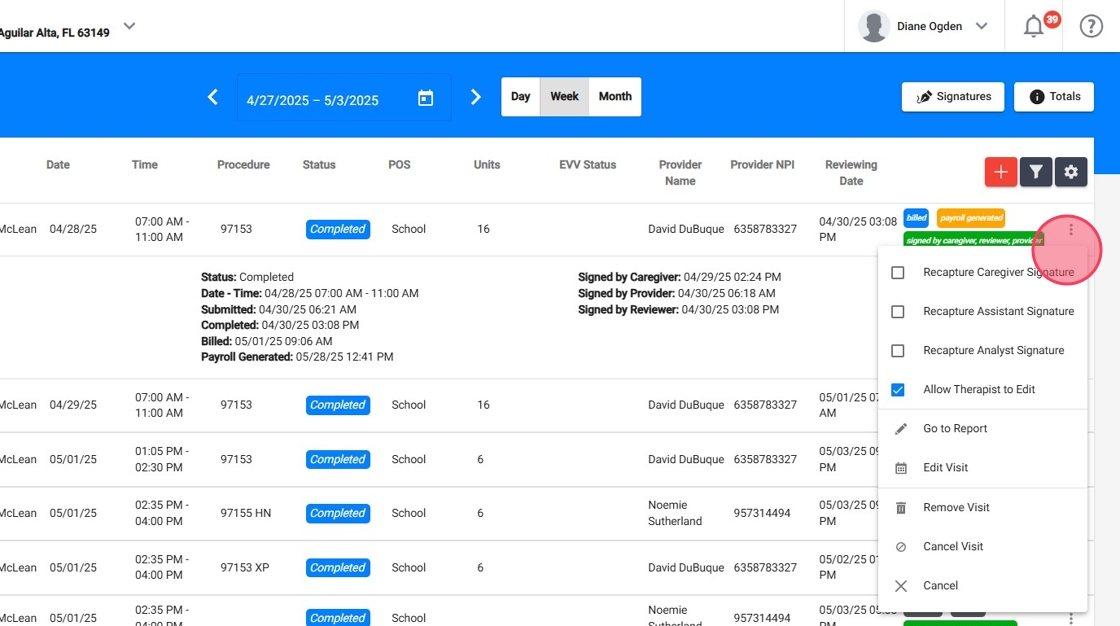
23. Take Actions
Click the three-dot menu on the right side of the session row to:
- Give access to recapture signatures
- Allow therapist to edit completed notes
24. And like from the calendar:
- Open the report
- Edit the visit details
- Cancel the visit
- Delete the visit
Create visits right from Oversight
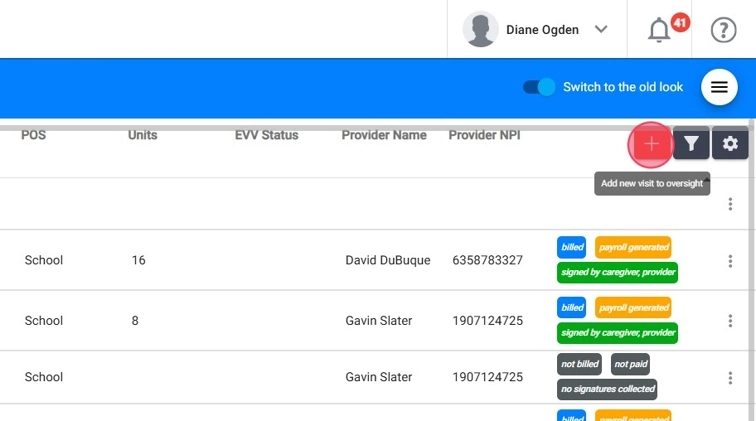
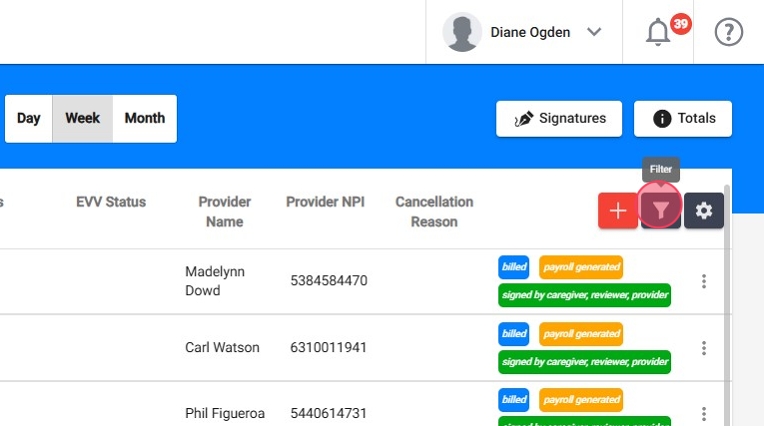
25. Users can now create new visits directly from the Oversight screen—no need to switch to the calendar view.
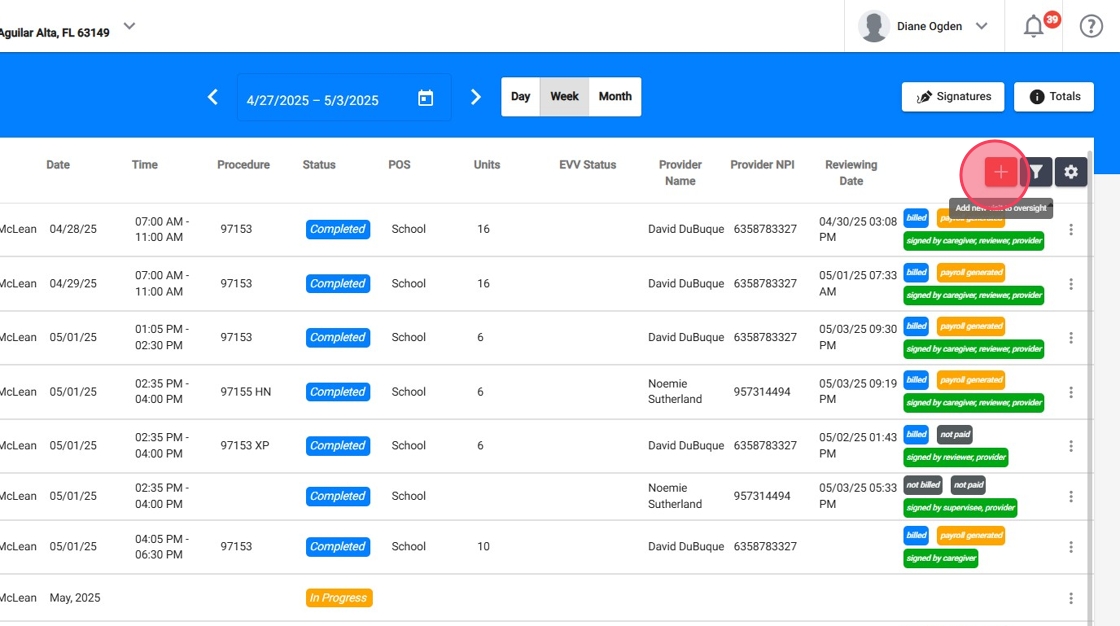
26. - Click the red plus sign (+) in the Oversight section.
- Follow the same steps as creating a visit from the calendar: set the date, time, provider, and service.

Client-Specific Oversight
27. You can now open an individualized Oversight dashboard for each client, giving you focused visibility into that client's events, notes, and reporting activity—without the noise of unrelated data.
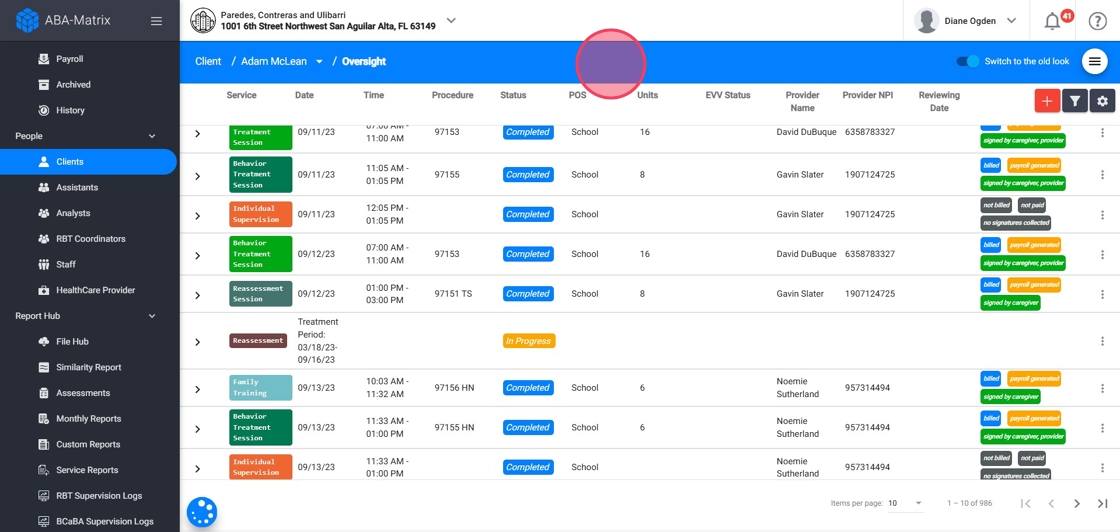
28. From the client's profile, simply go to the menu and select Oversight. This view displays only the sessions and reports related to that specific client.

29. Client-Level Filtering Options
Just like in the full Oversight view, you can apply precise filters to narrow down the client’s data:
- Therapist – Choose which therapists’ sessions you want to review.
- Service Type – Filter by services such as Behavior Treatment, Supervision, Assessments, Monthly reports, etc.
- Status – Filter by visit status: In Progress, Reviewing, Completed, Locked, or Incomplete.
- Procedure – Select procedures defined within your agency’s configuration.
- Start Date & End Date – Define a custom date range.
- Include Canceled – Optionally show canceled sessions.
30. Configure Your Client Oversight View
As in the main Oversight dashboard, you can customize your columns to tailor the client’s view:
- Choose which columns to show or hide (Status, EVV, Dates, Provider Info, etc.).
- You can sort events by clicking on any visible column (e.g., sort by Date, Status, Units).

31. Select Tags for client sessions
You can also enable tags to visually mark key statuses or outcomes of each session (like QA Approved, Billed, Payroll generated, collected signatures, etc.).
32. Export Client Oversight to Excel
Need to download that visit data for a single client? You can do that too:
- After applying your filters, click Export.
- The spreadsheet will download automatically.
33. Visit details and file overview
You can interact with each visit just like in the global view:
-
Click the arrow next to a session row to expand and see key fields such as:
Client, Provider, Procedure, Duration, Location, Status, Date & Time, Submitted Date, Completed Date, Billed Date, Payroll Date, and all signature dates.
34. - Click directly on the visit to open the File Overview, with all session details shown in context.
35. Session Actions in Client Oversight
Every visit entry includes a three-dot actions menu that allows you to:
- Edit the visit details and report
- Cancel or Delete it
- Grant access to recapture signatures
36. Create Sessions from the Client’s Oversight View
While viewing a specific client’s Oversight, click the red plus (+) icon to create a visit directly from the client’s profile, no need to switch to the calendar or global view.