
How to manage and schedule the Driving Time feature in administrative accounts (driving time and mileage)?
This guide offers crucial insights for administrators on effectively managing and scheduling Driving Time for therapists. By understanding the setup and tracking of travel time to and from service locations, agencies can optimize operational efficiency and ensure accurate compensation for their staff. It details essential configurations, service types, and payroll strategies, making it an invaluable resource for enhancing administrative processes and ensuring compliance with agency policies.
🚘What is Driving Time?
1. Driving Time lets you track both the time and distance spent traveling to and/or from a visit location. There are two types of travel entries:
- Driving Time TO Service: Time and distance spent getting to the visit location.
- Driving Time FROM Service: Time and distance spent leaving the visit, whether you're heading to your next client or returning home.
Enabling Driving Time Settings
2. To allow therapists to schedule Driving Time, administrators must enable the appropriate settings within the agency configuration.
✅ How to Enable Driving Time
- Go to Agency
- Click Settings
- Select Driving Time

3. ✅ Types of Driving Time
There are two types of Driving Time you can enable:
- To Service: Travel time before a session
- From Service: Travel time after a session

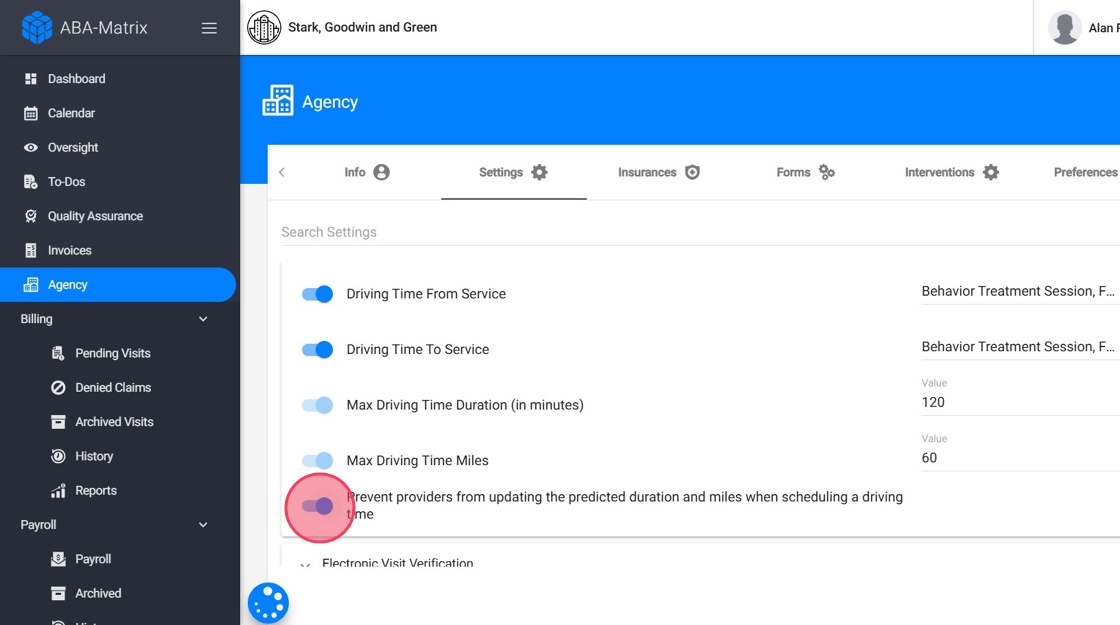
4. ✅Selecting event types that can include Driving Time
Once Driving Time is enabled, you can choose which types of services it applies to. You can enable it for any of the following:
- Behavior Treatment Sessions
- Family Training
- Assessment Sessions
- Reassessment Sessions
✔️ Select all applicable service types based on your agency’s practices.

5. ✅Set a maximum allowable duration per visit

6. ✅Set a maximum number of miles allowed per visit

These limits help ensure that scheduled Driving Time remains within your agency’s policies.
7. ✅Restricting Driving Time Edits
You can also choose to enable the setting “Prevent providers from updating the predicted duration and miles when scheduling a driving time.”
When this is enabled, therapists will only be able to use the system’s auto-calculated values from Google Maps, they will not be able to adjust them manually.
Scheduling a Session with Driving Time TO Service
8. Here’s how to schedule a session with Driving Time To that Service:
🔹 Step 1: Enable Driving Time To Session
When creating the session, check the option that says "With driving time to service". This tells the system you want to record the time it takes you to travel to the session location.
9.
🔹 Step 2: Select Start Address
You’ll see a dropdown list of possible starting points:
- 👥 All client addresses for clients assigned to you
- 🏡 Your own address as therapist (if added to your profile)
You can also manually type in any address if it's not listed in the client's profile

10.
🔹 Step 3: Select End Address
The end address will automatically show the address of the client for whom the session is being scheduled.
This is where you’re headed, so it will be your destination.

The system will not automatically fill in the address based on the POS (Place of Service). You must select the correct address manually from the dropdown list to ensure accuracy.
11.
🔹 Step 4: Get Route (Optional)
Click “Get Route” and the system will calculate:
- 📍 Distance (in miles)
- ⏱️ Duration (in minutes)
You can still edit the time or distance manually if the route seems off, or if you took a different path than the one suggested.
The system uses Google Maps to generate this info automatically.
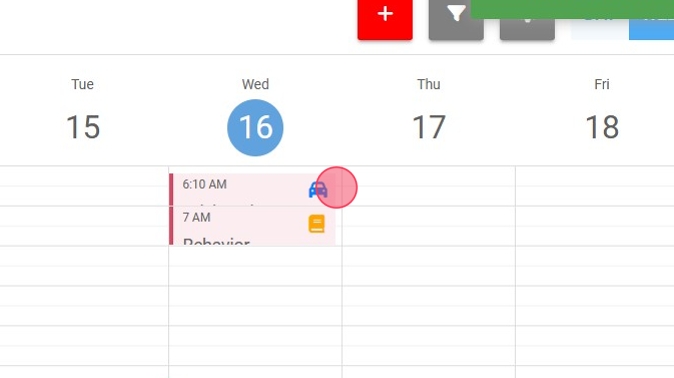
12. The driving time to service will appear in the Calendar as an event before the session, automatically marked as completed. The scheduled session will follow immediately after, starting at the time you selected.
13.
🔹 Editing Driving Time
You can edit the event later and adjust:
- The start/end addresses
- The calculated duration or miles
- Whether you want to include driving time at all

Scheduling a Session with Driving Time FROM Service
14. Now let’s say you want to record the time spent leaving the session and heading to your next location.
🔹 Step 1: Enable Driving Time From Session
When scheduling the visit, check the option that says "With Driving time from Service". This adds a driving time block after the session.

15.
🔹 Step 2: Select Start Address
You'll see a dropdown list with the address of the client the session is for. Select the correct one manually.

The system will not automatically fill in the address based on the POS (Place of Service). You must select the correct address manually from the dropdown list to ensure accuracy.
16.
🔹 Step 3: Select End Address
You'll see a dropdown list of possible destination addresses. This list includes:
- 👥 All clients assigned to you
- 🏡 Your own therapist address (if it’s been added to your profile)

17.
🔹 Step 4: Get Route (Optional)
Click “Get Route” and Google Maps will calculate the:
- Distance (miles)
- Duration (minutes)
Just like before, you can edit the results manually if needed.

18. Once saved, your calendar will show:
- The scheduled session at the time you selected
- A Driving Time event appearing directly after the session

Driving Time TO and FROM Service
19. Let’s say you have a session and you’re adding both To and From driving time:
Scenario:
- Driving To Service
- Session
- Driving From Service
In the calendar you will see each driving time automatically marked as completed, while the session behaves like any normal visit.

20. Editing Later
You can always come back and:
- Change addresses
- Recalculate the route
- Edit the distance or duration
- Remove or re-add driving time
Paying for Driving Time
⚠️ Important: Driving Time & Payroll
Once the Driving Time feature is activated, all Driving Time events will be sent to payroll by default.
If you do not want Driving Time to go to payroll, please contact our support team.
21. Agencies can choose how Driving Time will be compensated in payroll. Here's how it works:
- Set pay strategy in employee profiles:
- Go to the employee’s profile
- Go to the Pay Rates section

22. - Under “Driving Time” you can select one of the following payroll strategies:
- Miles (per mile)
- Duration (hourly)
You can set the compensation amount and apply effective dates for each strategy. This allows flexibility to adjust over time as needed.

23. 2. Include Driving Time in Payroll
To ensure Driving Time appears in the Payroll section, follow these steps:
- Go to the Payroll section.

24. - By default, Driving Time is only visible if the associated session has already been billed.
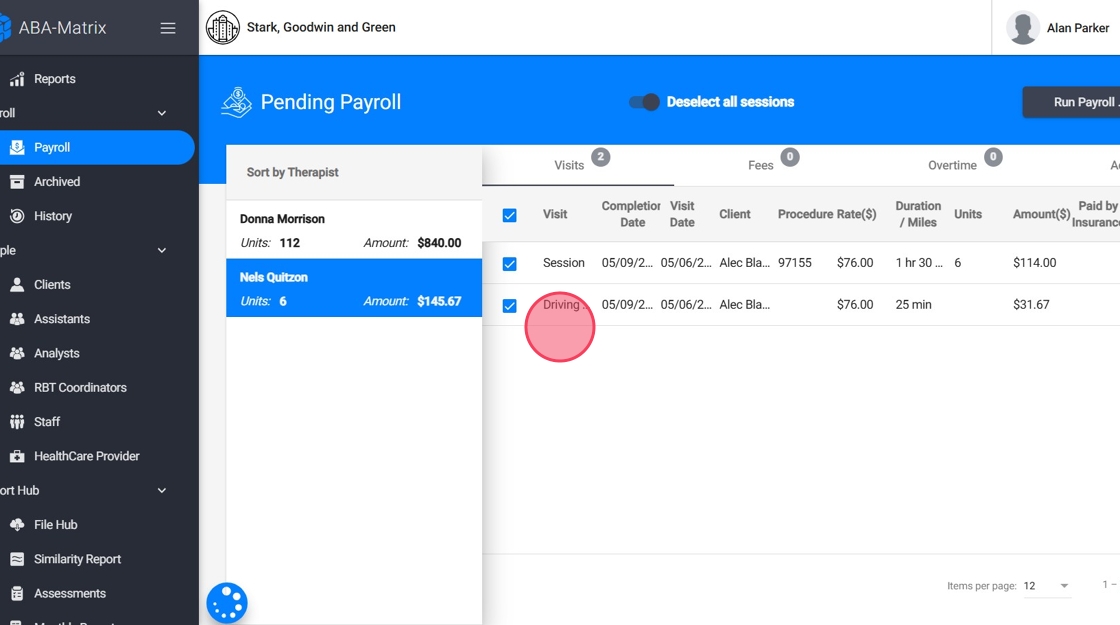
25. - If a session has not yet been billed, its associated Driving Time will not appear unless you uncheck the “Show only billed sessions” option in the payroll filter.
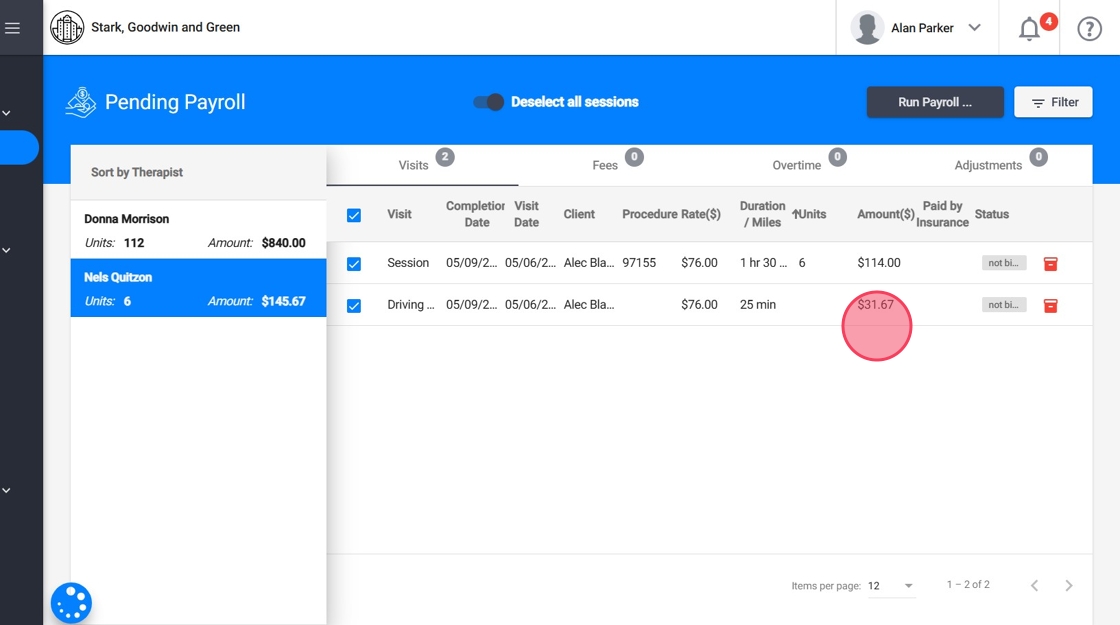
26. Depending on your payroll strategy, you'll also be able to see the duration or mileage associated with each Driving Time entry.