How to add a new coordinator
This guide provides step-by-step instructions on how to add a new coordinator to a system. It also explains how to assign assistants to the coordinator. Following this guide will ensure a smooth and efficient process for adding and managing coordinators in the system.
1. Go to the Coordinators view
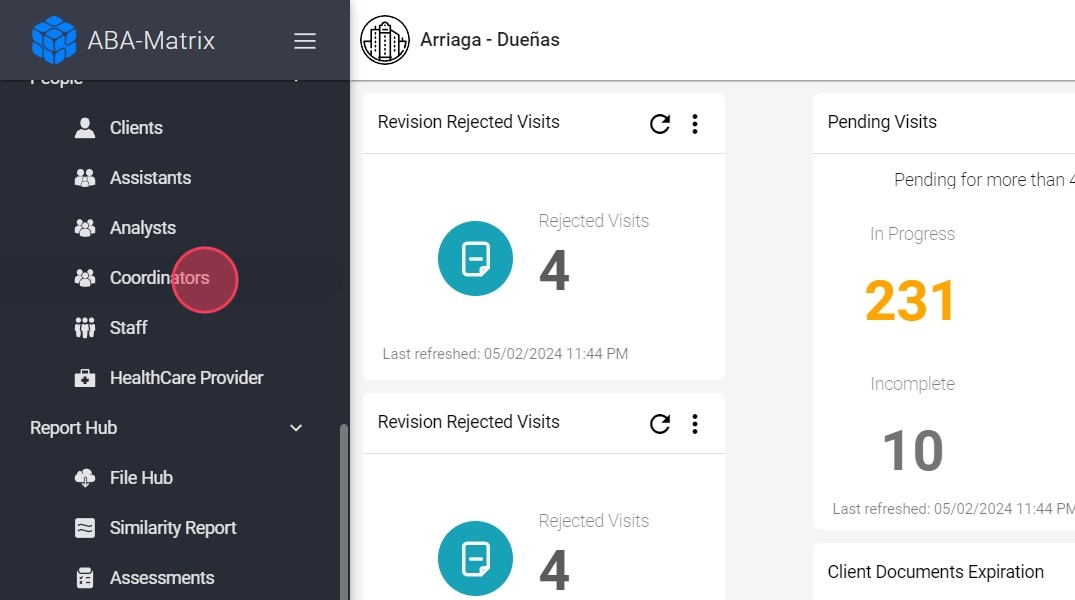
1. Press the “coordinator” button, located in the navigation bar on the left side of your monitor. You can see it in the image.
2. Add a new coordinator
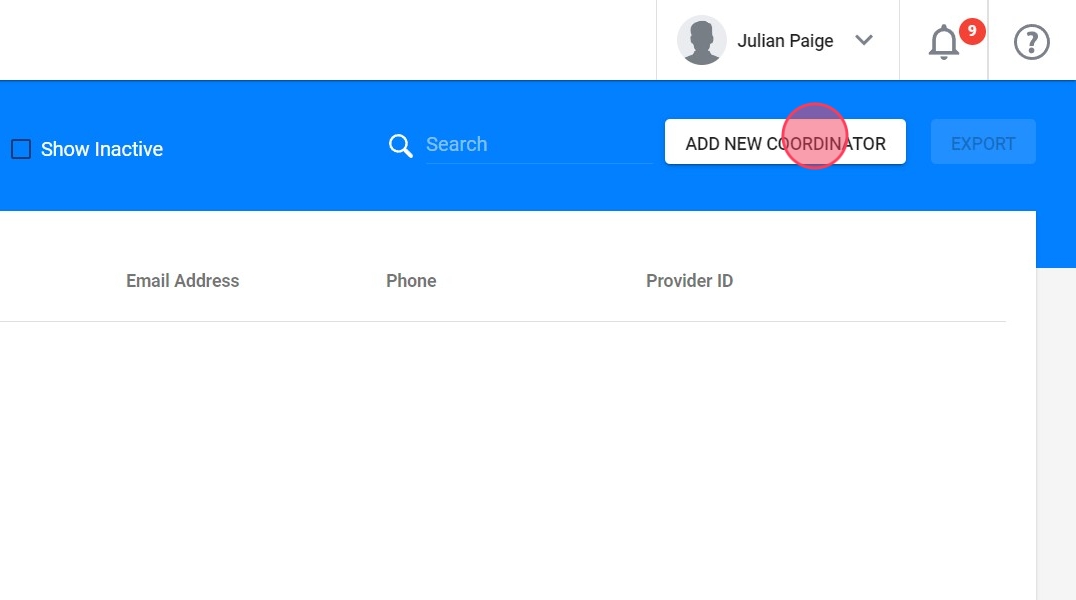
2. After opening the "coordinator" tab, press the "Add new coordinator" button, located in the upper right part of the screen, as shown in the image.
3. Enter the required information
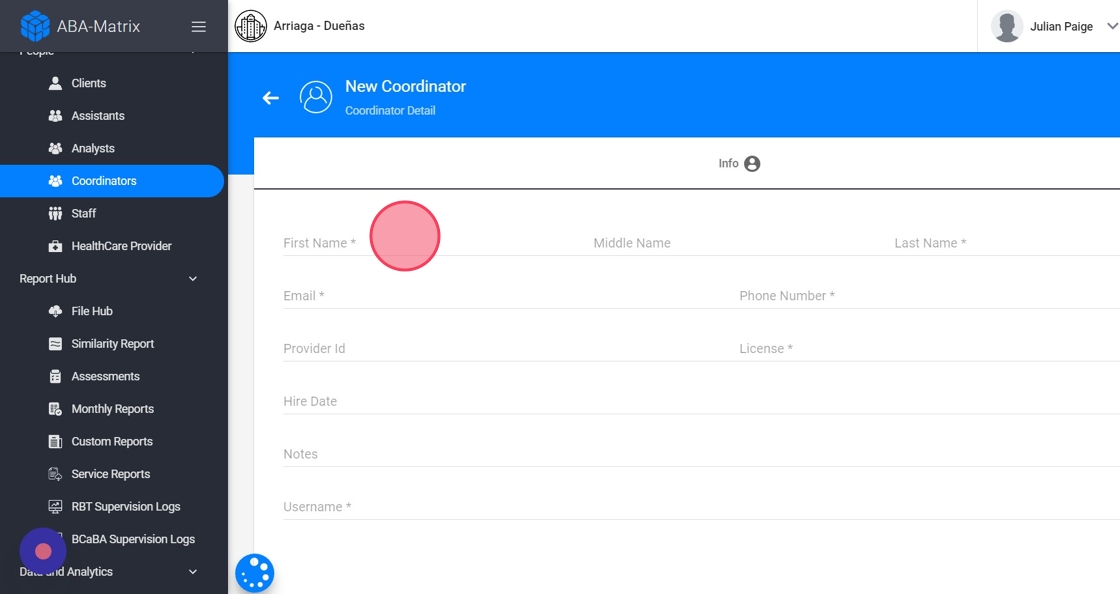
3. Click the "First Name *" field.
4. Assign a username
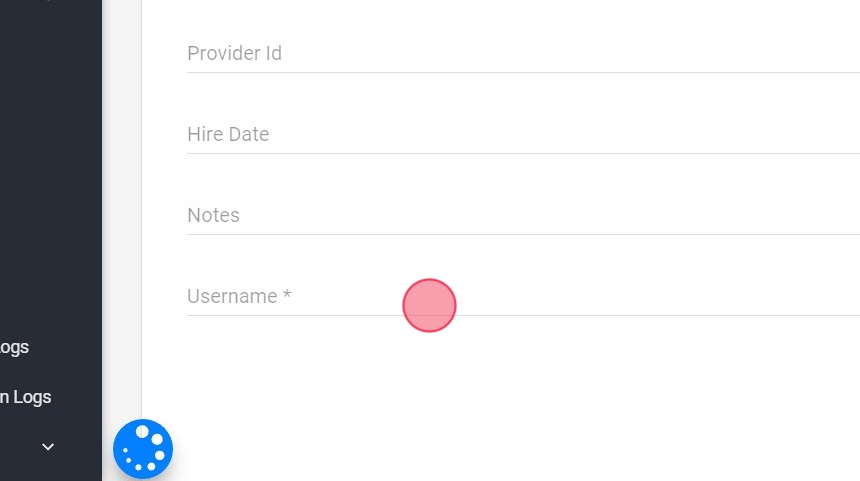
4. Remember that the "username" field must be entered the username with which the program will be accessed. It must be unique and contain no spaces. Once assigned, it cannot be changed, as shown in the image.
5. Add the new coordinator
5. After all the fields are completed, the “Add” button, located at the bottom right, is pressed to complete the introduction of a new coordinator to the system. It is seen in the image.
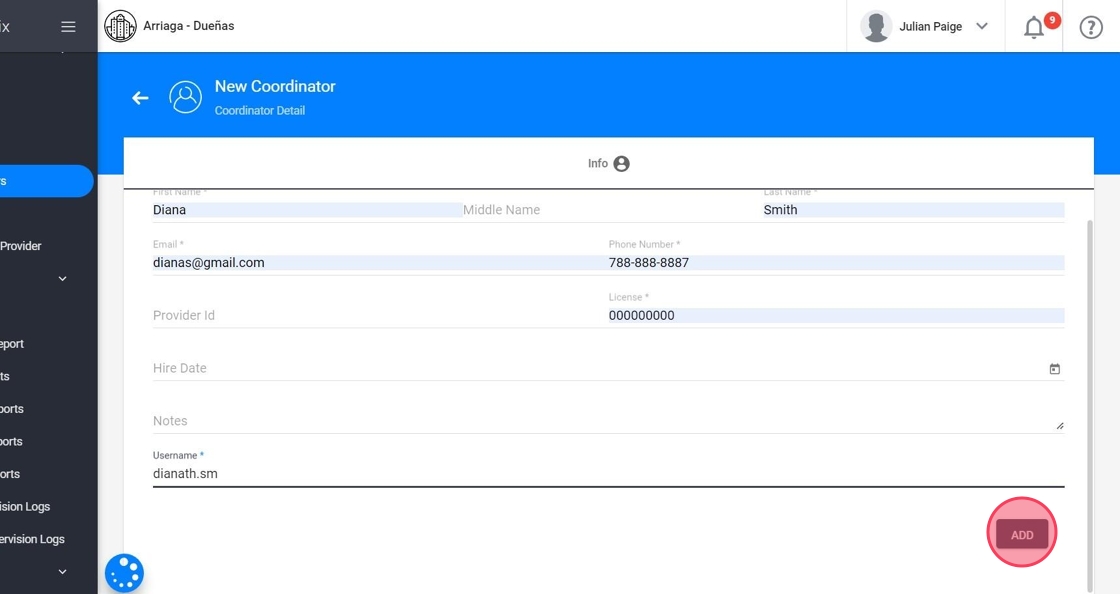
6. Once successfully completed, the coordinator will receive an email to the email address entered as part of the creation process, with a temporary password to access the program. The password may be changed to suit the coordinator.
6. Assign the RBTs
7. Now you need to access the account and assign the RBTs to which the coordinator will sign the Supervision records.
- Go to the Assistants tab

8. - Add the Assistants
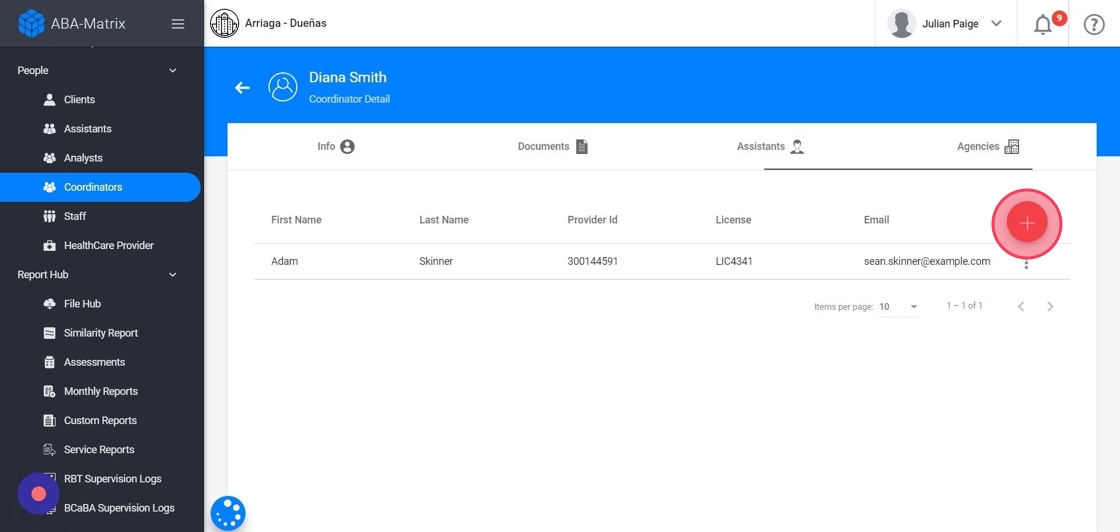
9. Select the Assistants.
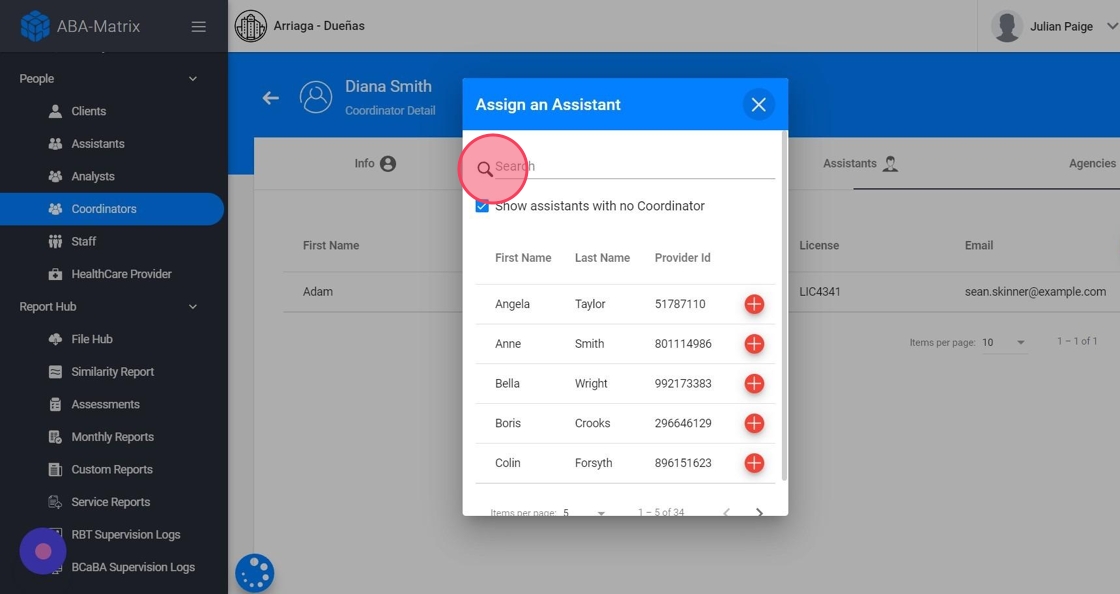
10. By default we only show RBTs with no coordinator, but you can unmark the checkbox Show assistants with no Coordinator and you will see all the RBTs from the agency.

11. Click on Confirm. Then the coordinator can access the website and sign the Supervision monitoring log.

