How to update client documents by adding a new version (for administrative staff)
This guide provides step-by-step instructions on how to update client documentation by adding a new version. It covers how to search for the correct client, navigate to the documents tab, select the document to update, enter the updated document information, and upload the updated file. It also highlights the benefits of having a list of previous versions, making it easier to use the system without deleting previous versions. This guide is useful for anyone who needs to update client documentation efficiently and accurately.
Go to the client profile
1. To search for the correct client, in the search tab you can type the client's first name, last name, "Medicaid number", "EQ Health number", the name of the caregiver or the client's phone number, as seen in the image.

Go to Documents tab
2. After entering the client's profile, press the "Document" button located at the top of the monitor, as shown in the image.

Part 1: Editing documents created automatically from the agency Folder Structure
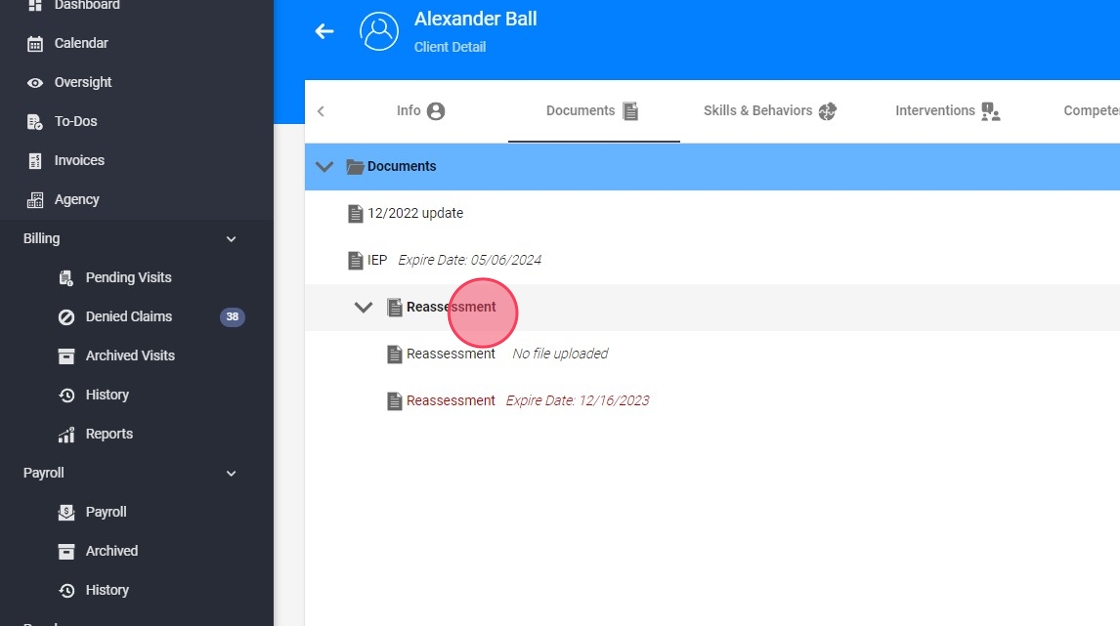
3. In the central part of the screen you will find all the documentation in the program about the client, you just need to look for the document to update.

4. We will focus our attention on the pencil symbol that is located above the central part of the screen where the document information is located, we click on it, as shown in the image.

5. A new screen will open to add information about the document. Press the "Select File" button to search our computer for the location of the version of the desired document and continue with its introduction into the program.

6. Once the document has been selected, press the "SAVE" button to conclude the new version in the program, as shown in the image.

Part 2: Adding documents new versions
7. In the central part of the screen you will find all the documentation in the program about the client, you just need to look for the document to update. Once the document is selected, information about the start date and last update will appear on the side. It can be seen in the image:

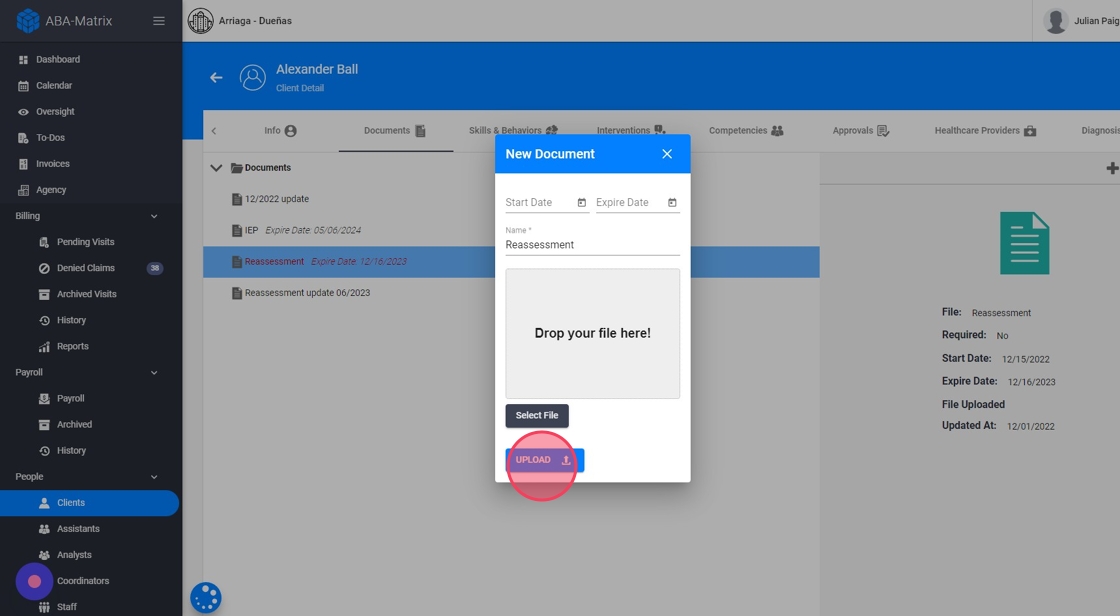
8. We will focus our attention on the + symbol that is located above the central part of the screen where the document information is located, we click on it, as shown in the image.

9. A new screen will open, with data that must be filled in, referring to the current version of the new document. Remember that fields with an asterisk (*) are required to fill. In the "name" section, enter the name of the document.

10. Once the information is complete, press the "Select File" button to search our computer for the location of the version of the desired document and continue with its introduction into the program.

11. Once the document has been selected, press the "upload" button to conclude the new version in the program, as shown in the image.
12. Once finished, you will see that a set of documents, with all the versions that have been created. This will allow a simpler use of the system, without the need to delete the previous version. In the image, you have an example.