How to add client interventions and link them to a specific behavior (for analysts)
This guide provides step-by-step instructions on how to add client interventions to a program. It explains how to access the program, search for the desired client, and enter new interventions. It also covers how to edit or delete interventions. Finally, you will find the necessary steps to link client interventions to specific behaviors. This guide is helpful for anyone who needs to track and manage client interventions efficiently.
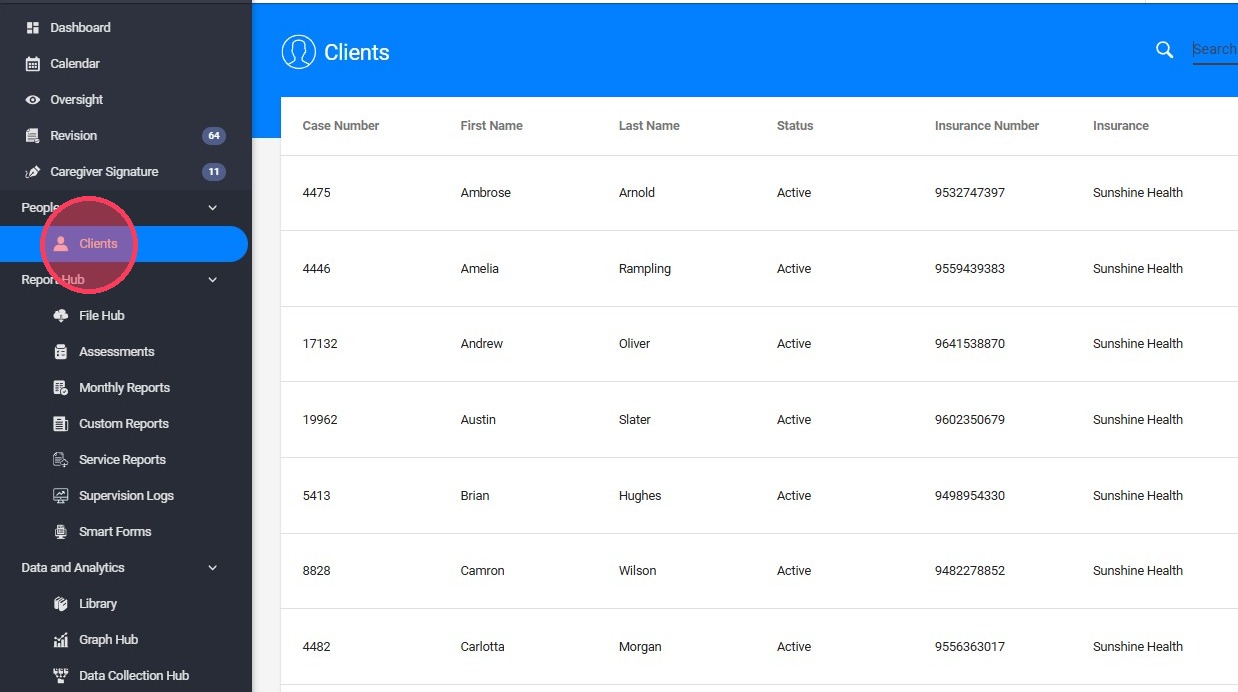
1. To access the program, enter your username and password. Once you're in the calendar, navigate to the "clients" button located in the side menu on the left side of your screen, as illustrated in the image.
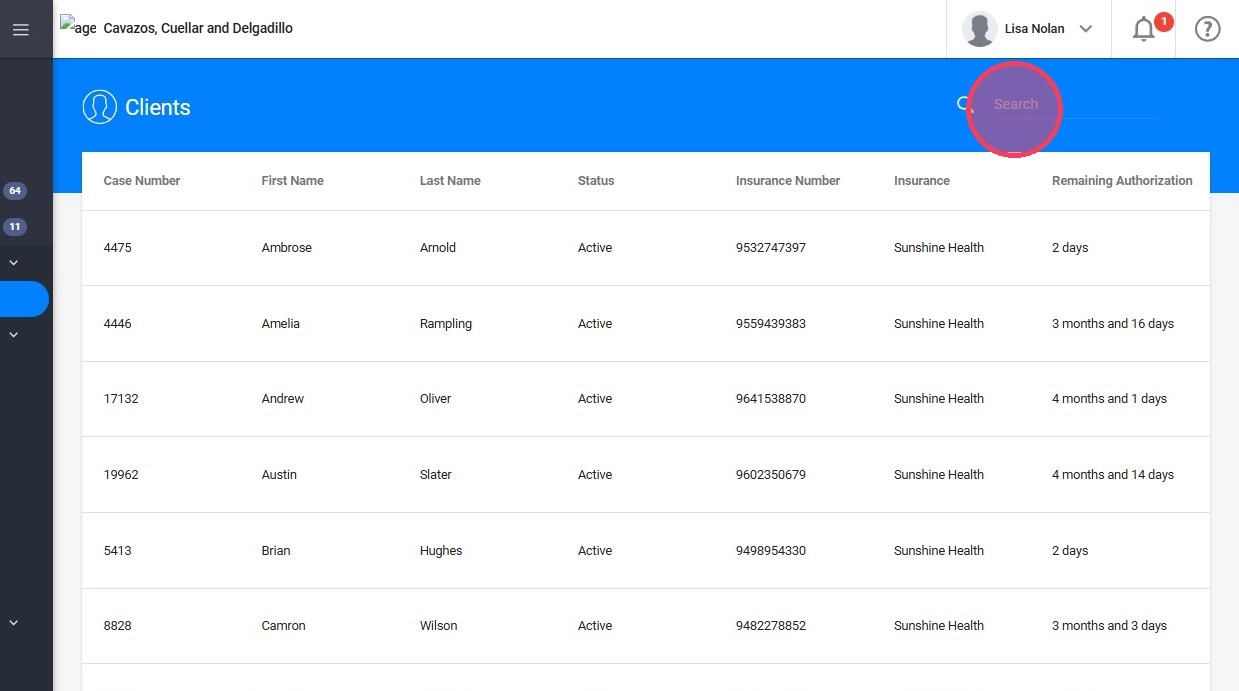
2. A window displaying a list of all clients will open. Navigate to the search bar in the upper right corner of your screen to find the client you're looking for. You can search using the client's first and last name, Medicaid number, the guardian's name, or the client's phone number, as shown in the image.
The client you seek will be displayed in the center of the screen, as highlighted in the image. Click on the client's name to proceed.
How to add new interventions
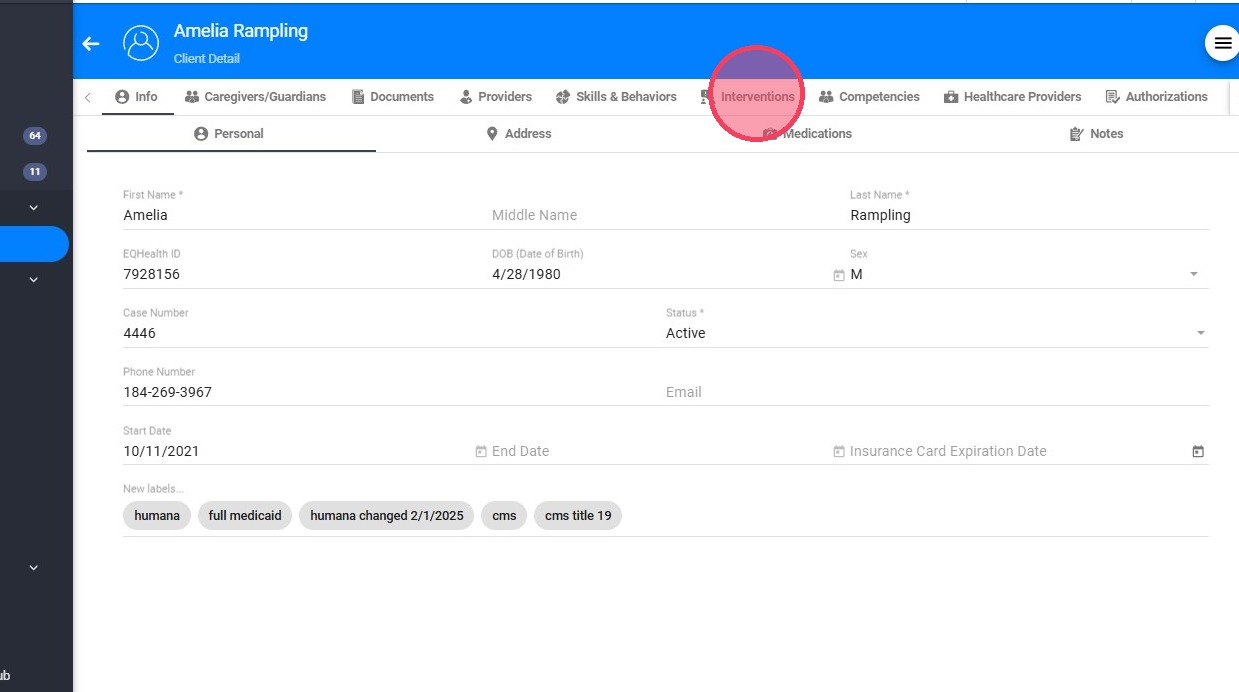
3. A screen with all the client's personal information will open.
- Go to the menu bar at the top of the screen, where you will find several sections containing all the documentation related to the client within the program.
- Click on the Intervention tab.
4. By default, each client is assigned the agency’s list of interventions. From this list, you can:
- Delete any interventions you do not plan to use
- Edit existing ones
- Or add new interventions tailored to the client’s needs
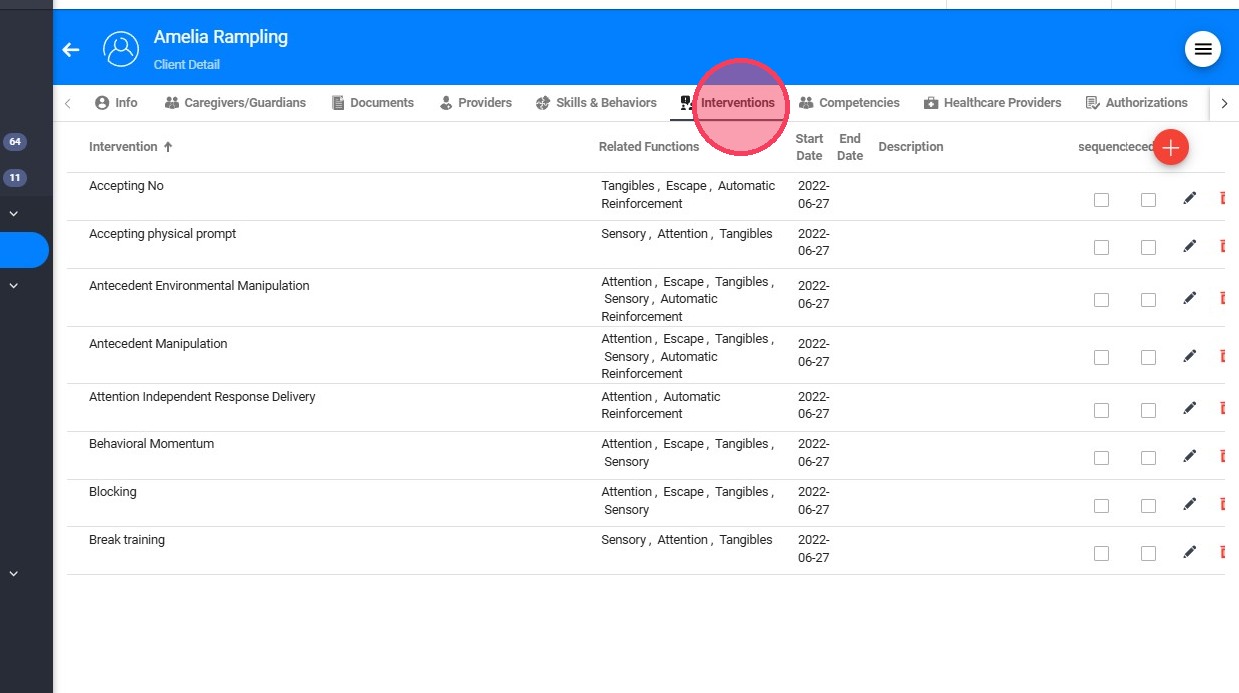
5. To add a new intervention, click the “+” icon in the upper right corner of the screen. A new window will open, allowing you to enter and save the new intervention.

6. A new window will appear where you must fill in the necessary fields, including the name of the intervention and its start date.
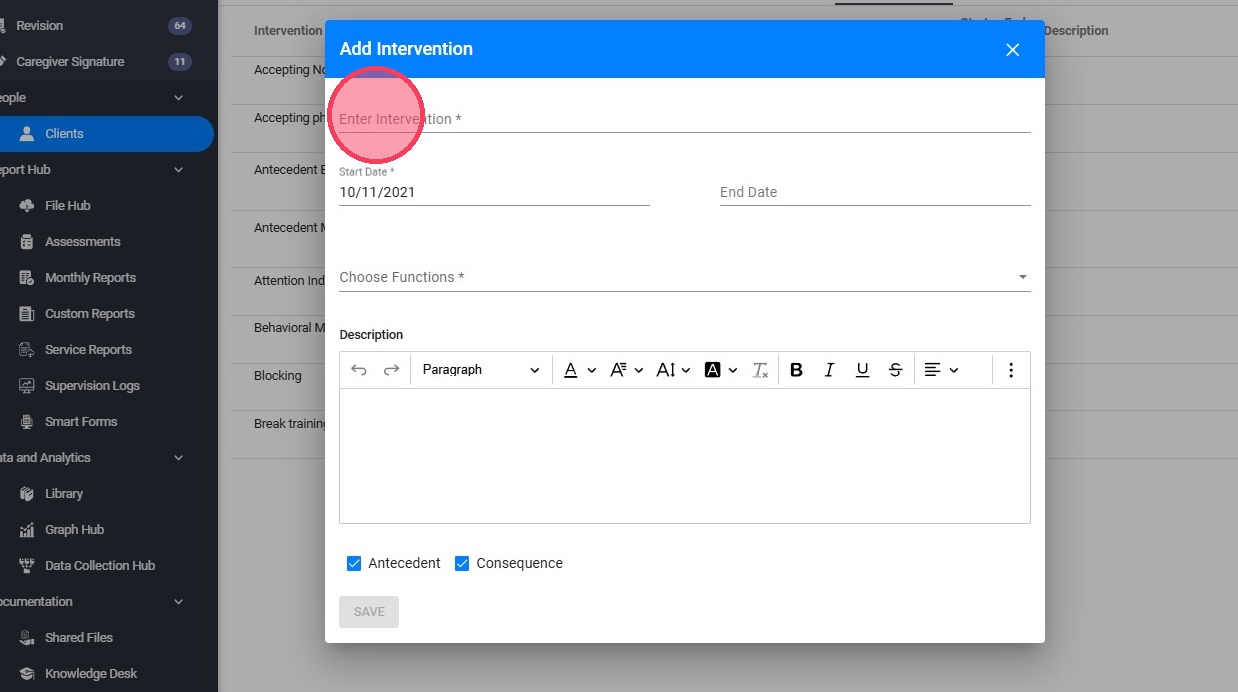
7. To select the appropriate functions, scroll through the menu using the arrow to the right of the field, as shown in the image.
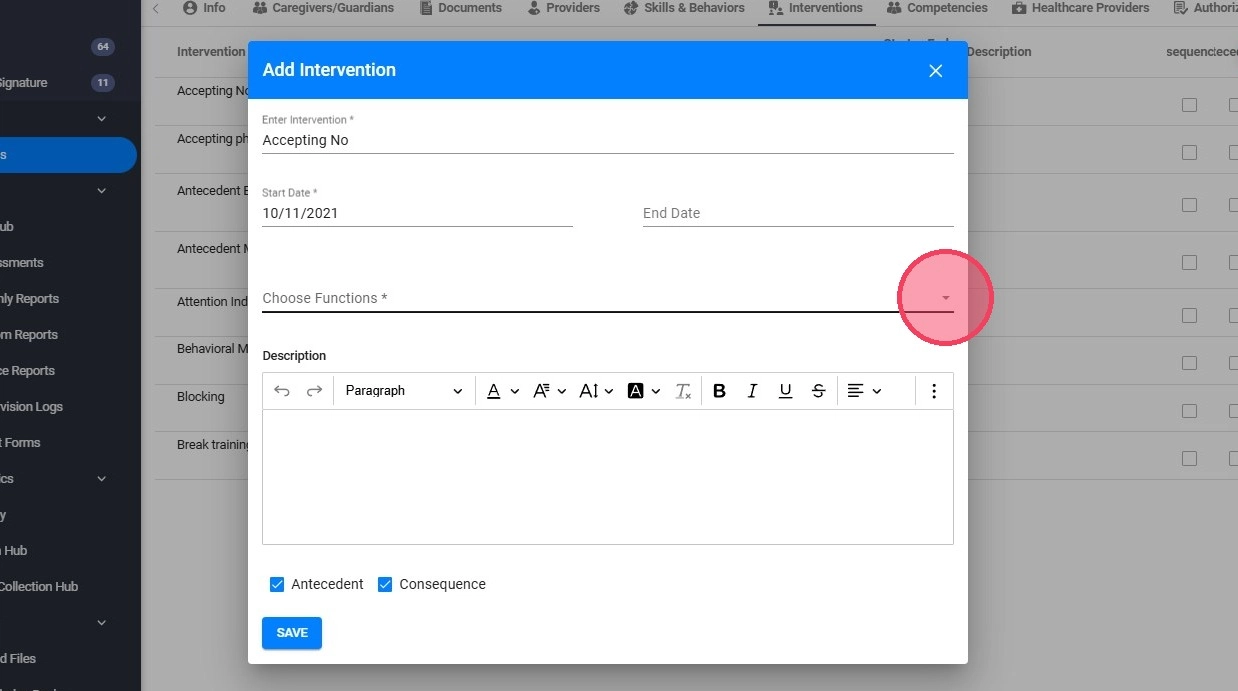
8. Enter the intervention details in the "Description" field.
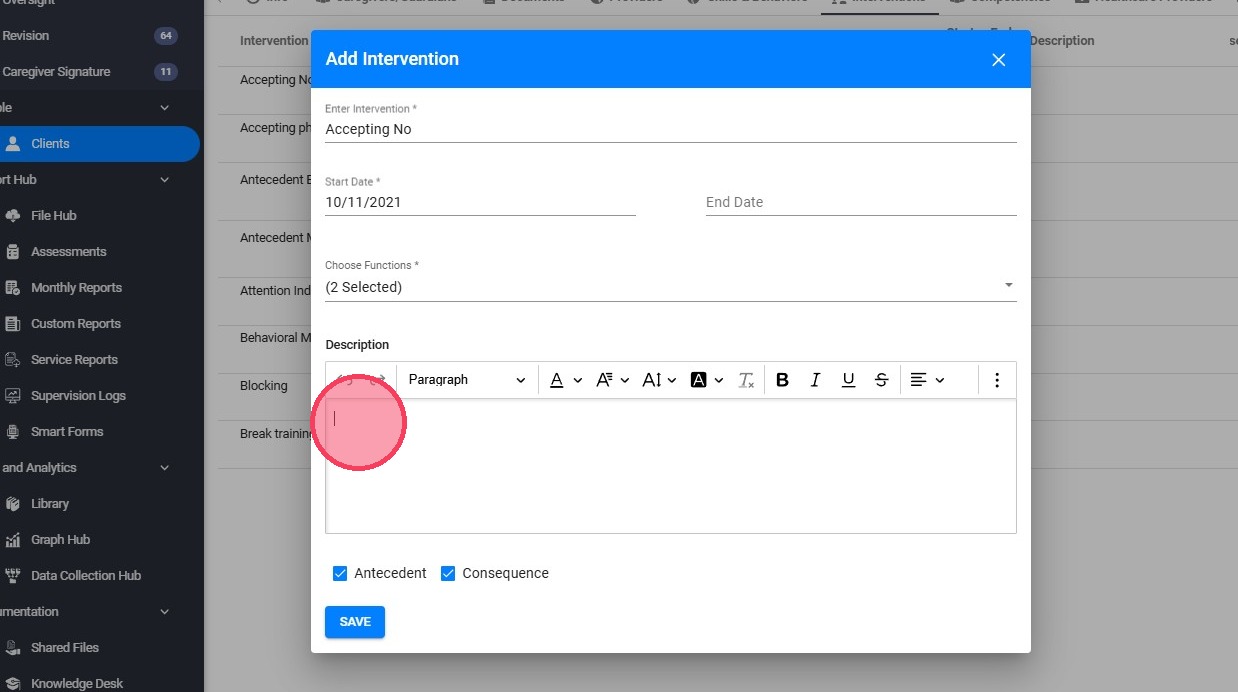
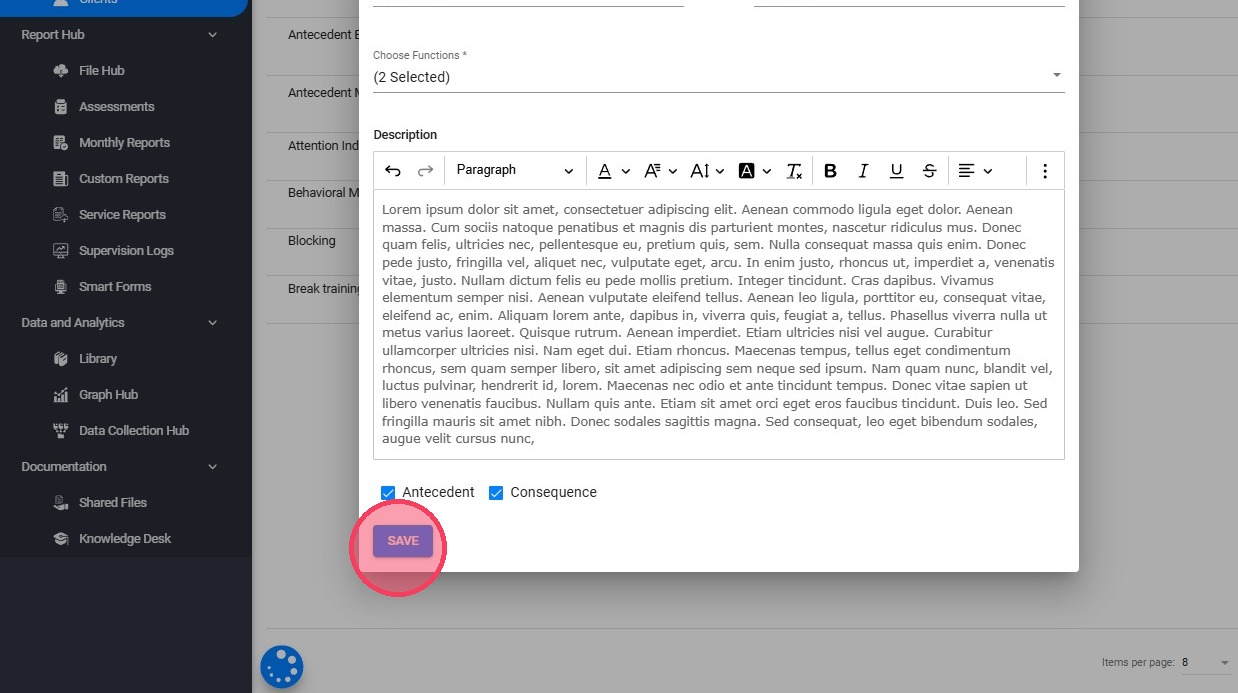
9. Before saving the new intervention, you can mark the classification of the intervention in Antecedent or Consequence.
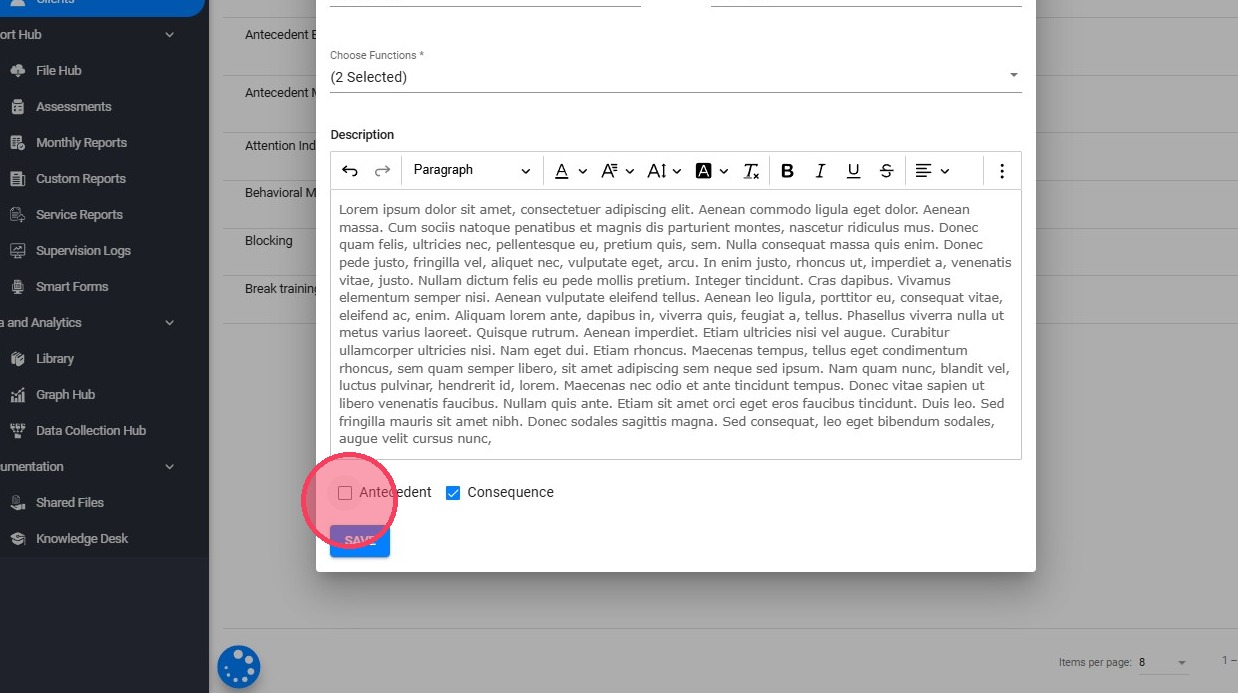
10. After filling out the fields, click on the "save" button located at the bottom of the screen, as shown in the image.
11. The newly added intervention will now appear in the intervention list.

How to edit existing interventions
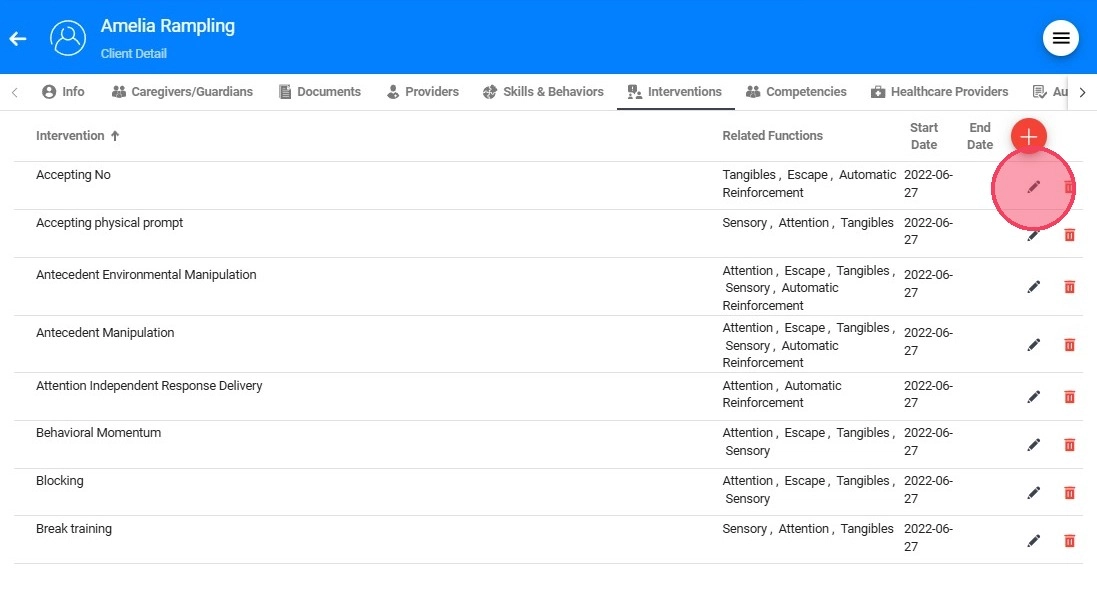
12. From this window, you can modify an intervention by clicking the pencil icon, or remove it entirely using the red trash can icon. Both options are located to the right of each intervention, as shown in the image.
How to link interventions to a specific behavior
After adding the interventions to the client profile, you can link the interventions to a specific behavior so that when the RBT completes their note and selects a behavior, only the antecedent or consequence interventions linked to that behavior are shown as available.
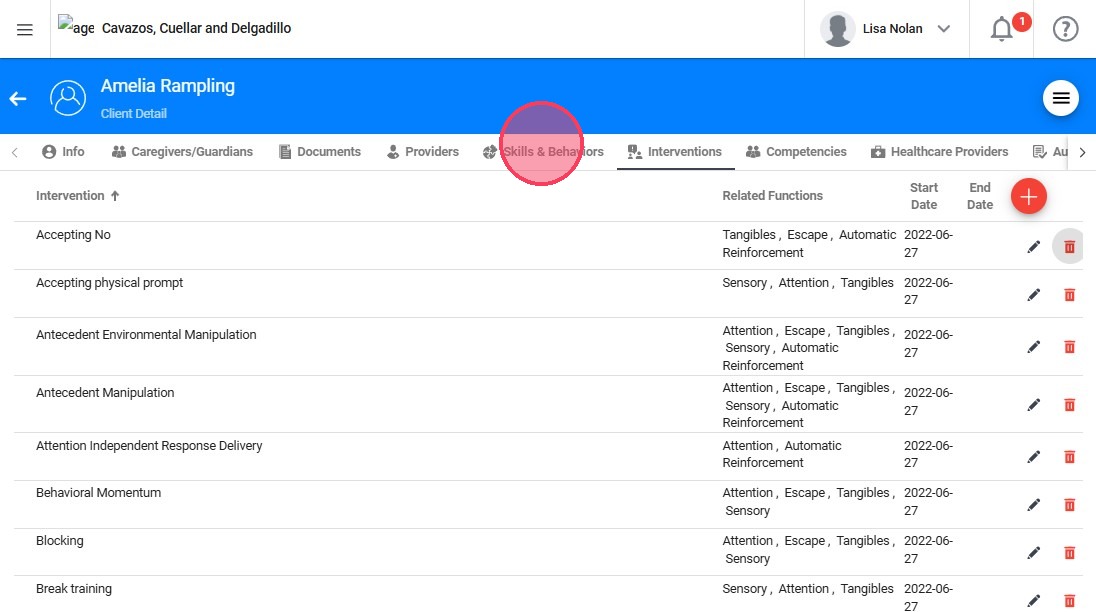
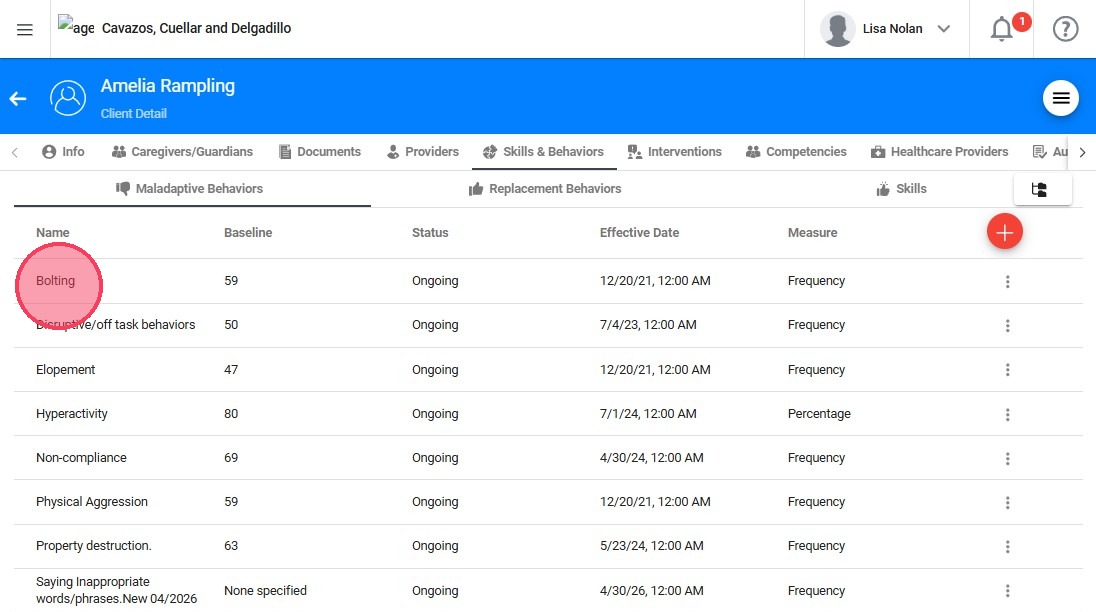
13. From the desired client's profile, locate the behavior to which you want to add the interventions. You can add the interventions to Maladaptive Behaviors.
Click "Skills & Behaviors"
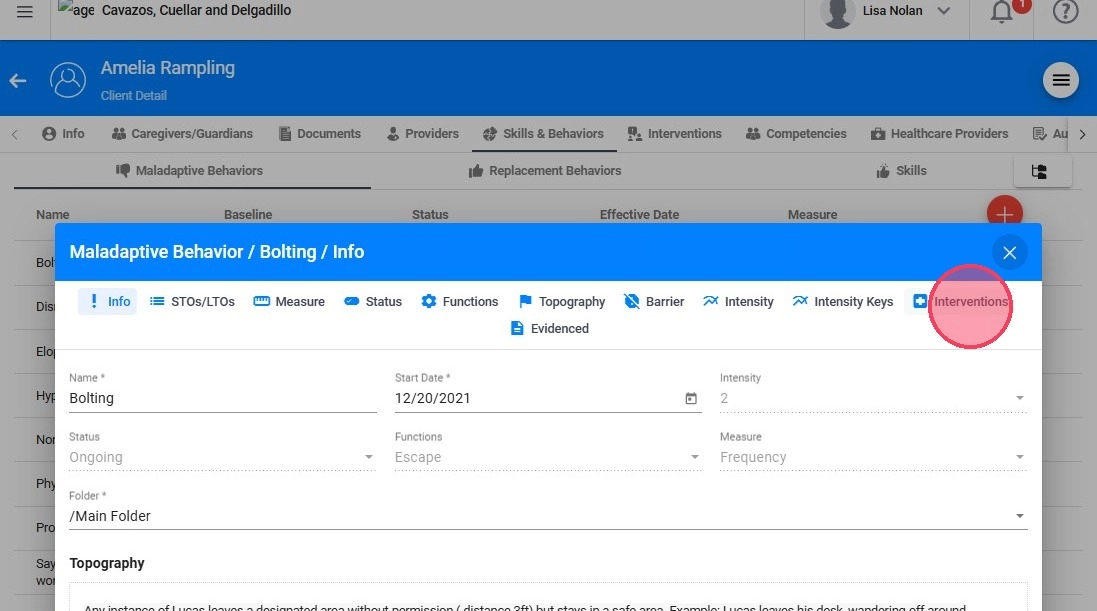
14. Click on the desire behavior and locate the Intervention tab to Add a new one.
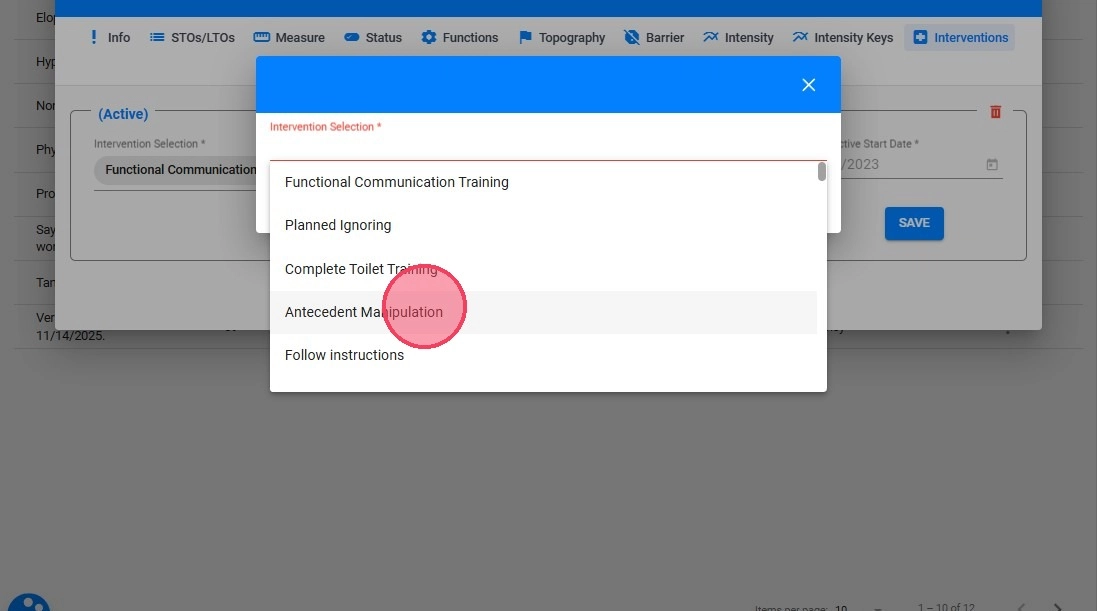
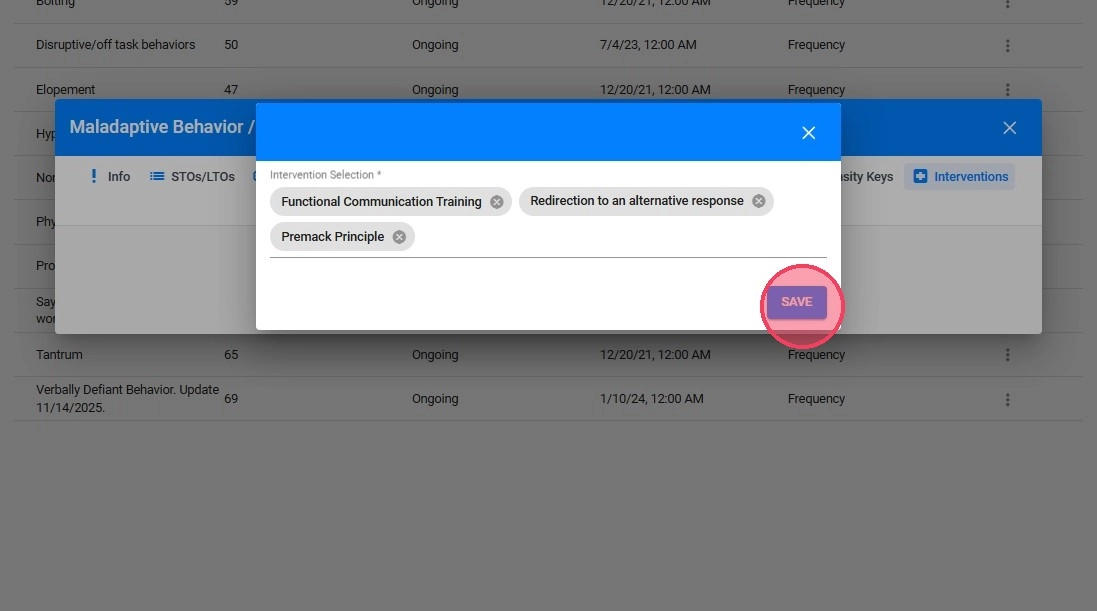
15. When you click on Intervention Selection, the list of interventions added to the client's profile will appear, where you can select the ones you want to link to the behavior.
16. After selecting all the interventions, press the "Save" button located at the bottom of the form.
17. It is important to note that these interventions can be modified as needed, including the start date of the new change, as shown below. Click "Change Interventions".
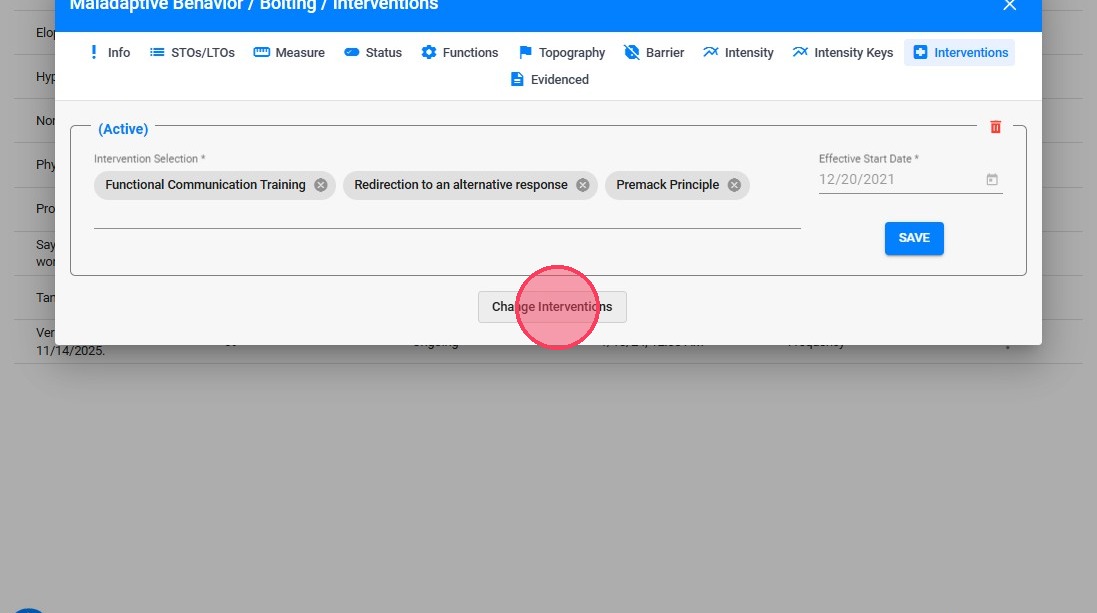
18. Select the desired interventions and click Save.