
How to Add a New Replacement Behavior
This guide will teach you how to add a new "Replacement Behavior." It will show you step by step how to search for the desired client, add the new replacement behavior, input relevant information, add short and long-term goals, save the information, and edit the behavior if necessary. If you need to add a new replacement behavior to your management program, this guide will help you do so efficiently and effectively.
To add a new "Replacements", you must access the program from an analyst or administration account and follow these steps.
Go to the client profile
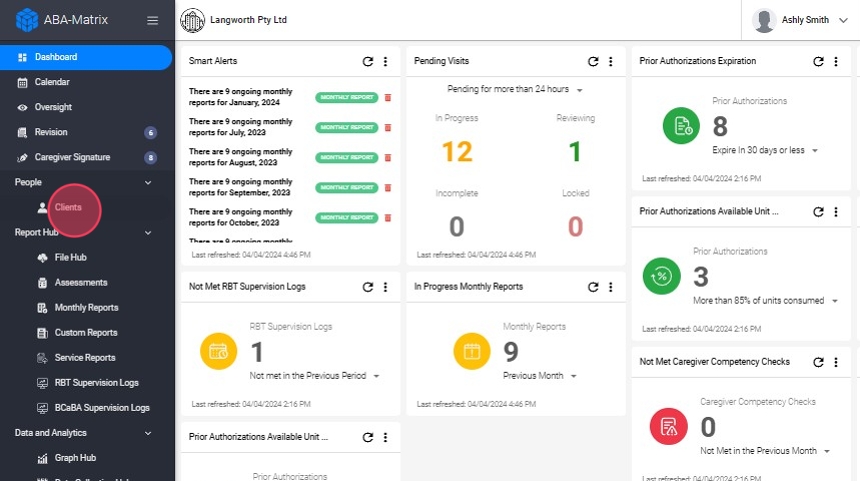
1. Go to the Clients link, and a window displaying a list of all clients will open.
Search for the client
2. Go to the search bar located at the top right of your screen to search for the desired client. You can use first and last name, "Medicaid number", "EQ Health number", caregiver's name or client's phone number to search.

Go to the Skills & Behaviors tab
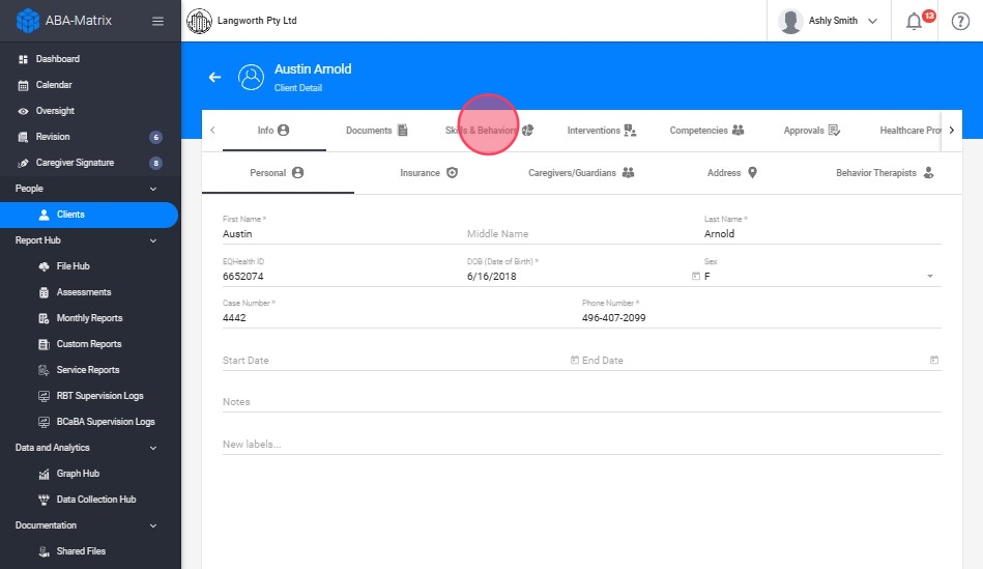
3. A screen will open with all the documentation and information about the client. Go to the menu bar at the top of the screen and find the "Skills and Behaviors" tab:
Select the Replacements Behaviors tab
4. Then press the "Replacement Behaviors" button, as seen in the image, located in the center of the screen.

Add the new Replacement Behavior
5. Click on the "+" button situated at the upper right corner of your screen.

Add the information of the Replacement
You will have access to a new window that is divided into 2 main parts:
6. The first part includes all the general information of the "replacement".

7. The second portion of this document pertains to the "Short Term Objectives" (STOs) and "Long Term Objectives" (LTOs) that need to be fulfilled.
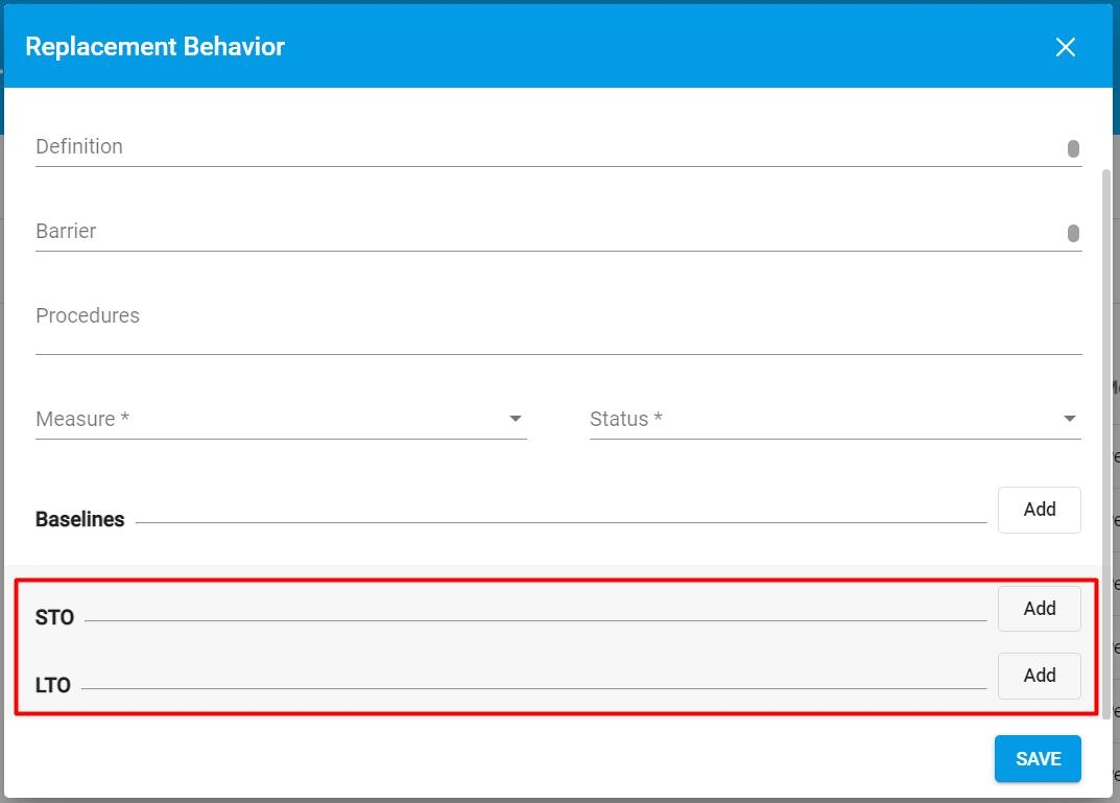
8. Please fill in the information pertaining to the new replacement behavior, ensuring that all fields marked with an asterisk (*) are completed.

Please note that the replacement will only be available from the effective date you select in the Start date field.
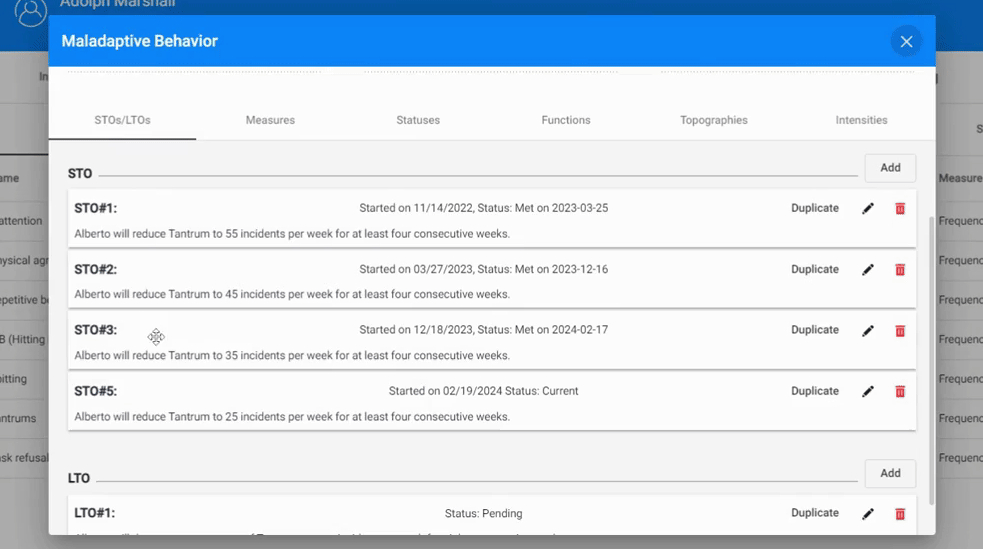
Short-Term Objectives (STOs) and Long-Term Objectives (LTOs)
9. To add a new "STO" or "LTO," press the "Add" button located on the right side of the screen. A small window will appear where you can enter all the information related to the "STO."
You have the option to set the start date, completion date, or expected completion date, if necessary.

10. You also have the possibility to specify the state in which the STO is and the effective date. The available statuses are:
- Pending: Marks the STOs that are waiting for implementation.
- Current: Indicates the active STO.
- Mastered: Designates objectives that have been successfully achieved.
- Discontinued: Indicates STOs that are no longer applicable or relevant.
These statuses offer better visibility into the progress of treatment plans and help you better monitor client outcomes over time.

11. Information about the new "STO" will be included in the bar called Description.

12. The LTOs are included in the same way as the STOs.

For improved functionality, initially create the first STO and LTO, then save. Afterward, proceed to create the remaining ones.
Save the information to add the replacement
13. After entering all the information, click the "Save" button to ensure the replacement is saved correctly.
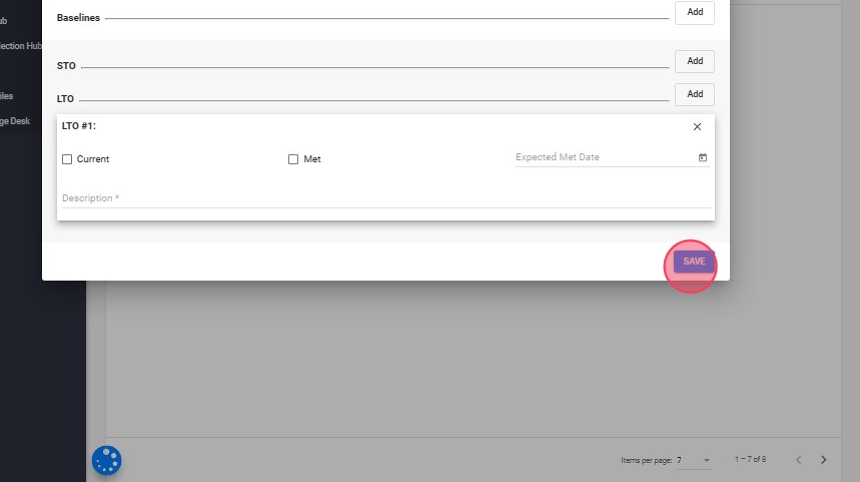
A notification should appear at the top of the screen indicating that the "replacement behavior" has been successfully established.
List of Replacements
14. You will find a list with all the "Replacement behaviors" of the client.

15. Remember that only 7 "replacements" appear on a page. Should you add more than seven, the additional ones will be saved on a subsequent page, accessible by clicking the button in the bottom right corner of your screen. You can also change the amount of items per page.

Edit the replacement
16. Once the replacement is created, you can edit and change its information. You just have to click on the replacement you want to modify, and you can do it from the tabs inside the popup window:
- STOs/LTOs
- Measures
- Statuses
- Procedures
- Barriers
- Definitions

Edit the STO/LTO
In the STO/LTO tab, you will have various editing options such as duplicate, edit, and delete.
17. Duplicate: You can duplicate the content of the STO if required.

Duplicating the initial STO you crafted and modifying the content of the duplicates can streamline the process of establishing a new behavior.
18. Delete: You can delete it.

You can edit STOs/LTOs in several ways:
- Adjust your order manually
- Change the name and description of STOs
- Change the status of the same
19. You can manually adjust the order of the STOs after they have been created. Click on the STO you want to move, then drag it to the position you want within the list. Release the mouse button to place the STO in its new position.
20. Users have the ability to personalize the names of the STOs to fit their individual requirements and tastes. To do this, simply click on the pencil icon next to the STO you wish to rename.

21. Click on the "Name" field to change the name of the STO and click on the "Description" field to change its description.

22. When you finish editing it click "SAVE".
