How to add provisional approvals
This guide provides step-by-step instructions on how to add provisional approvals. By following these steps, users will be able to add units without the need for a reference number, allowing them to work with clients even when the work units have been completed. This guide is beneficial for anyone looking to streamline their approval process and save time.
To add a provisional approval, just follow these steps:
1. 1. Go to the client profile
2. Find the Approvals tab
3. Add a new approval
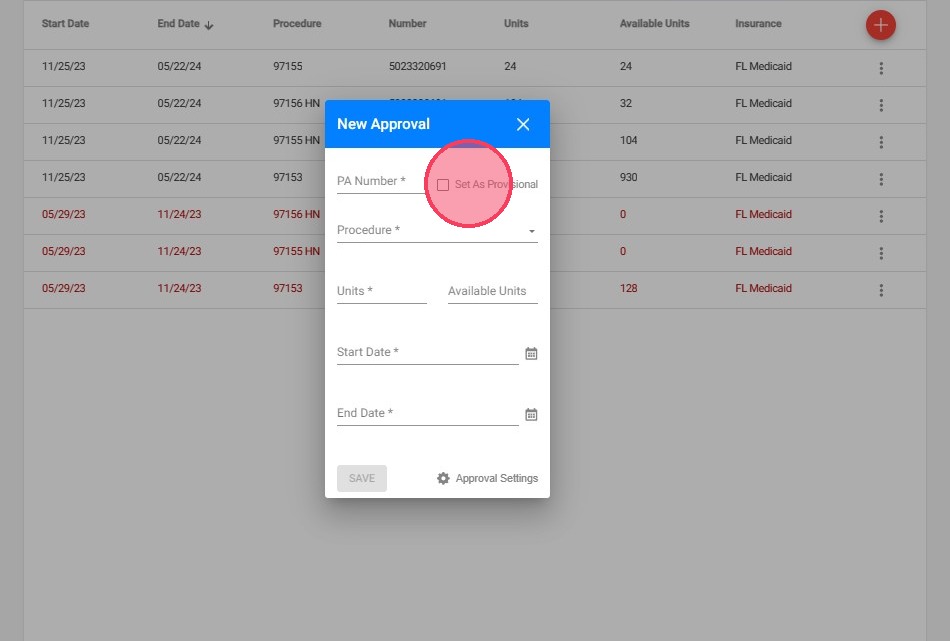
4. Go to Approval settings

2. 5. Select the option Set as Provisional.
You will be able to add units without the need for a reference number. This will allow you to include sessions to work with the client even if you do not have the reference number or when the work units have been completed. Once this option is selected, you will notice that the "number" field will become optional, so it will not be necessary for the approval to be generated.
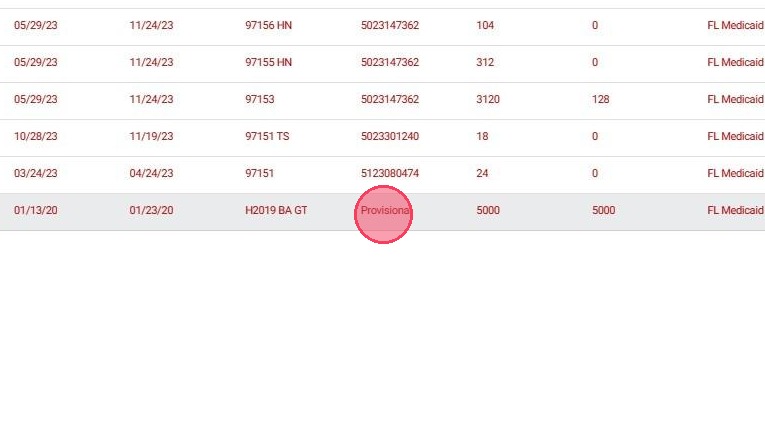
Notice how the number of the approval will be set as Provisional.
3. 6. Fill the rest of the information and click save:

4. Once added, the provisional approval number column will appear in red, like this: