How to add approvals
This guide provides step-by-step instructions on how to add approvals for clients. It explains how to select the client, navigate to the Approvals tab, add a new approval, and fill in the necessary information. It also highlights the option to set units as provisional and the importance of having available units to create new sessions. Following this guide will ensure that approvals are properly added and tracked in the system.
To add the approved units for each procedure, just follow these steps:
1. Select the client
1.
When you enter the program with your username and password, go to the left side menu of your screen, specifically the "clients" button, as shown in the image.

2. You will find the list of all your clients, just go to the search bar, located at the top right of your screen, to search for the desired client. To do the search, you can use the first and last name, "Medicaid number", "EQ Health number", name of the caregiver or the client's telephone number, as can be seen in the image.

2. Go to the Approvals tab
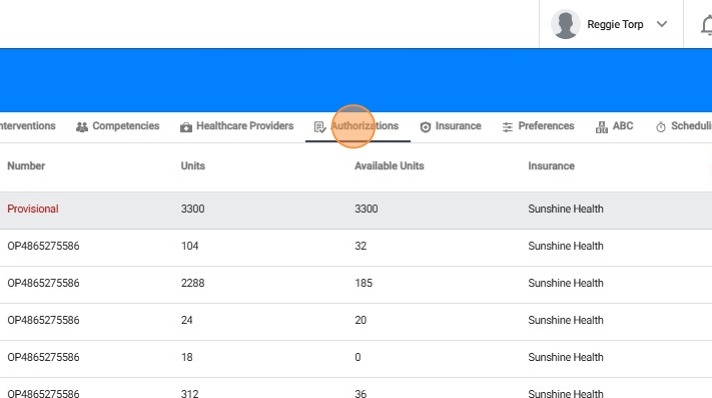
3. You will find all the documentation and information about the client. Go to the menu bar at the top of the screen and press the "Authorizations" button, as shown in the image.
3. Add a new approval
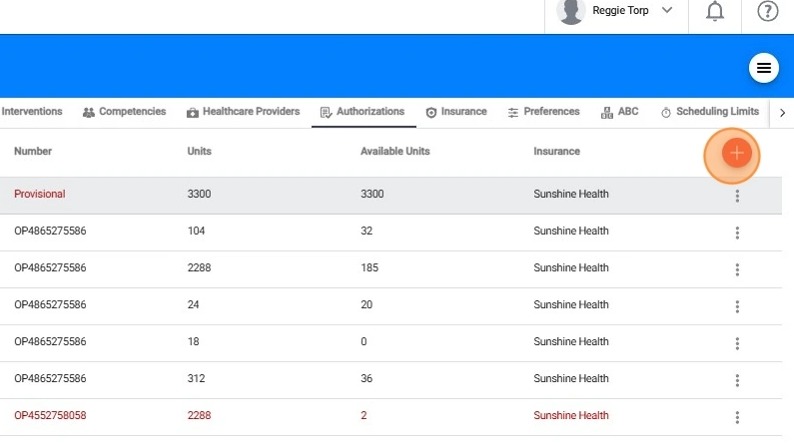
4. You will enter a window that contains all the authorizations related to that client. To add a new approval, press the "+" button located at the top right of the screen as shown in the image.
Authorizations in red indicate that they are expired. You can configure the system to receive notifications 45, 30, 15, 7, and/or 1 day before the expiration date.
4. Fill the authorization information
5. A small screen will appear with the information that you must complete. Remember that the fields with asterisks (*) needs to be filled in.
- PA Number: this option refers to the reference number of the approval
- Units: Here you must specify the current number of units available from the client.
- In the case of new approvals, it will be the same as the number of units approved.
- If you are adding a case (client) in the middle of the approval period, simply enter the number of units currently available to the client with that procedure
- Dates: Here you can specify the dates for the authorization
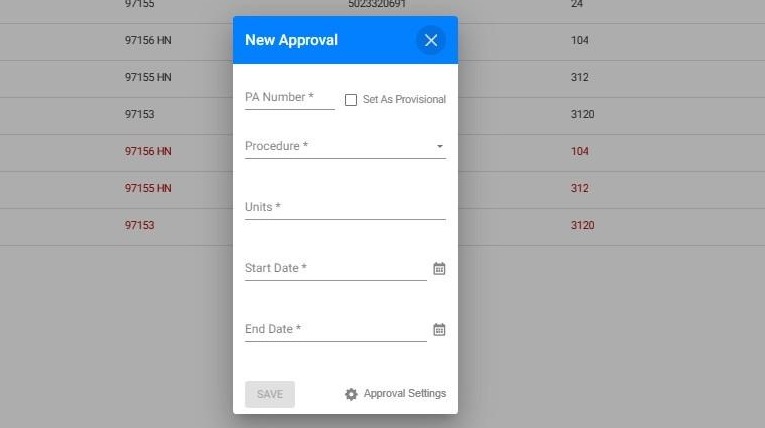
6. - Set as provisional: you will be able to add units without the need for a reference number. This will allow you to include sessions to work with the client even if you do not have the reference number or when the work units have been completed.
Once this option is selected, you will notice that the "number" field will automatically display PROVISIONAL, so it will not be necessary for the approval to be generated
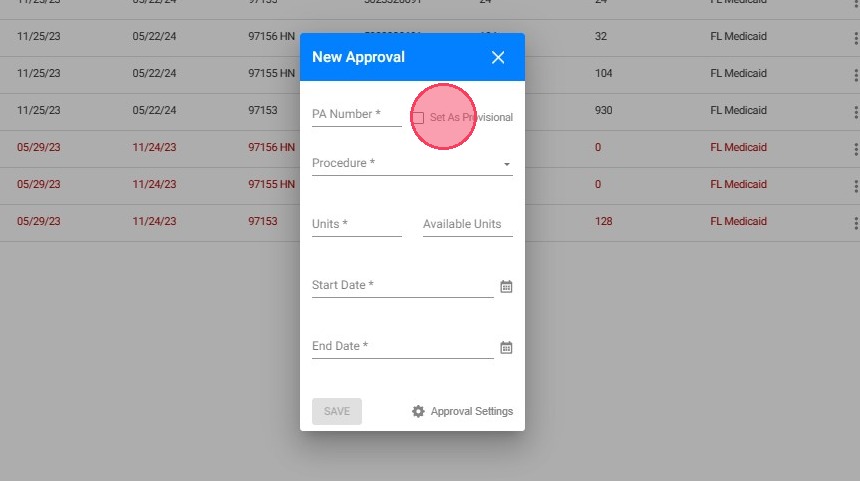
7. - Approval Settings: includes the option Set available units. You can specify the units that the client has available to work with

In order to create new sessions you will need available units, otherwise the program will not allow this action
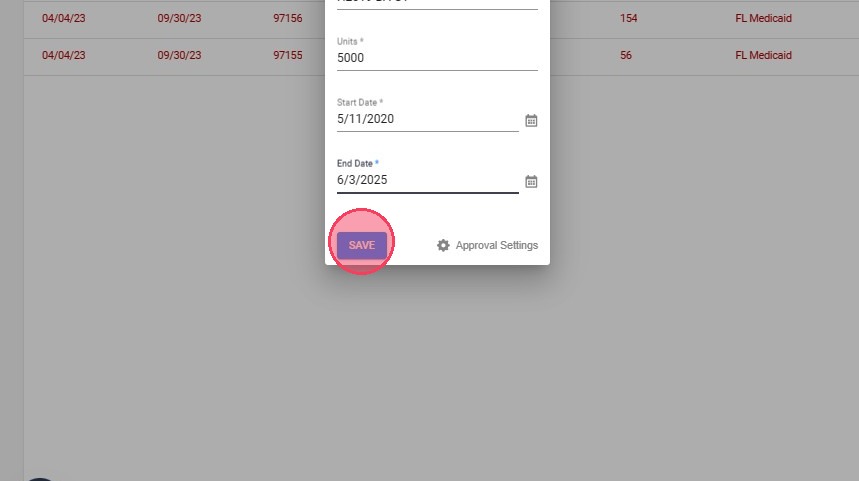
5. Save
8. Click "SAVE"
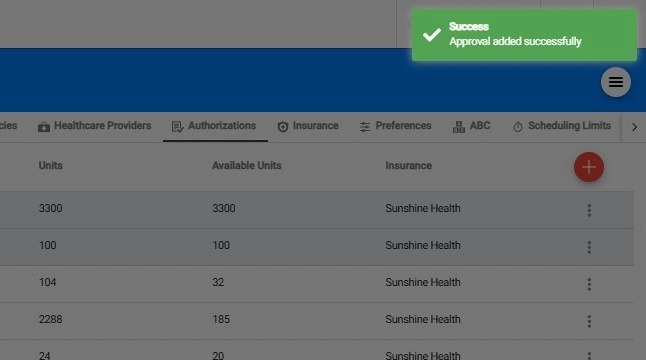
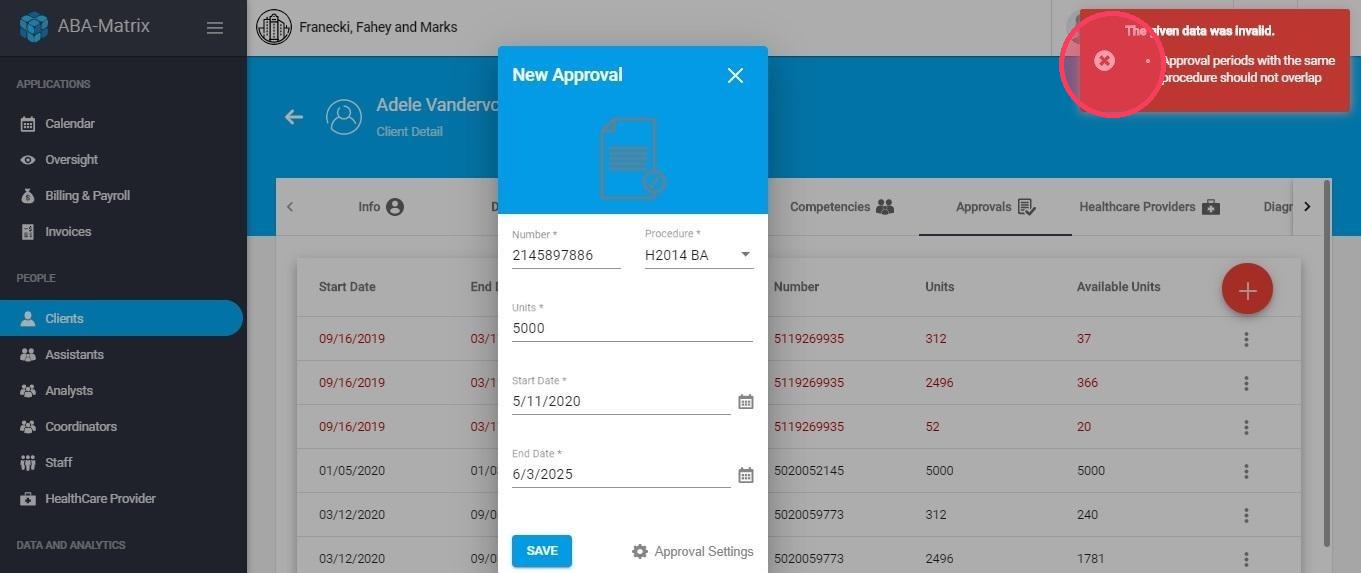
9. In case the information is not completed properly, you will receive an error message in the upper right part of your screen, as we show in the image with an example:
10. Once the necessary information has been filled, press the "save" button. You will receive a notification that the approval has been successfully added, with a green box at the top right of your screen.