How to add a new diagnosis
This guide provides step-by-step instructions on how to add a new diagnosis to a client's profile in a program. It includes detailed screenshots and explanations, making it easy for users to follow along. By following this guide, users can efficiently add new diagnoses and manage client information effectively.
1. To enter a new diagnosis, you need to log into the program using your username and password. Then, navigate to the "Clients" section by clicking the corresponding button in the side menu on the left side of the screen, as shown in the image.
1. Go to the client
2. To search you can use the first and last name, "Medicaid Number", "EQ Health Number", the name of the guardian or the client's phone number, as can be seen in the image.
The desired client in the central part of the screen as indicated in the image with a red arrow, click on the desired client.

2. Go to the Diagnosis tab
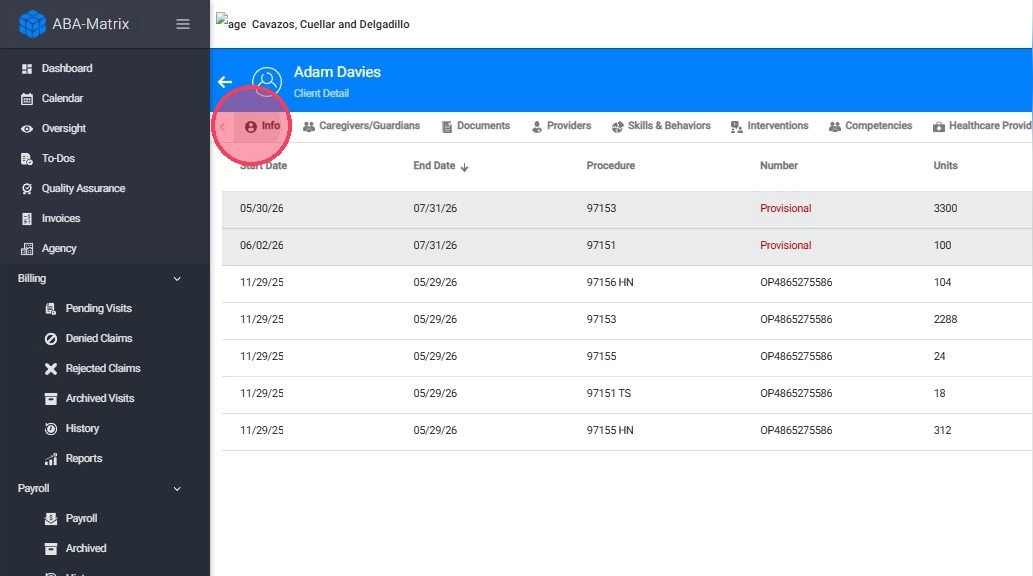
3. A screen will open with all the client personal information. Go to the menu bar located at the top of the screen, there you will find a series of sections with all the documentation found in the program regarding the client, move the bar by pressing the button marked with an arrowhead located in the upper right hand side of your screen. In the image we show you how to do it.
3. Add a new diagnosis
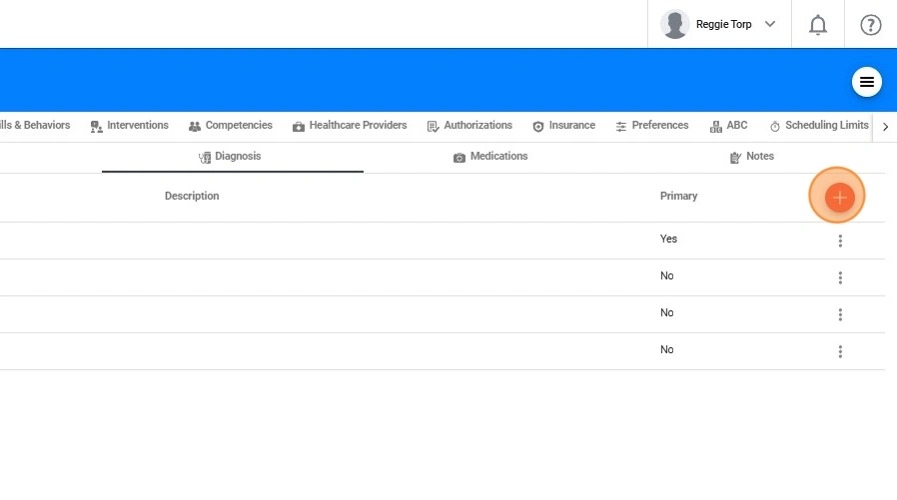
4. Once inside the "diagnosis" window, to add a new diagnosis, you must press the "+" button located in the upper right part of your screen, as we show you in the image.
4. Search for the diagnosis you want to add
5. A small window will open where you will find all the possible diagnoses to select. We will focus our attention on the search bar that you will find at the top, as shown in the image, which will allow us to locate the desired diagnosis. The search can be performed by entering both the name of the diagnosis and the code that represents it.
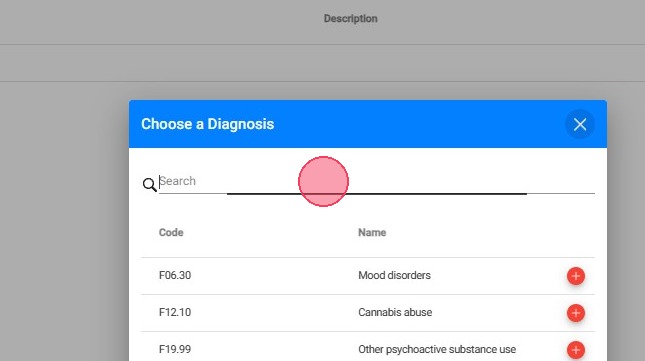
If the diagnosis you need to add is not in the list, please contact the system support team so we can add it to our database.
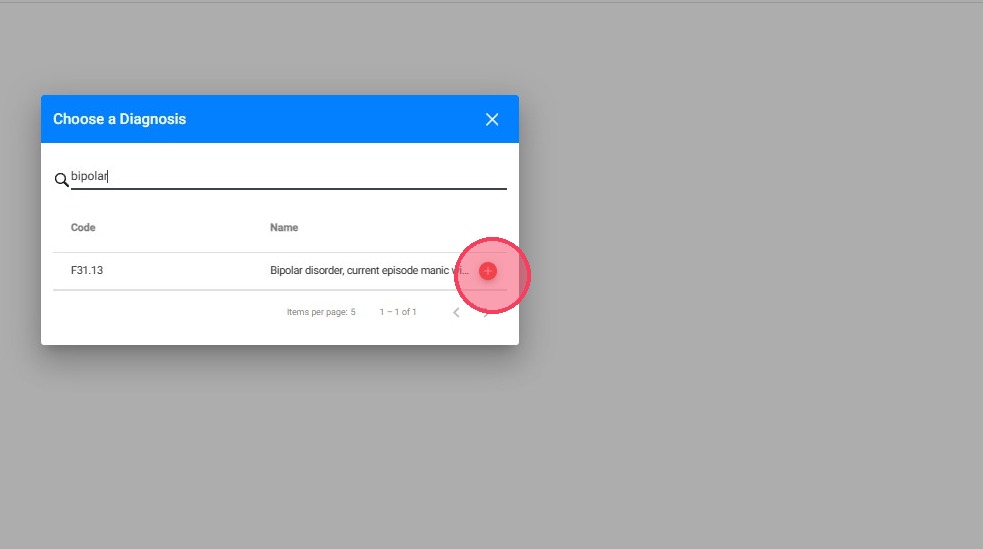
5. Add the diagnosis you want
6. Once the desired diagnosis is located, press the "+" button located to the right of each diagnosis, as we can see in the image.
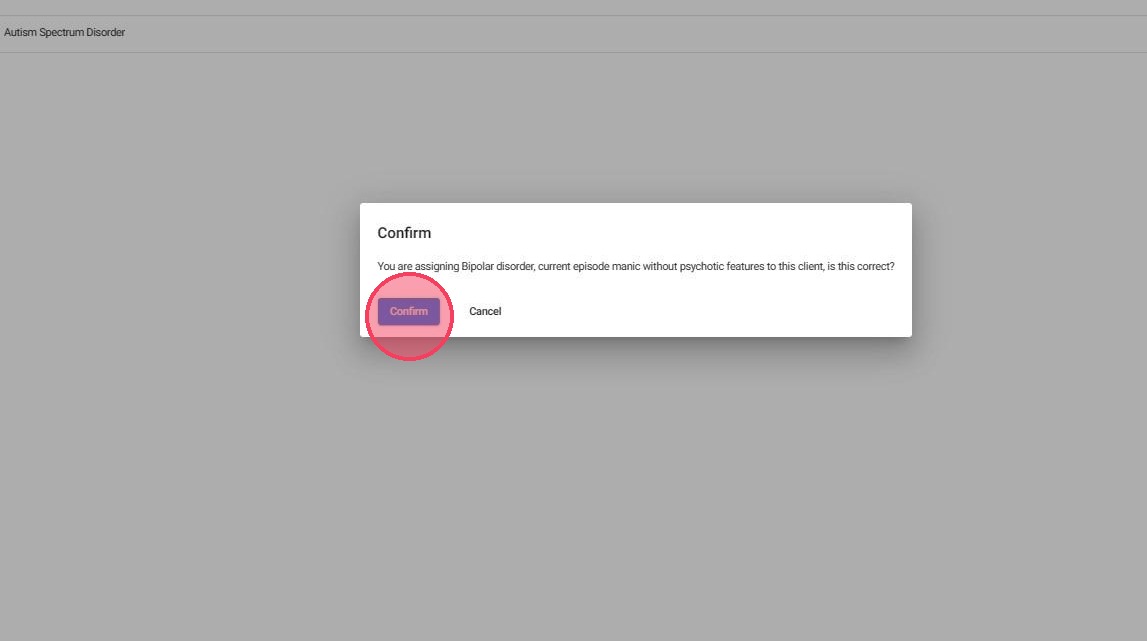
7. A new information window will open to confirm that a new diagnosis is being assigned to the selected client, you must confirm it by pressing the "confirm" button as shown in the image.
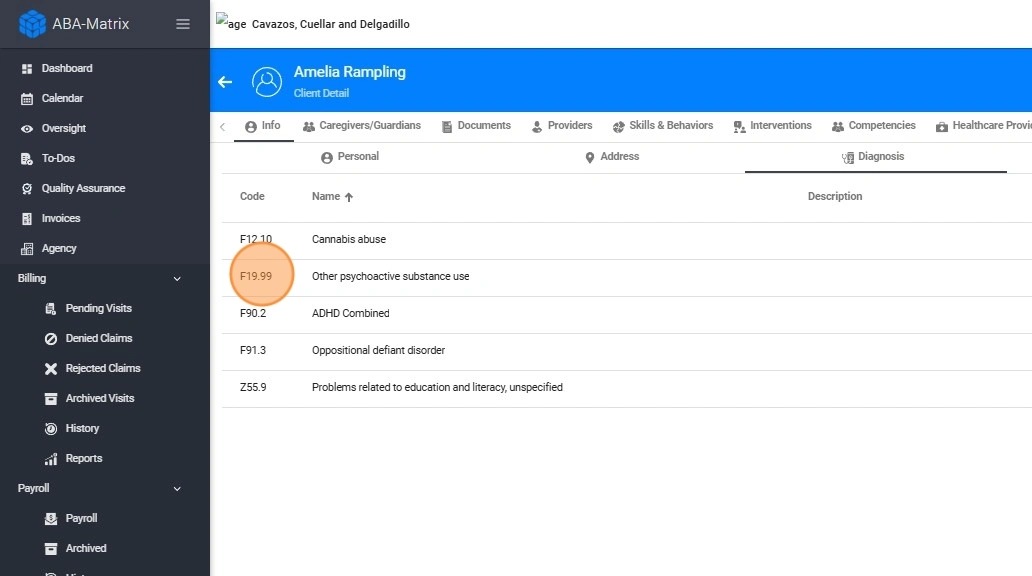
8. In this way, a new diagnosis will be added to the client and you should observe said diagnosis in the central bar of the screen as illustrated in the image.
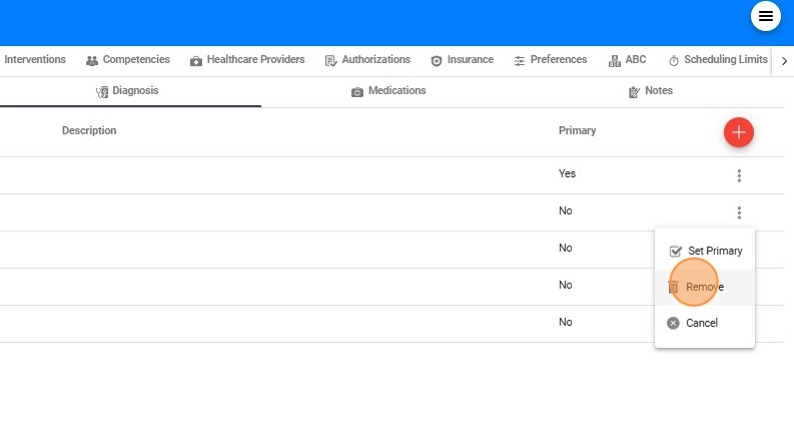
9. Within this window we also have the option of deleting a diagnosis by pressing the button represented by three vertical dots located to the right of each diagnosis as shown in the following image. and press the "remove" button.